# Administração Linux
Administração Servidores Linux
# Controlar Fans/Coolers - Linux
Controla os fans/coolers/temperatura com ipmitool
# How to control Dell server fanspeeds with ipmitool
Link: [https://wiki.joeplaa.com/en/tutorials/how-to-control-dell-server-fanspeeds-with-ipmitool](https://wiki.joeplaa.com/en/tutorials/how-to-control-dell-server-fanspeeds-with-ipmitool)
# Introduction
I'm running a homelab partly as a hobby, but also to support our business needs, especially the software development part. My current setup consist of three servers, one HP and two Dell servers. The HP server is running perfectly fine when considering its temperatures and fanspees. The fans are throttled down pretty aggressively, so I don't really have too much of an issue with noise. It will speed up and make a racket when TeamCity is doing its thing, but that is shortlived.
The Dells however are troublesome. I have a T320 with 8 harddisks running TrueNAS. The disks obviously produce heat and the single fan in the tower doesn't generate enough airflow. Or better said, because the air shroud is missing, the air is not properly routed along the disk and through the CPU heat sink. The CPU will run into the 50°C region (when idling) when the ambient temperature is around 30°C (we're experiencing a heat wave).
The other Dell, a R320, is just loud. The little fans have to spin at an insane rate to keep the CPU cool. On top of that, I flashed the RAID card to passthrough mode for ZFS. The server doesn't get any disk temperature readings and thus preventatively speeds up the fans (this doesn't seem to apply to the T320).
The real solution would be to have a dedicated, air-conditioned (or at least well ventilated) room. But alas, we don't have that luxury. Currently the servers are in a little hallway next to the office. This little room will heat up quickly with three servers buzzing away, so the doors cannot be closed permanently.
A temporary "fix", well it isn't really a fix, because they are still very loud, is to slow down the fans manually using `ipmitool` commands. The downside obviously is that temperatures will go up quickly. Luckily [brezlord](https://github.com/brezlord/iDRAC7_fan_control) made [a script](https://github.com/brezlord/iDRAC7_fan_control) to fix that, thanks man!.
# The script
I modified it a little to fit my specific usecase:
- Changed the "dynamic" temperature from 35 to 45°C
- Added additional speed settings
- Use the CPU instead of inlet (ambient) temperature to control the speeds
- Added additional speed increments
```bash
#!/bin/bash
#
# https://github.com/brezlord/iDRAC7_fan_control
# A simple script to control fan speeds on Dell generation 12 PowerEdge servers.
# If the inlet temperature is above 45deg C enable iDRAC dynamic control and exit program.
# If inlet temp is below 45deg C set fan control to manual and set fan speed to predetermined value.
# The tower servers T320, T420 & T620 inlet temperature sensor is after the HDDs so temperature will
# be higher than the ambient temperature.
# Variables
IDRAC_IP="IP address of iDRAC"
IDRAC_USER="user"
IDRAC_PASSWORD="password"
# Fan speed in %
SPEED0="0x00"
SPEED5="0x05"
SPEED10="0x0a"
SPEED15="0x0f"
SPEED20="0x14"
SPEED25="0x19"
SPEED30="0x1e"
SPEED35="0x23"
SPEED40="0x28"
SPEED45="0x2D"
SPEED50="0x32"
TEMP_THRESHOLD="45" # iDRAC dynamic control enable threshold
#TEMP_SENSOR="04h" # Inlet Temp
#TEMP_SENSOR="01h" # Exhaust Temp
TEMP_SENSOR="0Eh" # CPU 1 Temp
#TEMP_SENSOR="0Fh" # CPU 2 Temp
# Get system date & time.
DATE=$(date +%d-%m-%Y\ %H:%M:%S)
echo "Date $DATE"
# Get temperature from iDARC.
T=$(ipmitool -I lanplus -H $IDRAC_IP -U $IDRAC_USER -P $IDRAC_PASSWORD sdr type temperature | grep $TEMP_SENSOR | cut -d"|" -f5 | cut -d" " -f2)
echo "--> iDRAC IP Address: $IDRAC_IP"
echo "--> Current CPU Temp: $T"
# If CPU ~~ambient~~ temperature is above 45deg C enable dynamic control and exit, if below set manual control.
if [[ $T > $TEMP_THRESHOLD ]]
then
echo "--> Temperature is above 45deg C"
echo "--> Enabled dynamic fan control"
ipmitool -I lanplus -H $IDRAC_IP -U $IDRAC_USER -P $IDRAC_PASSWORD raw 0x30 0x30 0x01 0x01
exit 1
else
echo "--> Temperature is below 45deg C"
echo "--> Disabled dynamic fan control"
ipmitool -I lanplus -H $IDRAC_IP -U $IDRAC_USER -P $IDRAC_PASSWORD raw 0x30 0x30 0x01 0x00
fi
# Set fan speed dependant on CPU ~~ambient~~ temperature if CPU ~~inlet~~ temperature is below 45deg C.
# If CPU ~~inlet~~ temperature between 0 and 19deg C then set fans to 15%.
if [ "$T" -ge 0 ] && [ "$T" -le 19 ]
then
echo "--> Setting fan speed to 15%"
ipmitool -I lanplus -H $IDRAC_IP -U $IDRAC_USER -P $IDRAC_PASSWORD raw 0x30 0x30 0x02 0xff $SPEED15
# If inlet temperature between 20 and 24deg C then set fans to 20%
elif [ "$T" -ge 20 ] && [ "$T" -le 24 ]
then
echo "--> Setting fan speed to 20%"
ipmitool -I lanplus -H $IDRAC_IP -U $IDRAC_USER -P $IDRAC_PASSWORD raw 0x30 0x30 0x02 0xff $SPEED20
# If inlet temperature between 25 and 29deg C then set fans to 25%
elif [ "$T" -ge 25 ] && [ "$T" -le 29 ]
then
echo "--> Setting fan speed to 25%"
ipmitool -I lanplus -H $IDRAC_IP -U $IDRAC_USER -P $IDRAC_PASSWORD raw 0x30 0x30 0x02 0xff $SPEED25
# If inlet temperature between 30 and 34deg C then set fans to 30%
elif [ "$T" -ge 30 ] && [ "$T" -le 34 ]
then
echo "--> Setting fan speed to 30%"
ipmitool -I lanplus -H $IDRAC_IP -U $IDRAC_USER -P $IDRAC_PASSWORD raw 0x30 0x30 0x02 0xff $SPEED30
# If inlet temperature between 35 and 40deg C then set fans to 35%
elif [ "$T" -ge 35 ] && [ "$T" -le 39 ]
then
echo "--> Setting fan speed to 35%"
ipmitool -I lanplus -H $IDRAC_IP -U $IDRAC_USER -P $IDRAC_PASSWORD raw 0x30 0x30 0x02 0xff $SPEED35
# If inlet temperature between 40 and 45deg C then set fans to 40%
elif [ "$T" -ge 40 ] && [ "$T" -le 45 ]
then
echo "--> Setting fan speed to 40%"
ipmitool -I lanplus -H $IDRAC_IP -U $IDRAC_USER -P $IDRAC_PASSWORD raw 0x30 0x30 0x02 0xff $SPEED40
fi
```
# Implementation
## pfSense
1. Create a folder `/root/fan_control`
2. The Bash executable in pfSense is located in `usr/local/bin/bash`, so make sure this is specified in the top of the script:
```bash
#!/usr/local/bin/bash
...
```
3. Copy the script to the folder
4. Make script executable: `chmod +x /root/fan_control/fan_control.sh`
5. Add iDRAC credentials in script
6. Run the script to test
7. Create a cron job with `crontab -e` and add line:
```shell
* * * * * /usr/local/bin/bash /root/fan_control/fan_control.sh >/dev/null 2>&1
```
## TrueNAS
I followed [breznet's guide](https://www.breznet.com/dell-idrac7-manual-fan-control/).
1. Create a dataset `fan_control`
2. Copy the script to the dataset
3. Make script executable: `chmod +x /mnt/store1/fan_control/fan_control.sh`
4. Add iDRAC credentials in script
5. Run the script to test
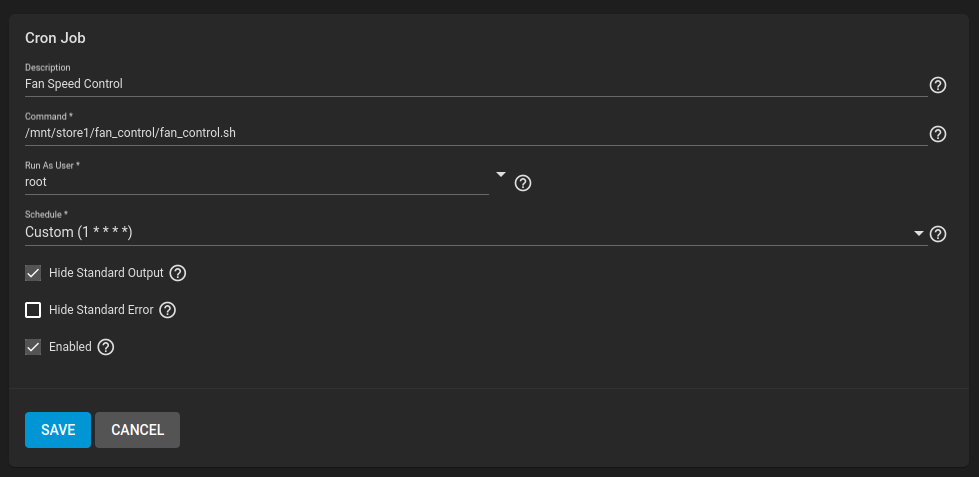
6. Create a cron job in TrueNAS GUI running every minute
#
# Script controla fan - decimal/hexadecinal
Link: [https://forum.proxmox.com/threads/ipmi-tool-error-after-v8-upgrade.129334/page-2](https://forum.proxmox.com/threads/ipmi-tool-error-after-v8-upgrade.129334/page-2)
Bash:
```bash
#!/bin/bash
# Fancontrol v1.1 2022-09-15 15:42
# Define variables
MAX_FAN=90
MIN_FAN=20
HIGH_TEMP=37
LOW_TEMP=35
SPEED_STEP=10
IDRAC_IP=10.0.0.1
IPMI_USER=fancontrol
IPMI_PASSWORD=yoursupercomplexpassword
# Define Functions
ENABLE_FAN ()
{
ipmitool -I lanplus -H $IDRAC_IP -U $IPMI_USER -P $IPMI_PASSWORD raw 0x30 0x30 0x01 0x00 > /dev/null 2>&1
}
GET_TEMP ()
{
ipmitool -I lanplus -H $IDRAC_IP -U $IPMI_USER -P $IPMI_PASSWORD sensor reading "Exhaust Temp"|sed 's/[^0-9]//g'
}
SET_FAN ()
{
ipmitool -I lanplus -H $IDRAC_IP -U $IPMI_USER -P $IPMI_PASSWORD raw 0x30 0x30 0x02 0xff $FAN_SETTING > /dev/null 2>&1
}
# File to save the last fan speed
[ -f fan_speed.last ] || echo $MIN_FAN > fan_speed.last
FAN_SPEED=$( $HIGH_TEMP)) ; then
FAN_SPEED=$(expr $FAN_SPEED + $SPEED_STEP)
if (($FAN_SPEED > $MAX_FAN)) ; then
FAN_SPEED=$MAX_FAN
fi
fi
if (($CURRENT_TEMP < $LOW_TEMP)) ; then
FAN_SPEED=$(expr $FAN_SPEED - $SPEED_STEP)
if (($FAN_SPEED < $MIN_FAN)) ; then
FAN_SPEED=$MIN_FAN
fi
fi
FAN_SETTING=$(printf "0x"'%x\n' $FAN_SPEED)
ENABLE_FAN
SET_FAN
logger -t FanControl "Current Temperature" $CURRENT_TEMP"C" "Fans at" $FAN_SPEED"%"
echo $FAN_SPEED > fan_speed.last
exit 0
```
**Informações adicionais:**
Launch a command prompt on the server and navigate to the directory above. Then run the following commands, substituting the ip address (-H), username (-U), and password (-P) of your iDRAC:
```
To enable remote fan control: ipmitool -I lanplus -H 192.168.1.240 -U root -P calvin raw 0x30 0x30 0x01 0x00
To set the fan to 20%: ipmitool -I lanplus -H 192.168.1.240 -U root -P calvin raw 0x30 0x30 0x02 0xff 0x14
To set the fan to 25%: ipmitool -I lanplus -H 192.168.1.240 -U root -P calvin raw 0x30 0x30 0x02 0xff 0x19
To set the fan to 30%: ipmitool -I lanplus -H 192.168.1.240 -U root -P calvin raw 0x30 0x30 0x02 0xff 0x1e
To set the fan to 35%: ipmitool -I lanplus -H 192.168.1.240 -U root -P calvin raw 0x30 0x30 0x02 0xff 0x23
To set the fan to 40%: ipmitool -I lanplus -H 192.168.1.240 -U root -P calvin raw 0x30 0x30 0x02 0xff 0x28
To set the fan to 45%: ipmitool -I lanplus -H 192.168.1.240 -U root -P calvin raw 0x30 0x30 0x02 0xff 0x2D
To set the fan to 50%: ipmitool -I lanplus -H 192.168.1.240 -U root -P calvin raw 0x30 0x30 0x02 0xff 0x32
```
**TABELA CONVERSÃO DECIMAL PARA HEXADECIMAL**
# Decimal-hexadecimal-binary conversion table
Dec
Hex
Bin
Dec
Hex
Bin
Dec
Hex
Bin
Dec
Hex
Bin
0
0
00000000
64
40
01000000
128
80
10000000
192
c0
11000000
1
1
00000001
65
41
01000001
129
81
10000001
193
c1
11000001
2
2
00000010
66
42
01000010
130
82
10000010
194
c2
11000010
3
3
00000011
67
43
01000011
131
83
10000011
195
c3
11000011
4
4
00000100
68
44
01000100
132
84
10000100
196
c4
11000100
5
5
00000101
69
45
01000101
133
85
10000101
197
c5
11000101
6
6
00000110
70
46
01000110
134
86
10000110
198
c6
11000110
7
7
00000111
71
47
01000111
135
87
10000111
199
c7
11000111
8
8
00001000
72
48
01001000
136
88
10001000
200
c8
11001000
9
9
00001001
73
49
01001001
137
89
10001001
201
c9
11001001
10
a
00001010
74
4a
01001010
138
8a
10001010
202
ca
11001010
11
b
00001011
75
4b
01001011
139
8b
10001011
203
cb
11001011
12
c
00001100
76
4c
01001100
140
8c
10001100
204
cc
11001100
13
d
00001101
77
4d
01001101
141
8d
10001101
205
cd
11001101
14
e
00001110
78
4e
01001110
142
8e
10001110
206
ce
11001110
15
f
00001111
79
4f
01001111
143
8f
10001111
207
cf
11001111
16
10
00010000
80
50
01010000
144
90
10010000
208
d0
11010000
17
11
00010001
81
51
01010001
145
91
10010001
209
d1
11010001
18
12
00010010
82
52
01010010
146
92
10010010
210
d2
11010010
19
13
00010011
83
53
01010011
147
93
10010011
211
d3
11010011
20
14
00010100
84
54
01010100
148
94
10010100
212
d4
11010100
21
15
00010101
85
55
01010101
149
95
10010101
213
d5
11010101
22
16
00010110
86
56
01010110
150
96
10010110
214
d6
11010110
23
17
00010111
87
57
01010111
151
97
10010111
215
d7
11010111
24
18
00011000
88
58
01011000
152
98
10011000
216
d8
11011000
25
19
00011001
89
59
01011001
153
99
10011001
217
d9
11011001
26
1a
00011010
90
5a
01011010
154
9a
10011010
218
da
11011010
27
1b
00011011
91
5b
01011011
155
9b
10011011
219
db
11011011
28
1c
00011100
92
5c
01011100
156
9c
10011100
220
dc
11011100
29
1d
00011101
93
5d
01011101
157
9d
10011101
221
dd
11011101
30
1e
00011110
94
5e
01011110
158
9e
10011110
222
de
11011110
31
1f
00011111
95
5f
01011111
159
9f
10011111
223
df
11011111
32
20
00100000
96
60
01100000
160
a0
10100000
224
e0
11100000
33
21
00100001
97
61
01100001
161
a1
10100001
225
e1
11100001
34
22
00100010
98
62
01100010
162
a2
10100010
226
e2
11100010
35
23
00100011
99
63
01100011
163
a3
10100011
227
e3
11100011
36
24
00100100
100
64
01100100
164
a4
10100100
228
e4
11100100
37
25
00100101
101
65
01100101
165
a5
10100101
229
e5
11100101
38
26
00100110
102
66
01100110
166
a6
10100110
230
e6
11100110
39
27
00100111
103
67
01100111
167
a7
10100111
231
e7
11100111
40
28
00101000
104
68
01101000
168
a8
10101000
232
e8
11101000
41
29
00101001
105
69
01101001
169
a9
10101001
233
e9
11101001
42
2a
00101010
106
6a
01101010
170
aa
10101010
234
ea
11101010
43
2b
00101011
107
6b
01101011
171
ab
10101011
235
eb
11101011
44
2c
00101100
108
6c
01101100
172
ac
10101100
236
ec
11101100
45
2d
00101101
109
6d
01101101
173
ad
10101101
237
ed
11101101
46
2e
00101110
110
6e
01101110
174
ae
10101110
238
ee
11101110
47
2f
00101111
111
6f
01101111
175
af
10101111
239
ef
11101111
48
30
00110000
112
70
01110000
176
b0
10110000
240
f0
11110000
49
31
00110001
113
71
01110001
177
b1
10110001
241
f1
11110001
50
32
00110010
114
72
01110010
178
b2
10110010
242
f2
11110010
51
33
00110011
115
73
01110011
179
b3
10110011
243
f3
11110011
52
34
00110100
116
74
01110100
180
b4
10110100
244
f4
11110100
53
35
00110101
117
75
01110101
181
b5
10110101
245
f5
11110101
54
36
00110110
118
76
01110110
182
b6
10110110
246
f6
11110110
55
37
00110111
119
77
01110111
183
b7
10110111
247
f7
11110111
56
38
00111000
120
78
01111000
184
b8
10111000
248
f8
11111000
57
39
00111001
121
79
01111001
185
b9
10111001
249
f9
11111001
58
3a
00111010
122
7a
01111010
186
ba
10111010
250
fa
11111010
59
3b
00111011
123
7b
01111011
187
bb
10111011
251
fb
11111011
60
3c
00111100
124
7c
01111100
188
bc
10111100
252
fc
11111100
61
3d
00111101
125
7d
01111101
189
bd
10111101
253
fd
11111101
62
3e
00111110
126
7e
01111110
190
be
10111110
254
fe
11111110
63
3f
00111111
127
7f
01111111
191
bf
10111111
255
ff
11111111
# Quiet Fans on Dell PowerEdge Servers Via IPMI
Link: https://blog.hessindustria.com/quiet-fans-on-dell-poweredge-servers-via-ipmi/
[JOSHUA HESS](https://blog.hessindustria.com/author/joshua/)• 3 MIN READ

## Intro
You just got your new shiny Dell PowerEdge server all set up, but you are getting annoyed by the constant fan ramping up and down or the louder than desired whining of fans. Or worse yet, you just added an "unsupported" GPU or another PCIe device to your PowerEdge and now the fans are ripping at near 100% and screaming away like a jet engine. Fear not! This quick tutorial will get your server to STFU in no time!
When I first got into servers and HomeLab years ago, the standard and accepted way to quiet down PowerEdge servers was to add a resistor in series with each of the fans. Luckily, the newer generations of PowerEdge servers since then have a standard IPMI interface and some known commands to manually control the fan speed. No resistors or soldering irons required this time, nice.
## Step By Step
### Before We Begin
Before starting, you'll need to:
1. Have access to a Linux machine (Ubuntu recommended)
2. Know your Dell iDRAC IP address and login credentials
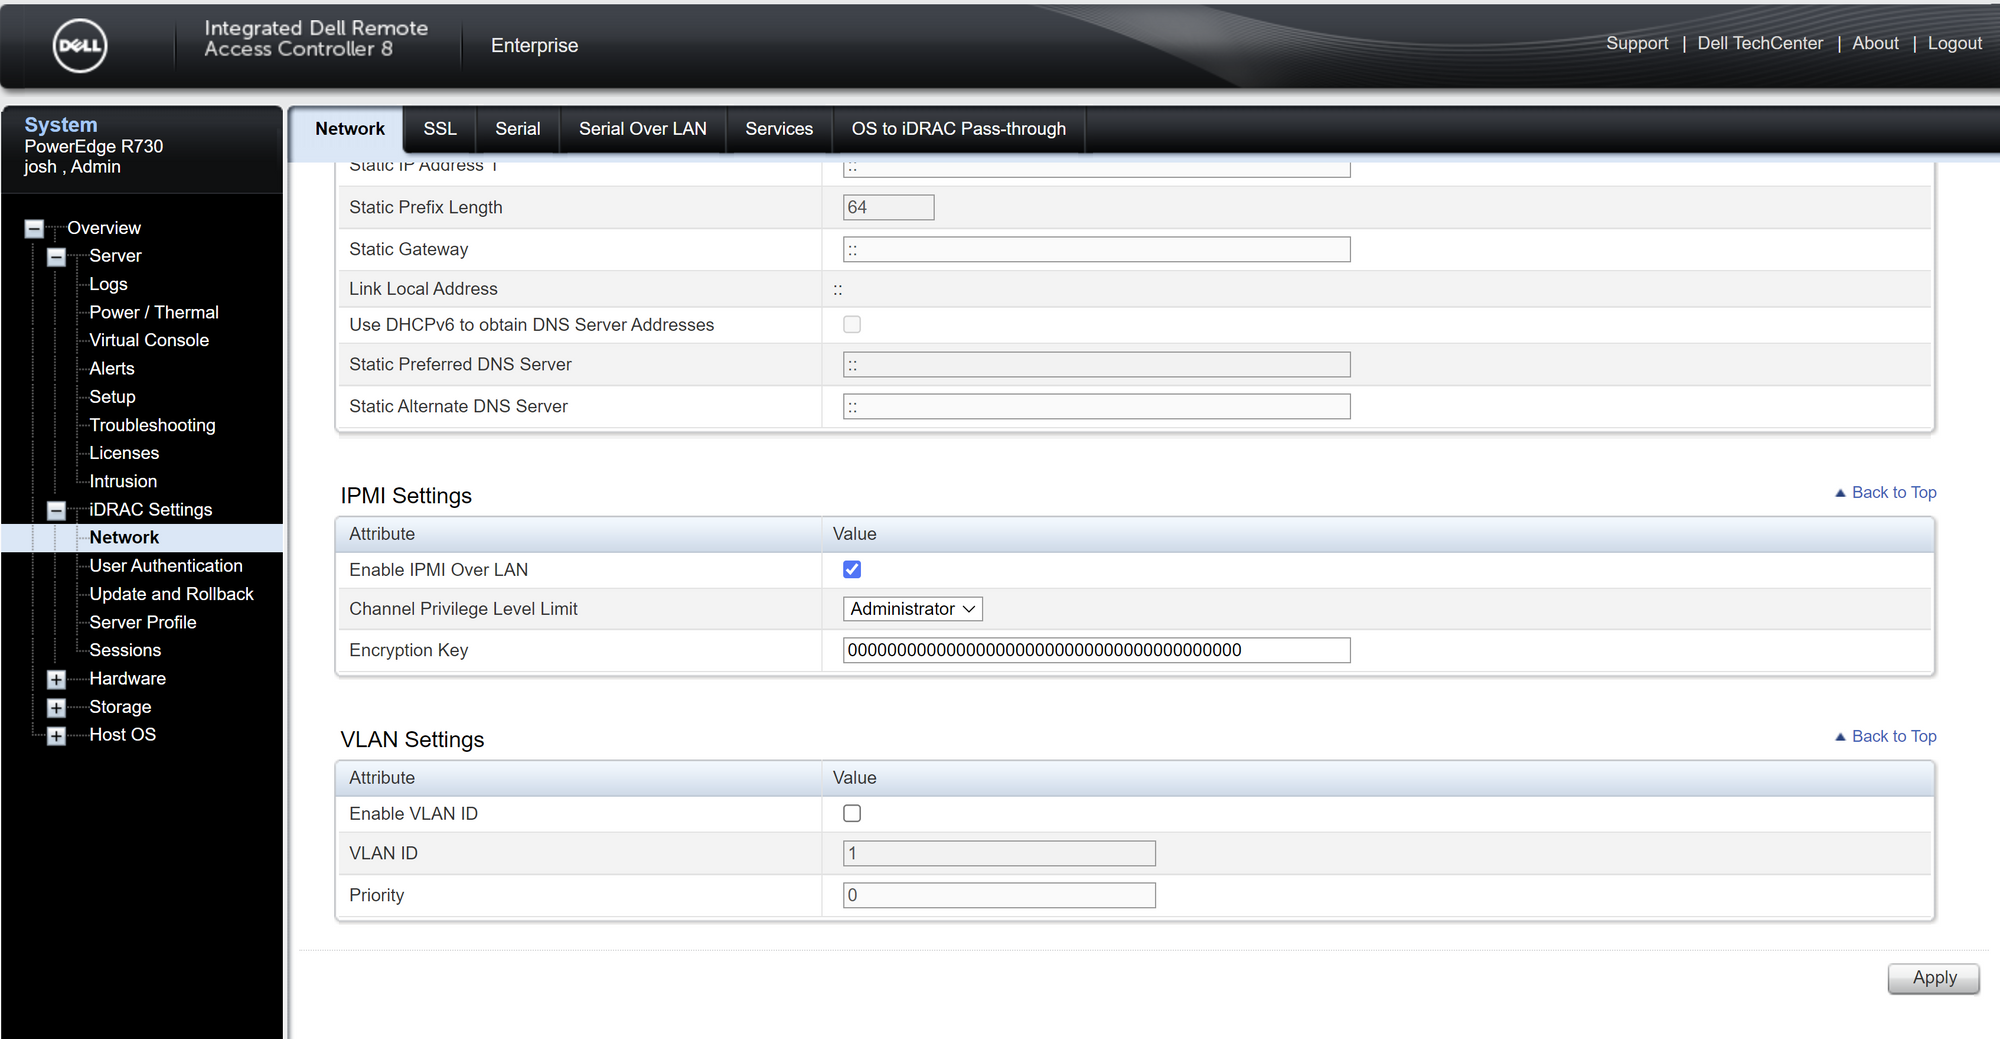
3. Make sure IPMI Over LAN option is enabled in iDRAC as shown below
### Install IPMI Tool
The first thing to do is install IPMI Tool. To do so, open a terminal and run the following command:
```
sudo apt install ipmitool
```
This is what we will use to send raw IPMI commands to the server.
### Enter Manual Fan Control Mode
To put the fan speed controller into manual or fixed speed mode, run the following command with your own iDRAC IP and credentials:
```
ipmitool -I lanplus -H -U -P raw 0x30 0x30 0x01 0x00
```
### Set Static Fan Speed
To set a static fan speed run the following command with your own iDRAC IP, credentials, and fan speed as a percentage (0-100) in hexadecimal format (0x00-0x64).
```
ipmitool -I lanplus -H -U -P raw 0x30 0x30 0x02 0xFF
```
For example, setting the speed to 10% (0xA) would be as follows:
```
ipmitool -I lanplus -H -U -P raw 0x30 0x30 0x02 0xFF 0xA
```
**NOTE:** The static fan speed commands only work if the speed controller is set in manual mode as set above. It will return to automatic mode upon an iDRAC reset.
### Maximizing Sound Reduction
It may be counterintuitive, but to minimize sound level, lower fan speed isn't always better. In my case, with the R730 server, I found that the optimum fan speed for minimum perceived sound was 11% fan speed. I found that the lower speeds had a lower frequency sound which was actually more noticeable than the higher frequency whine at slightly higher speeds. It's worth sweeping through the speeds on your setup and finding the highest speed with an acceptable sound level.
### Double Check Your Temps
The downside to setting the fans to a static speed is, of course, reduced cooling performance and no reaction during high load. In my case, this was not an issue since my server never goes near full load and my ambient temperatures are consistently quite low. However, it is worth double-checking your temperatures and running some synthetic loads to see what the worse case would look like. You can find most of the critical temperatures exposed in the iDRAC web interface.
### Final Thoughts
This method worked great for me and I have used this on all my servers in my home lab. I took this one step further and made a bash script that I can call at a moment's notice if the settings get reset. This can happen if the iDRAC is reset in any way (FW update, SW reset, sustained power outage). You can see the simple bash script below for reference:
```
#!/bin/bash
ipmitool -I lanplus -H -U -P raw 0x30 0x30 0x01 0x00
ipmitool -I lanplus -H -U -P raw 0x30 0x30 0x02 0xFF 0xB
echo Server STFU done!
```
That's it! I hope this was helpful and saves some headaches and bleeding ears for fellow PowerEdge owners.
# Dell Fan Noise Control - Silence Your Poweredge
Link: [https://www.reddit.com/r/homelab/comments/7xqb11/dell\_fan\_noise\_control\_silence\_your\_poweredge/](https://www.reddit.com/r/homelab/comments/7xqb11/dell_fan_noise_control_silence_your_poweredge/)
Hey,
there were some threads complaining about server noise in this sub the last days. I did some research on how to manually controlling the PowerEdge fans.
I read threads on this sub and other boards and found a lot of commands. These are already widely known, but I wanted to list them again. Maybe they will help others.
I tested them with my R210II, T620 and T330. So basically a 11th, 12th and 13th generation PowerEdge. Although you might have to change the sensors' names accordingly.
```
### Dell Fan Control Commands
#
#
# Hex to Decimal: http://www.hexadecimaldictionary.com/hexadecimal/0x1a/
#
#
# print temps and fans rpms
ipmitool -I lanplus -H -U -P sensor reading "Ambient Temp" "FAN 1 RPM" "FAN 2 RPM" "FAN 3 RPM"
#
# print fan info
ipmitool -I lanplus -H -U -P sdr get "FAN 1 RPM" "FAN 2 RPM" "FAN 3 RPM"
#
# enable manual/static fan control
ipmitool -I lanplus -H -U -P raw 0x30 0x30 0x01 0x00
#
# disable manual/static fan control
ipmitool -I lanplus -H -U -P raw 0x30 0x30 0x01 0x01
#
# set fan speed to 0 rpm
ipmitool -I lanplus -H -U -P raw 0x30 0x30 0x02 0xff 0x00
#
# set fan speed to 20 %
ipmitool -I lanplus -H -U -P raw 0x30 0x30 0x02 0xff 0x14
#
# set fan speed to 30 %
ipmitool -I lanplus -H -U -P raw 0x30 0x30 0x02 0xff 0x1e
#
# set fan speed to 100 %
ipmitool -I lanplus -H -U -P raw 0x30 0x30 0x02 0xff 0x64
```
I wrote a small script, that will check the servers temperature periodically (crontab) and disables or enables the dynamic fan control based on a temperature threshold. You may have to adjust the time frame depending on your server usage.
```
#!/bin/bash
#
# crontab -l > mycron
# echo "#" >> mycron
# echo "# At every 2nd minute" >> mycron
# echo "*/2 * * * * /bin/bash /scripts/dell_ipmi_fan_control.sh >> /tmp/cron.log" >> mycron
# crontab mycron
# rm mycron
# chmod +x /scripts/dell_ipmi_fan_control.sh
#
DATE=$(date +%Y-%m-%d-%H%M%S)
echo "" && echo "" && echo "" && echo "" && echo ""
echo "$DATE"
#
IDRACIP=""
IDRACUSER=""
IDRACPASSWORD=""
STATICSPEEDBASE16="0x0f"
SENSORNAME="Ambient"
TEMPTHRESHOLD="29"
#
T=$(ipmitool -I lanplus -H $IDRACIP -U $IDRACUSER -P $IDRACPASSWORD sdr type temperature | grep $SENSORNAME | cut -d"|" -f5 | cut -d" " -f2)
# T=$(ipmitool -I lanplus -H $IDRACIP2 -U $IDRACUSER -P $IDRACPASSWORD sdr type temperature | grep $SENSORNAME2 | cut -d"|" -f5 | cut -d" " -f2 | grep -v "Disabled")
echo "$IDRACIP: -- current temperature --"
echo "$T"
#
if [[ $T > $TEMPTHRESHOLD ]]
then
echo "--> enable dynamic fan control"
ipmitool -I lanplus -H $IDRACIP -U $IDRACUSER -P $IDRACPASSWORD raw 0x30 0x30 0x01 0x01
else
echo "--> disable dynamic fan control"
ipmitool -I lanplus -H $IDRACIP -U $IDRACUSER -P $IDRACPASSWORD raw 0x30 0x30 0x01 0x00
echo "--> set static fan speed"
ipmitool -I lanplus -H $IDRACIP -U $IDRACUSER -P $IDRACPASSWORD raw 0x30 0x30 0x02 0xff $STATICSPEEDBASE16
fi
```
# brezlord/iDRAC7_fan_control
Link: [https://github.com/brezlord/iDRAC7\_fan\_control](https://github.com/brezlord/iDRAC7_fan_control)
A simple script to control fan speeds on Dell generation 12 PowerEdge servers.
If the monitored temperature is above 35deg C enable iDRAC dynamic control and exit program.
If monitored temperature is below 35deg C set fan control to manual and set fan speed to predetermined value.
The tower servers T320, T420 & T620 inlet temperature sensor is after the HDDs so temperature will be higher than the ambient temperature.
As you may have discovered, when you cross flash a Dell H310 raid controller to IT mode and as soon as the iDRAC detects that a drive has been inserted the fans spin up and get loud even when the ambient temperature is low, say 20deg C. This is as designed by Dell, which sucks.
#### Directly from page 30 PowerEdge T320 Technical Guide
*RAID Setup with PERC H310: A system configured as non-RAID has a higher noise level than a system configured as RAID. With non-RAID, the temperature of the hard disk drives is not monitored, which causes the fan speed to be higher to ensure sufficient cooling resulting in higher noise level*
There is no warranty provided and you use this scrip at your own risk. Please ensure you review the temperature set points for your use case to ensure your hard drives are kept at your desired temperature, change the set points as needed. I suggest that you trend you HDD temps to validate your setting and that you setup alarms in TrueNAS so that you get warnings if the HDD temperatures get to high.
I use this script on a Dell T320 running TrueNAS 12 and it work great. The server lives in my garage, which in Western Australia can get into the low 40s deg C.
You will need to create a data set for the script to reside in and make it executable, this assumes that you have a pool called tank and a dataset named fan\_control.
```
chmod +x /mnt/tank/fan_control/fan_control.sh
```
Make sure you set the below variables;
```
IDRAC_IP="IP address of iDRAC"
IDRAC_USER="user"
IDRAC_PASSWORD="passowrd"
```
There are multiple temperature sensors that you can choose to use. Just uncomment the one you would like the script to monitor. Not all temperature sensors are available in some models. You can run the following command from the shel to list all of the available temperature sensors on you generation 12 Dell sever.
```
ipmitool -I lanplus -H -U -P sdr type temperature
```
Output from a Dell T320
```
Inlet Temp | 04h | ok | 7.1 | 23 degrees C
Temp | 0Eh | ok | 3.1 | 33 degrees C
Temp | 0Fh | ns | 3.2 | Disabled
```
Output from a Dell R720
```
Inlet Temp | 04h | ok | 7.1 | 20 degrees C
Exhaust Temp | 01h | ok | 7.1 | 31 degrees C
Temp | 0Eh | ok | 3.1 | 50 degrees C
Temp | 0Fh | ok | 3.2 | 45 degrees C
```
You will need to enable IPMI in the iDRAC and the user must have administrator privileges.
You can test the script by running ./fan\_control.sh from the scrips directory. If it is working you should get an output similar to this;
```
Date 04-09-2020 10:24:52
--> iDRAC IP Address: 192.168.40.140
--> Current Inlet Temp: 22
--> Temperature is below 35deg C
--> Disabled dynamic fan control
--> Setting fan speed to 20%
```
Once you have verified the script is working you can set it to run every 5 minutes via cron.
On TrueNAS Core this can be found under the Tasks menu --> Cron Jobs.
On TrueNAS Scale this can be found under the System menu --> Advanced Cron Jobs tab.
## Systemd
Once the service is up and running, the temprature will be checked every `INTERVAL_SEC` seconds. Fan speed will change if the temprature has changed and warrants a speed change.
There is a delay before the temprature monitoring begins and is controlled by the variable `INITIAL_START_DELAY_SEC`. After this initial delay the time between checks is governed by the `INTERVAL_SEC` value.
When the server is shutdown/rebooted or started, the manual control is reset, this is to avoid any left over low fan speeds from previous power outage/powerdown/shutdown etc.
The files required to run the service are `fan_control_dyn.sh` `fancontrol.service`
Simply execute the following to get the service set up.
```
sudo cp fan_control_dyn.sh /usr/local/sbin/fan_control_dyn.sh
sudo chmod 755 /usr/local/sbin/fan_control_dyn.sh
sudo cp fancontrol.service /etc/systemd/system/fancontrol.service
sudo systemctl enable fancontrol.service
sudo systemctl start fancontrol.service
```
If you are using a location other than `/usr/local/sbin/fan_control_dyn.sh` then you'll need to modify the location in the `fancontrol.service` file as well
```
ExecStart=/MY_ABSOLUTE_PATH/fan_control_dyn.sh
```
# Dell PowerEdge T620 : How To Reduce FAN Speed with IPMI
Link: [https://std.rocks/dell\_t620\_fanspeed.html](https://std.rocks/dell_t620_fanspeed.html)
- *Last updated: Feb 8, 2022*
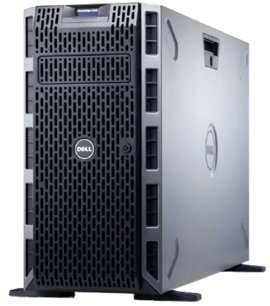
Recently I had to replace **Dell** certified mechanical **hard drives** with uncertified **SSD** drives on a **PowerEdge T620** server and was unpleasantly suprised to find that the fans were spinning noisly when inserted.
After quick research, I discovered that it was a known issue and that **Dell** wasn't able to offer any [solution](https://www.dell.com/community/Systems-Management-General/PowerEdge-T620-Fan-Speed-75-after-installing-SSD/td-p/5136373)…
Thanks to god/internet, I also found a post where a user has been able to control the fan speed with the **ipmitool**. So, big thanks to, [tatmde](https://www.reddit.com/r/homelab/comments/7xqb11/dell_fan_noise_control_silence_your_poweredge/).
I will simply post here what I have done in my situation.
⚠️ Be advised that changing the fan speed may result in overheating and damage to the components. ⚠️
## Enable IPMI over LAN
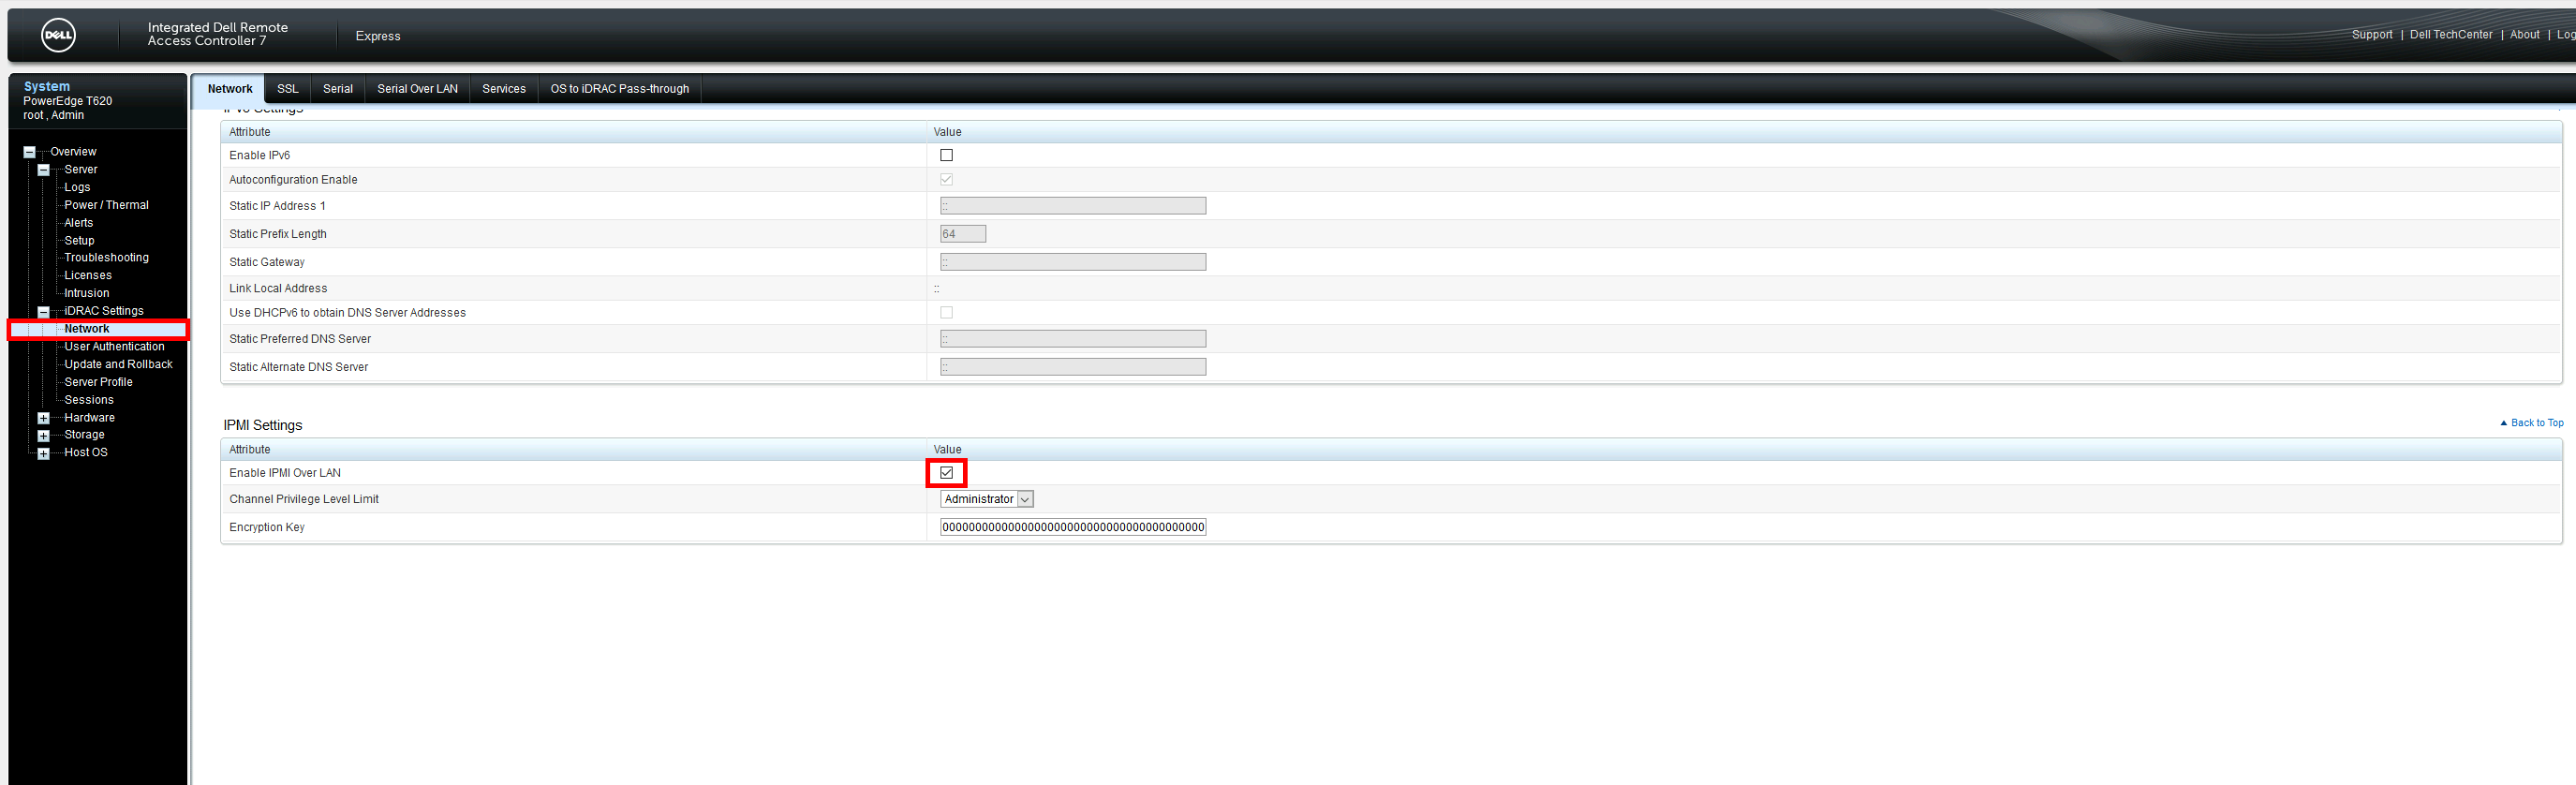
To control the **FANs speed** via network we need to enable **IPMI over LAN** from **IDRAC**.
⚠️ Enable **IPMI over LAN** could be considered as security issue cause a remote station would have the capability to control the system's power state as well as being able to gather certain platform information. ⚠️
- Connect to your **iDRAC**, go to **iDRAC Settings** > **Network** and enable **IPMI Over LAN** :
## ipmitool utility
### Installing on GNU/Linux
Install **ipmitool** software. This utility will allow us to communicate with the **IPMI**.
- From a **Debian** you could use this command to install **ipmitool** :
```
root@host:~# apt-get install ipmitool
```
### Using ipmitool
#### Check temperature
- Get **temperature** informations :
```
user@host:~$ ipmitool -I lanplus -H -U -P sdr type temperature
Inlet Temp | 04h | ok | 7.1 | 21 degrees C
Temp | 0Eh | ok | 3.1 | 29 degrees C
Temp | 0Fh | ok | 3.2 | 35 degrees C
```
- We can see the corresponding values in **iDRAC** :
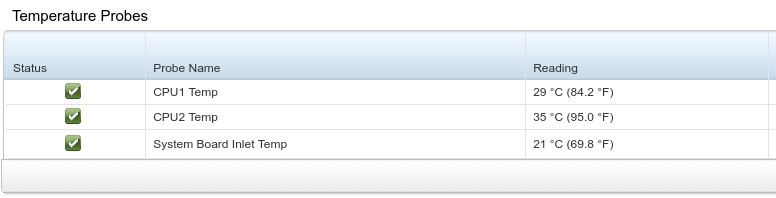#### Control FAN Speed
- To disable **manual**/**static** fan control (auto mode) :
```
user@host:~$ ipmitool -I lanplus -H -U -P raw 0x30 0x30 0x01 0x01
```
- To enable **manual**/**static** fan control (manual mode) :
```
user@host:~$ ipmitool -I lanplus -H -U -P raw 0x30 0x30 0x01 0x00
```
- Get current **Fan** speed :
```
user@host:~$ ipmitool -I lanplus -H -U -P sdr get Fan1 Fan2 | grep "Sensor Reading"
Sensor Reading : 1560 (+/- 120) RPM
Sensor Reading : 1560 (+/- 120) RPM
```
- Set **Fan** speed at **1320 RPM (16%)** :
```
user@host:~$ ipmitool -I lanplus -H -U -P raw 0x30 0x30 0x02 0xff 0x10
```
- Set **Fan** speed at **1560 RPM (20%)** :
```
user@host:~$ ipmitool -I lanplus -H -U -P raw 0x30 0x30 0x02 0xff 0x14
```
- Set **Fan** speed at **2040 RPM (30%)** :
```
user@host:~$ ipmitool -I lanplus -H -U -P raw 0x30 0x30 0x02 0xff 0x1e
```
- Set **Fan** speed at **3000 RPM (50%)** :
```
user@host:~$ ipmitool -I lanplus -H -U -P raw 0x30 0x30 0x02 0xff 0x32
```
- Set **Fan** speed at **5040 RPM (100%)** :
```
user@host:~$ ipmitool -I lanplus -H -U -P raw 0x30 0x30 0x02 0xff 0x64
```
## Create ipmi service
I got mad and decided to create a **service** that automatically regulates the **speed** of the **fans**.
I will detail here the different **steps** to set it up.
*Note : This script is adapted to my own configuration*
### Create system account
- For **security** reason I decided to run the service with **system account**. So let's create a **system** account :
```
root@host:~# useradd --system --no-create-home ipmiservice
```
- Create **log** folder :
```
root@host:~# mkdir /var/log/ipmiservice
```
```
root@host:~# chown -R ipmiservice /var/log/ipmiservice
```
### Create bash script
- Create **/usr/local/sbin/ipmiservice.sh** file :
```
root@host:~# touch /usr/local/sbin/ipmiservice.sh
```
```
root@host:~# chown ipmiservice: /usr/local/sbin/ipmiservice.sh
```
```
root@host:~# chmod +x /usr/local/sbin/ipmiservice.sh
```
- **/usr/local/sbin/ipmiservice.sh** :
```
#!/bin/bash
#Stops script on errors, unset variables or failing pipeline
set -euo pipefail
#variables definitions
LOG=/var/log/ipmiservice/ipmi.log
IP="192.168.1.10"
PASSWORD='STp@ssw0rd!'
#functions
##Set Fan Speed, accept one argument to set speed
FanSpeed()
{
ipmitool -I lanplus -H "$IP" -U root -P "$PASSWORD" raw 0x30 0x30 0x02 $1
}
##Get Temp values
GetValues()
{
#Get motherboard, cpu1 and cpu2 temperature
OUTPUT=$(/usr/bin/ipmitool -I lanplus -H "$IP" -U root -P "$PASSWORD" sdr type temperature | sed -e 's/Temp\(.*0Eh\)/Cpu1\1/' -e 's/Temp\(.*0Fh\)/Cpu2\1/')
#Extract motherboard temp
SB=$(echo $OUTPUT| awk -F'|' '{ print $5 $9 $13 }' | awk '{ print $1 }')
#Extract cpu1 temp
CPU1=$(echo $OUTPUT| awk -F'|' '{ print $5 $9 $13 }' | awk '{ print $5 }')
#Extract cpu2 temp
CPU2=$(echo $OUTPUT| awk -F'|' '{ print $5 $9 $13 }' | awk '{ print $9 }')
#motherboard+cpu1+cpu2 temp
LOG_TOTAL=$(($SB+$CPU1+$CPU2))
#Get Fan1 speed
FANS=$(ipmitool -I lanplus -H "$IP" -U root -P "$PASSWORD" sensor reading Fan1 | awk '{ print $3 }')
}
#set manual mode
ipmitool -I lanplus -H "$IP" -U root -P "$PASSWORD" raw 0x30 0x30 0x01 0x00
GetValues
echo "$(date "+%Y-%m-%d %H:%M:%S")" "MB : $SB | CPU1 : $CPU1 | CPU2 : $CPU2 | LOG_TOTAL : $LOG_TOTAL"
while :
do
if [ "$LOG_TOTAL" -le 100 ] && [ $FANS -eq 1440 ]; then
echo "$(date "+%Y-%m-%d %H:%M:%S")" "FAN speed : 1440, don't do anything" | tee -a "$LOG"
elif [ "$LOG_TOTAL" -le 100 ] && [ $FANS -ne 1440 ]; then
FanSpeed "0xff 0x12" #Set speed to 1440
echo "$(date "+%Y-%m-%d %H:%M:%S")" "Set speed to 1440" | tee -a "$LOG"
elif [ "$LOG_TOTAL" -gt 100 ] && [ "$LOG_TOTAL" -le 105 ] && [ $FANS -ne 1560 ]; then
FanSpeed "0xff 0x14" #Set speed to 1560
echo "$(date "+%Y-%m-%d %H:%M:%S")" "Set speed to 1560" | tee -a "$LOG"
elif [ "$LOG_TOTAL" -gt 105 ] && [ "$LOG_TOTAL" -le 115 ] && [ $FANS -ne 2040 ]; then
FanSpeed "0xff 0x1e" #Set speed to 2040
echo "$(date "+%Y-%m-%d %H:%M:%S")" "Set speed to 2040" | tee -a "$LOG"
elif [ "$LOG_TOTAL" -gt 115 ] && [ "$LOG_TOTAL" -le 130 ] && [ $FANS -ne 3000 ]; then
FanSpeed "0xff 0x32" #Set speed to 3000
echo "$(date "+%Y-%m-%d %H:%M:%S")" "Set speed to 3000" | tee -a "$LOG"
elif [ "$LOG_TOTAL" -gt 130 ] && [ $FANS -ne 5040 ]; then
FanSpeed "0xff 0x64" #Set speed to 5040
echo "$(date "+%Y-%m-%d %H:%M:%S")" "Set speed to 5040" | tee -a "$LOG"
fi
sleep 30s
GetValues
echo "$(date "+%Y-%m-%d %H:%M:%S")" "MB : $SB | CPU1 : $CPU1 | CPU2 : $CPU2 | TEMP TOTAL : $LOG_TOTAL" >> "$LOG"
echo "$(date "+%Y-%m-%d %H:%M:%S")" "FAN speed : $FANS" | tee -a "$LOG"
done
```
### Create systemd service
Now we will create a **systemd** service.
- Create **systemd** service :
```
root@host:~# vim /etc/systemd/system/ipmi.service
```
```
[Unit]
Description=ipmi t620 fan control
After=network.target
[Service]
Type=simple
User=ipmiservice
Group=ipmiservice
WorkingDirectory=/usr/local/sbin/
ExecStart=/usr/local/sbin/ipmiservice.sh
Restart=always
[Install]
WantedBy=multi-user.target
```
- Enable **systemd** service :
```
root@host:~# systemctl enable ipmi.service
```
- Start **systemd** service :
```
root@host:~# systemctl start ipmi.service
```
- Check **logs** output :
```
root@host:~# tail -f /var/log/ipmiservice/ipmi.log
2021-05-09 15:16:57 FAN speed : 1440, don't do anything
2021-05-09 15:17:32 MB : 22 | CPU1 : 37 | CPU2 : 40 | TEMP TOTAL : 99
2021-05-09 15:17:32 FAN speed : 1440, don't do anything
2021-05-09 15:18:04 MB : 22 | CPU1 : 38 | CPU2 : 40 | TEMP TOTAL : 100
2021-05-09 15:18:04 FAN speed : 1440, don't do anything
2021-05-09 15:18:36 MB : 22 | CPU1 : 39 | CPU2 : 40 | TEMP TOTAL : 101
2021-05-09 15:18:36 FAN speed : 1440, don't do anything
2021-05-09 15:18:37 Set speed to 1560
2021-05-09 15:19:09 MB : 22 | CPU1 : 38 | CPU2 : 40 | TEMP TOTAL : 100
2021-05-09 15:19:09 FAN speed : 1560
```
# dell-idrac-6-fan-speed-control-service
Link: [hippyod/dell-idrac-6-or-7-fan-speed-control-service: Simple service to monitor ambient temp of Dell PowerEdge R610 or R720 (iDRAC 6 or 7) and set fan speed manually and appropiately via IPMI (github.com)](https://github.com/hippyod/dell-idrac-6-or-7-fan-speed-control-service)
git clone [https://github.com/hippyod/dell-idrac-6-or-7-fan-speed-control-service.git](https://github.com/hippyod/dell-idrac-6-or-7-fan-speed-control-service.git)
Simple service to monitor ambient temp of Dell PowerEdge R610 or R720 (iDRAC 6 & 7) and set fan speed manually and appropiately via IPMI.
This service will start on boot, monitor the average core CPU temperature every 30s, and adjust fan speed over LAN via the ipmitool based on a rolling average of the average CPU temperatures every two minutes; i.e. `${AVG_CPU_TEMPS_ARRAY_SUM}/4`
**\[NOTE: if you don't understand the instructions, that's what internet search is for.\]**
1. Make sure ipmitool and lm\_sensors is installed; e.g.
`sudo dnf install ipmitool lm_sensors`
2. Make sure iDRAC is enabled over lan from the host OS
3. Get the IP address of iDRAC from the LCD menus at the front of the screen, or during boot
4. Enter the iDRAC IP address, username, and password in fan-speed-control.sh
1. We suggest making the IP address static
2. We suggest changing the root/calvin default username and password on iDRAC first if you haven't already done so
3. If the fan isn't under control by the time your login screen comes up, check the IP address first
5. `sudo sensors-detect`
1. Hit enter all the way through until it asks you to write out the results of the probe unless you know what you're doing
6. `sudo cp fan-speed-control.sh /usr/local/bin/`
7. `sudo cp fan-speed-control.service /usr/lib/systemd/system/`
8. `sudo systemctl enable /usr/lib/systemd/system/fan-speed-control.service`
9. `sudo systemctl start fan-speed-control.service`
The service will start and run every 5 seconds until a proper temperature average is calculated, and then every 30 seconds (default), adjusting the fan speed appropiately as the average core CPU temperature rises. Minimum rotation is set to 15%. Once the temp rises past 90% of the high CPU temperature as reported by the sensors command, it will return control to iDRAC until the core CPU average temperature falls back under 90% of the reported high. *Please read through the script to understand the default settings, and to adjust the IP address of your iDRAC.*
This stopped my machine (first a Dell Poweredge R610, and later a R720) from sounding like a jet engine, but it still sounds like a loud, '90's era desktop with this. Still much better and much more tolerable. Expect the fan speed to adjust somewhat regularly depending on usage and sensor sensistivity, and adjust the way the service works to your heart's desire, but see warning and disclaimer below. Occasionally the sensors may miss a beat, which will cause the script to fail. The script is designed to restart the service until fixed.
### DISCLAIMER
Original script before modification can be found and freely obtained from [NoLooseEnds](https://github.com/NoLooseEnds/Scripts)
# REDUCE THE FAN NOISE OF THE DELL R720XD (PLUS OTHER 12TH GEN SERVERS) WITH IPMI
Link: [https://blog.filegarden.net/2020/10/06/reduce-the-fan-noise-of-the-dell-r720xd-plus-other-12th-gen-servers-with-ipmi/](https://blog.filegarden.net/2020/10/06/reduce-the-fan-noise-of-the-dell-r720xd-plus-other-12th-gen-servers-with-ipmi/)
##### [](https://blog.filegarden.net/2020/10/06/reduce-the-fan-noise-of-the-dell-r720xd-plus-other-12th-gen-servers-with-ipmi/ "6:11 am")[Spencer LeB](https://blog.filegarden.net/author/sleblanc/ "View all posts by Spencer LeB")## Introduction
In this guide I will be showing you how you can reduce the fan noise of the Dell Powerdge r720XD. This will probably work on the r720 and other 12th gen dell servers. To do this, we will be using IPMI to manually override the fan speed.
### Requirements
In order to follow this guide, you will need the following:
- A Linux machine (or anything with `ipmitool` available)
- 12th gen Dell Poweredge Server with iDRAC 7
### Disclaimer
Make sure you keep an eye out on the temperatures of the server or else it will overheat and could cause hardware damage. If you brick your server, thats your problem!
## Getting setup
### Enabling IPMI
The first thing you will need to do is connect to the iDRAC interface on your dell server. You can do so by entering the IP address of the DRAC in a browser. If you are unsure on the IP address, you can find it by powering on the server, pressing F2 to enter the system setup, go to the DRAC section and find the IP somewhere in there. You then need to login. the default credentials are username `root` and password `calvin`.
Once logged in, you will need to go to `Overview -> iDRAC Settings -> Network` and then scroll to the IMPI Settings. You will need to make sure this is enabled.
### Installing IPMI tool
First of all, check if you already have `ipmitool` installed. If you do, you can skip this step. If not, lets install it.
If you are on a debian based machine, you can use apt to install it. First, lets update our apt repo.
```
sudo apt update
```
Now lets install it
```
sudo apt install ipmitool
```
## Controlling some fans
### Enabling manual fan control
Once IPMI has been enabled, we now need to enable remote fan control. We can do so with this command. Make sure to replace the IP, username and password for your system.
```
ipmitool -I lanplus -H SERVERS_IP_HERE -U IDRAC_USERNAME -P 'IDRAC_PASSWORD_HERE' raw 0x30 0x30 0x01 0x00
```
### Setting the speed
You may not have noticied a difference in the sound yet but dont worry, we can now override the current fan speed with our own. Prepare yourself! Use this command to set the fan speed to 20%.
```
ipmitool -I lanplus -H SERVERS_IP_HERE -U IDRAC_USERNAME -P 'IDRAC_PASSWORD_HERE' raw 0x30 0x30 0x02 0xff 0x14
```
If you cant hear the difference or you would like to check the current speed, you can do so via the iDRAC system. go to `Overview -> Hardware -> Fans`.
### Custom speeds
If you want to change the speed to something other than 20%, you just need to change the value at the end from `0x14` to whatever you’d like. `0x14` is the hexadecimal value for 20. Here are some premade values for you. If your not sure how to work out hexadecimal values, check out this [website](https://www.rapidtables.com/convert/number/decimal-to-hex.html).
### Set fan speed to 25%
```
ipmitool -I lanplus -H SERVERS_IP_HERE -U IDRAC_USERNAME -P 'IDRAC_PASSWORD_HERE' raw 0x30 0x30 0x02 0xff 0x19
```
### Set fan speed to 30%
```
ipmitool -I lanplus -H SERVERS_IP_HERE -U IDRAC_USERNAME -P 'IDRAC_PASSWORD_HERE' raw 0x30 0x30 0x02 0xff 0x1E
```
### Set fan speed to 50%
```
ipmitool -I lanplus -H SERVERS_IP_HERE -U IDRAC_USERNAME -P 'IDRAC_PASSWORD_HERE' raw 0x30 0x30 0x02 0xff 0x32
```
### Set fan speed to 60%
```
ipmitool -I lanplus -H SERVERS_IP_HERE -U IDRAC_USERNAME -P 'IDRAC_PASSWORD_HERE' raw 0x30 0x30 0x02 0xff 0x3C
```
### Set fan speed to 100%
```
ipmitool -I lanplus -H SERVERS_IP_HERE -U IDRAC_USERNAME -P 'IDRAC_PASSWORD_HERE' raw 0x30 0x30 0x02 0xff 0x64
```
Original Author
[https://back2basics.io/2020/05/reduce-the-fan-noise-of-the-dell-r720xd-plus-other-12th-gen-servers-with-ipmi/](https://back2basics.io/2020/05/reduce-the-fan-noise-of-the-dell-r720xd-plus-other-12th-gen-servers-with-ipmi/)
# Verificação de Status - Linux
# How to Check CPU Information on Linux?
Link: [https://www.scaler.com/topics/cpu-info-linux/](https://www.scaler.com/topics/cpu-info-linux/)
By Eshika Shah 7 mins read Last updated: 18 Jul 2023
##### **Overview**
Checking CPU information on Linux is an essential task for understanding your system's hardware configuration and capabilities. The CPU (Central Processing Unit) is a crucial component that performs calculations executes instructions, and manages system resources. You can gather details such as the CPU model, architecture, clock speed, number of cores, cache size, and supported features by checking CPU information.
#### **Introduction**
Linux provides various methods to get CPU info linux, from simple commands to more advanced tools. These methods offer different levels of detail and flexibility, allowing you to choose the one that suits your needs. By exploring these methods, you can gain valuable insights into your CPU and optimize your system accordingly.
Some commonly used methods to get CPU info linux include using commands like "lscpu," "cat /proc/cpuinfo," "top" or "htop," "nproc," and utilizing tools such as "hardinfo," "hwinfo," "dmidecode," "inxi," and "lshw." Each method provides specific information about the CPU, enabling you to analyze its capabilities and make informed decisions.
To get CPU info linux is beneficial in various scenarios. It helps system administrators understand the system's performance characteristics, identify hardware limitations, and plan resource allocation. Developers and software enthusiasts can utilize CPU information to optimize applications for specific CPU architectures and features. Additionally, troubleshooting performance issues, diagnosing compatibility problems, and monitoring system utilization is also facilitated by checking CPU information.
In the following sections, we will delve into each method to get CPU info linux, providing step-by-step instructions and explanations on how to use them effectively. By understanding these methods, you will be equipped with the knowledge to gather comprehensive CPU information and make informed decisions based on your system's hardware capabilities.
It's important to note that the specific commands and tools mentioned in this guide may vary depending on your Linux distribution. However, the underlying concepts and approaches remain consistent across distributions.
Checking CPU information on Linux allows you to understand the characteristics and capabilities of your system's CPU. It provides crucial insights for system optimization, troubleshooting, and resource allocation. Utilizing various commands and tools in the Linux ecosystem allows you to gather detailed information about the CPU model, architecture, clock speed, cores, cache size, and supported features. With this knowledge, you can make informed decisions to maximize your system's performance and compatibility.
#### **Methods to Get CPU Information on Linux**
#### Using lscpu Command
The lscpu command provides detailed information about the CPU architecture and characteristics. Open a terminal and type:
```shell
$ lscpu
```
This command will display information such as CPU model, CPU family, number of cores and threads, clock speed, and cache size. The lscpu command output is easy to read and provides a concise overview of the CPU's specifications.
#### Using cat /proc/cpuinfo
The /proc/cpuinfo file contains information about the CPU and its features. Open a terminal and run:
```console
$ cat /proc/cpuinfo
```
This command will display detailed information about each CPU core, including model name, vendor, cache size, and flags indicating CPU-supported features. The output can be quite extensive, as it provides information for each core on the system.
#### Using top or htop Command
The top and htop commands are system monitoring tools that provide real-time information about processes and system resources. Open a terminal and type:
```console
$ top
```
or
```console
$ htop
```
Look for the CPU section, which displays CPU usage, load average, and individual core usage information. While these commands primarily focus on process monitoring, they glance at CPU utilization and core performance.
#### Using nproc Command
The nproc command displays the number of processing units available. Open a terminal and run:
```console
$ nproc
```
This command will output the total number of CPU cores. It provides a simple way to determine the number of cores without diving into detailed specifications.
#### Using hardinfo Command
The hardinfo command is a graphical tool that provides detailed information about hardware components, including the CPU. Install it if it's not already available and run:
```console
$ hardinfo
```
Navigate to the "Processor" section to view CPU-related information. And click generate report. Hardinfo offers a user-friendly interface and presents CPU details in an organized manner.
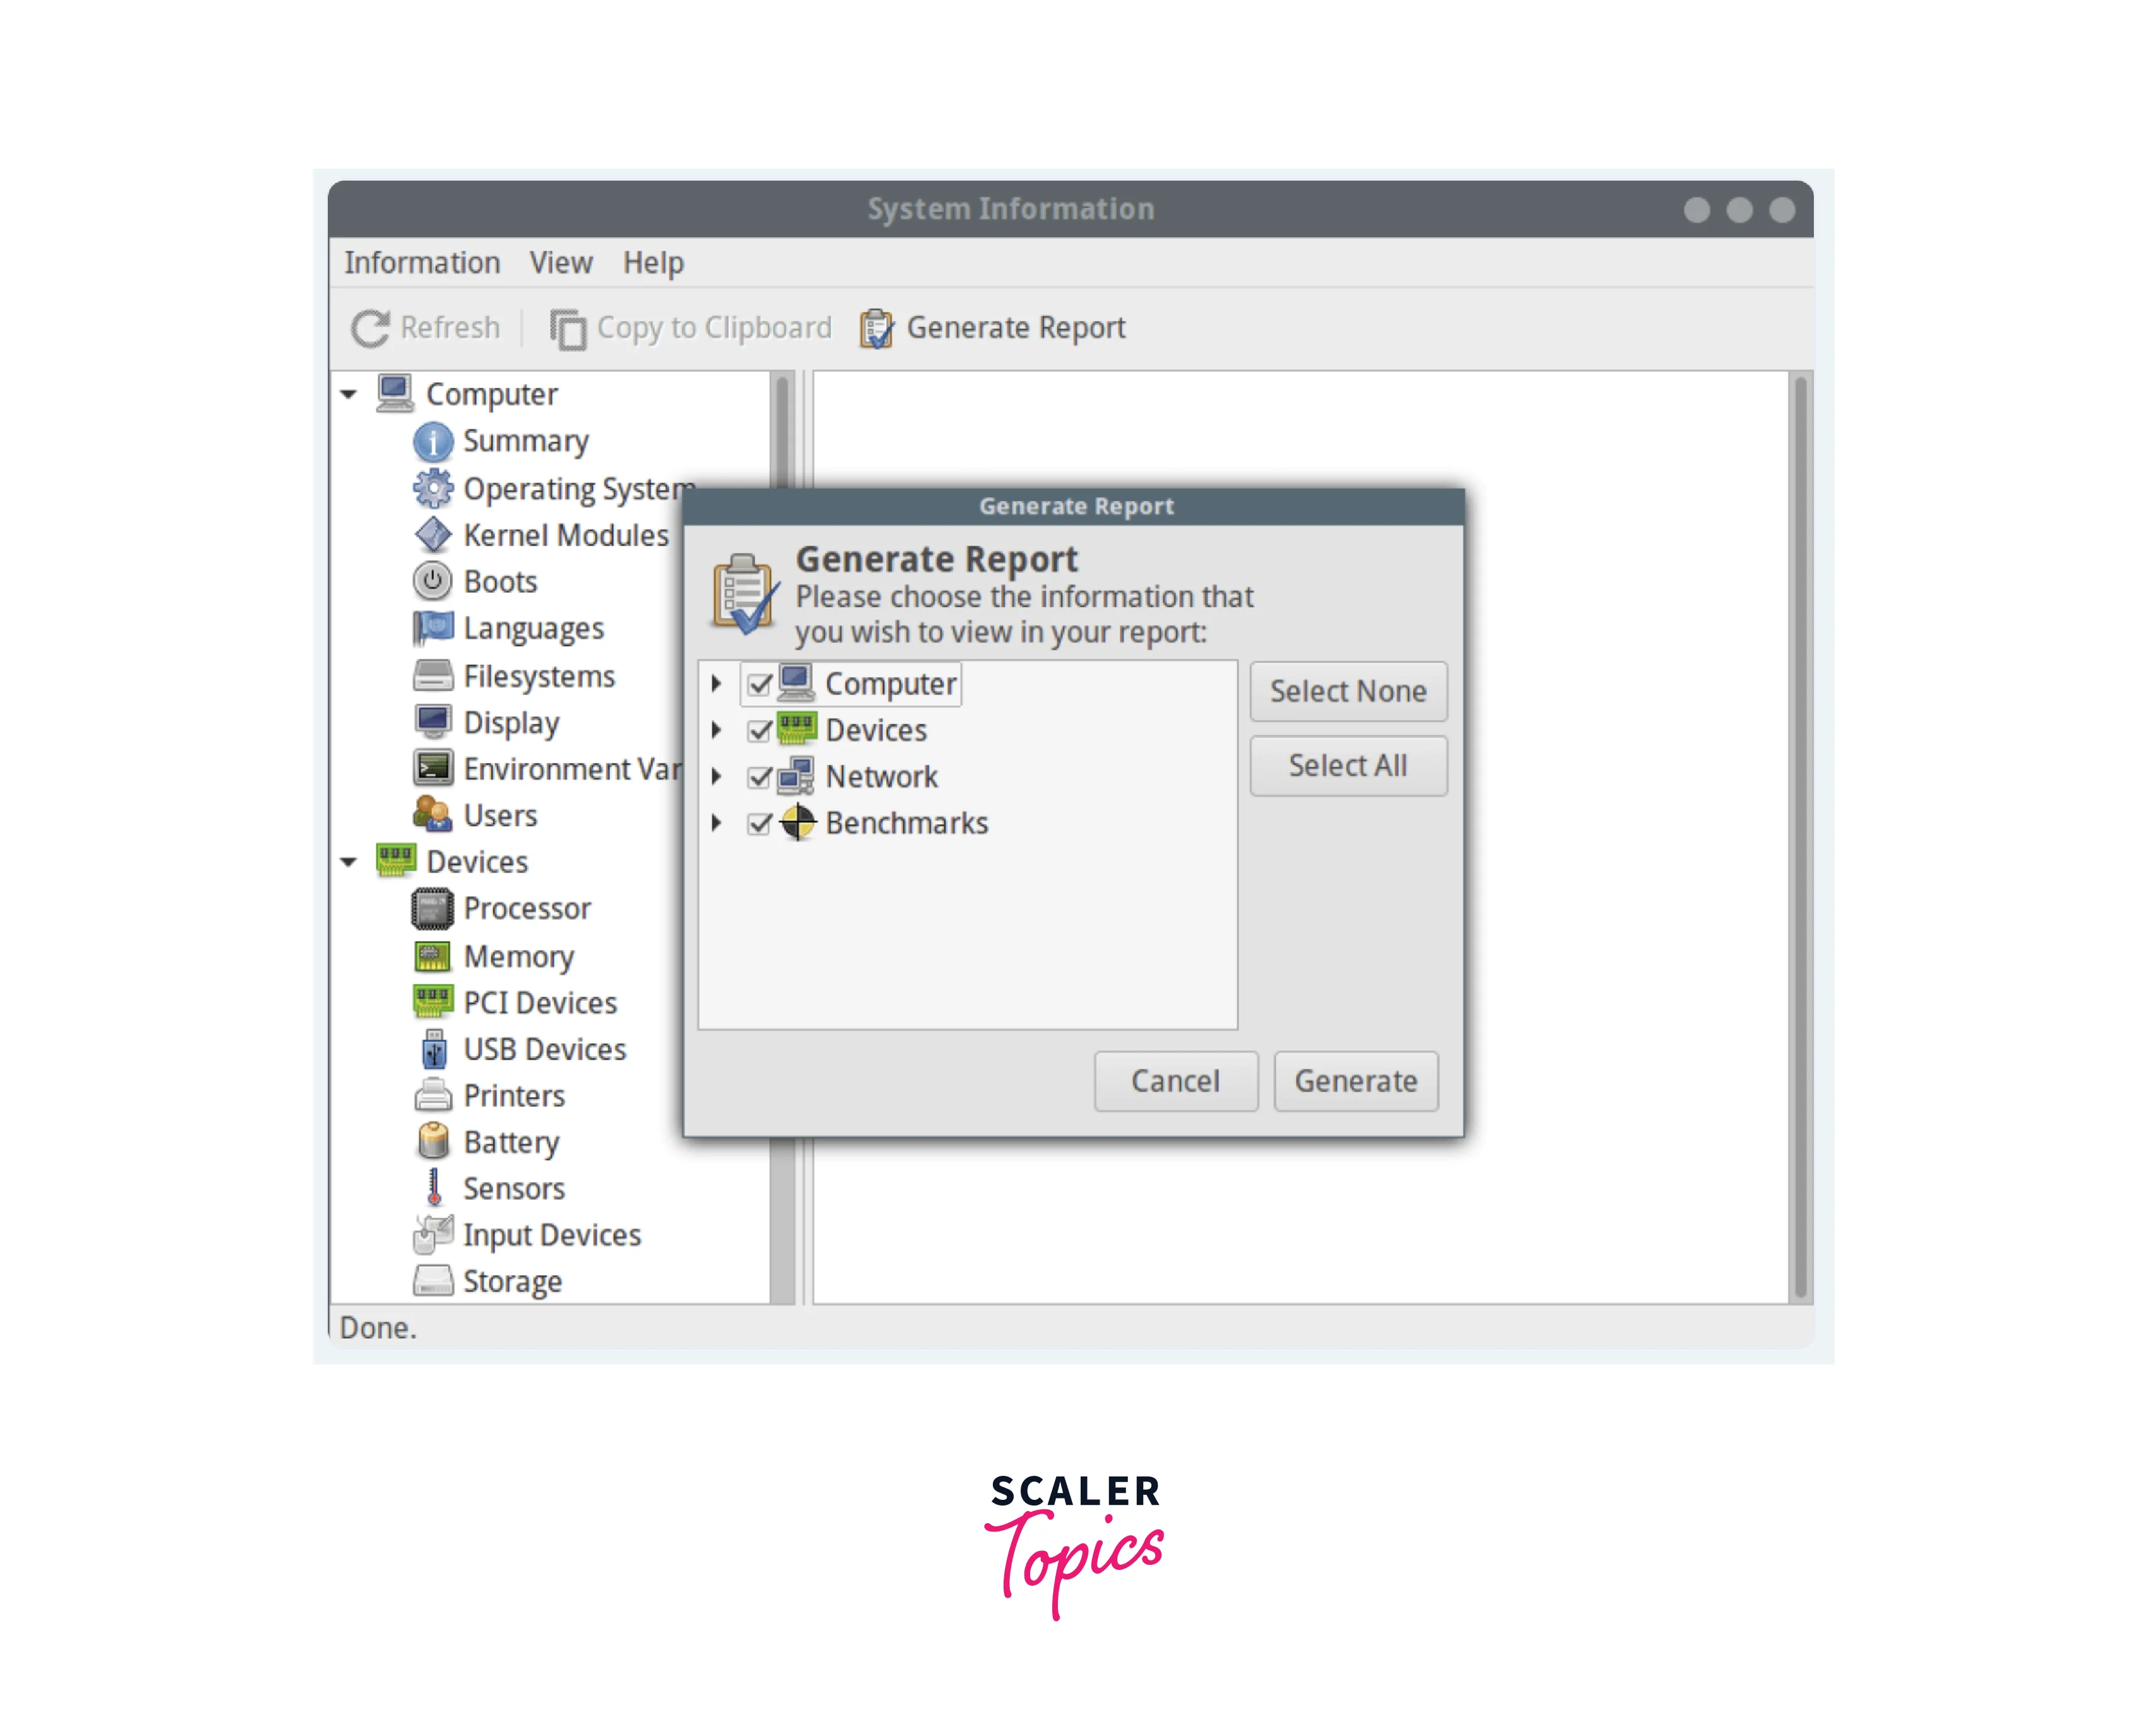
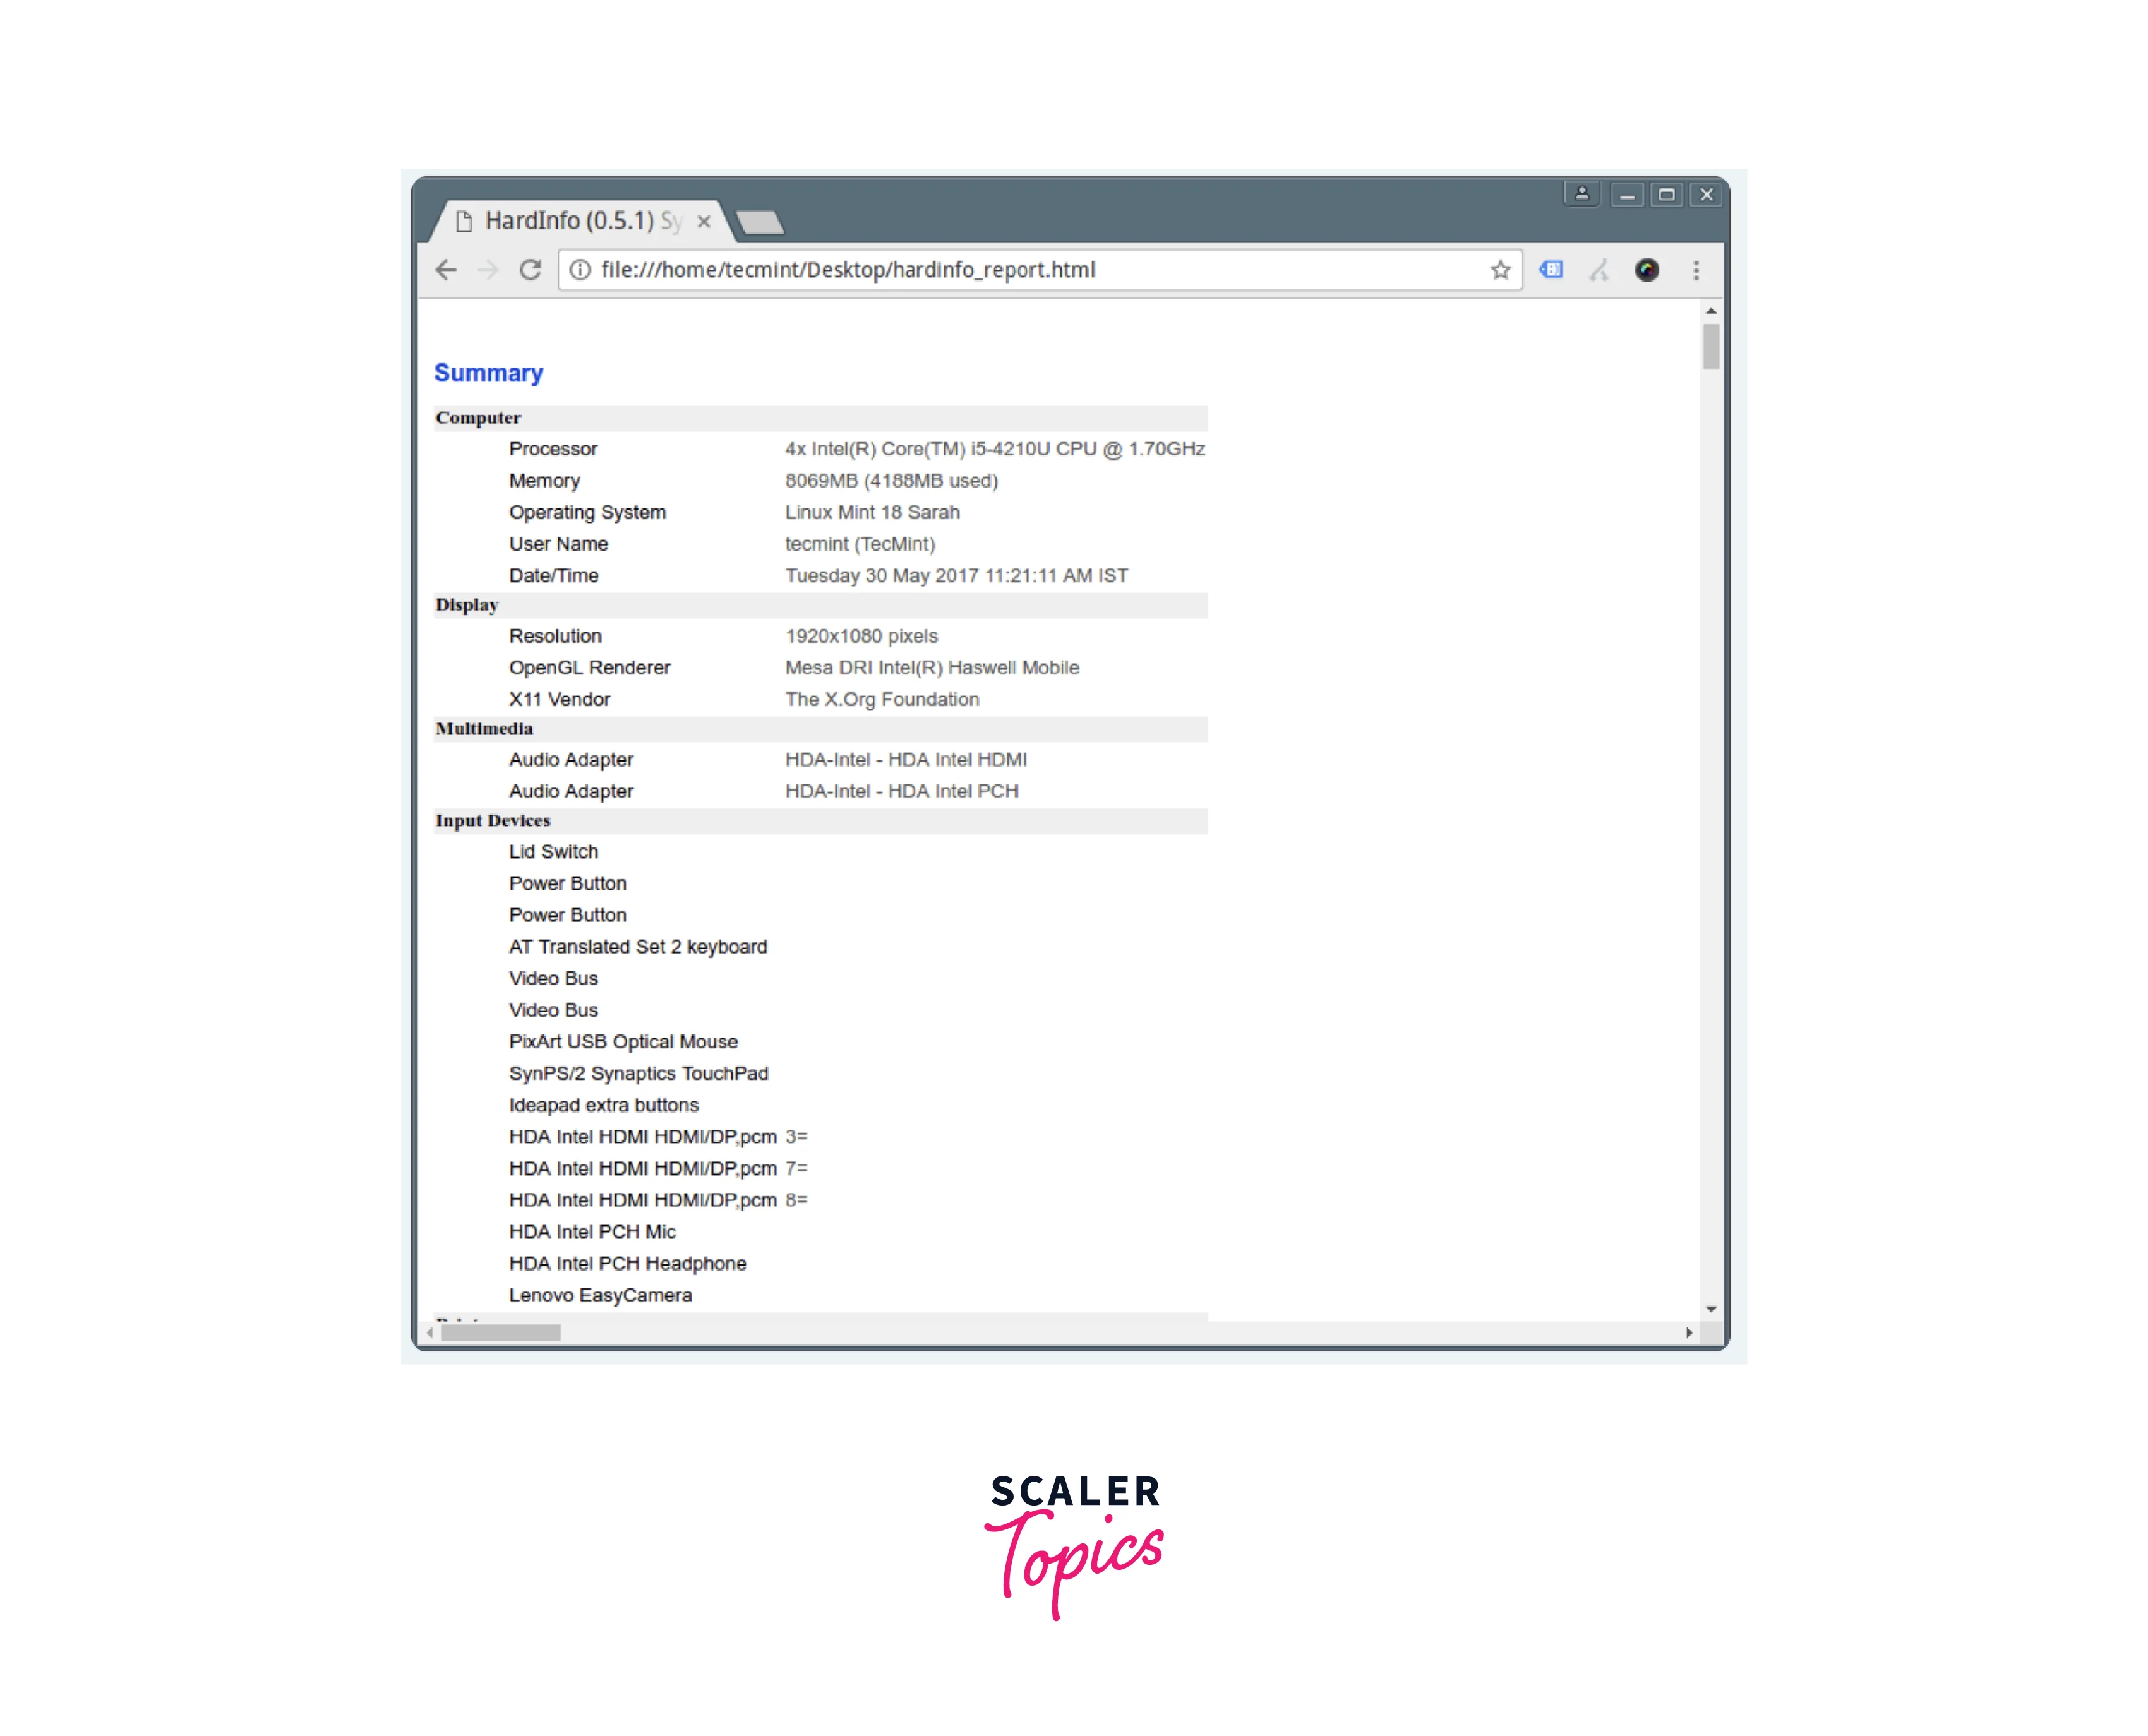
#### Using hwinfo Command
The hwinfo command is a powerful hardware information tool. Install it if needed and execute:
```console
$ hwinfo --cpu
```
This command will provide comprehensive information about the CPU, including architecture, clock speed, cache size, and supported features. The output may contain a wealth of information, making it suitable for advanced users and system administrators.
#### Using dmidecode -t Processor Command
The dmidecode command displays information from the system DMI (Desktop Management Interface) table. Open a terminal and run:
```console
$ sudo dmidecode -t processor
```
This command will output detailed information about the CPU, such as socket designation, type, family, and characteristics. The dmidecode command extracts information directly from the system's firmware, providing accurate and specific details about the CPU.
#### Using getconf \_NPROCESSORS\_ONLN Command
The getconf command retrieves system configuration variables. Open a terminal and type:
```shell
$ getconf _NPROCESSORS_ONLN
```
This command will display the number of online processors or CPU cores. It is a quick way to obtain the core count without requiring extensive CPU information.
#### Using Inxi Tool
The inxi tool provides a comprehensive system information overview, including CPU details. Install it if necessary and run:
```console
$ inxi -C
```
This command will display CPU-related information, including model, cache size, clock speed, and other relevant details. Inxi is a versatile tool that offers a wide range of system information, making it useful for various purposes.
#### Using lshw Tool
The lshw command (Hardware Lister) provides detailed information about the system's hardware configuration. Install it if not already available and execute:
```shell
$ sudo lshw -class processor
```
This command will show detailed information about the processor, including model, vendor, capabilities, clock speed, and more. Lshw generates a comprehensive report that includes various hardware components, making it a valuable tool for system inspection.
Here are some other methods to get Linux CPU info:
**1. Using the cpufrequtils Command:**
The cpufrequtils package provides utilities for managing CPU frequency scaling. Install it if needed and run:
```console
$ cpufreq-info
```
This command will display information about the current CPU frequency scaling settings, including the available scaling governors and the maximum and minimum CPU frequencies.
**2. Using the sysfs Filesystem:**
Linux provides a sysfs filesystem that exposes information about the system's devices and drivers. Open a terminal and navigate to the "/sys/devices/system/cpu" directory. Inside this directory, you will find subdirectories corresponding to each CPU core. You can access files such as "cpu MHz" to retrieve the current CPU frequency, "cache" to obtain cache-related information, and "cpuinfo\_max\_freq" to determine the maximum CPU frequency.
**3. Using the dmidecode -t 4 Command:**
The dmidecode command can also provide information about the CPU sockets available on the system. Open a terminal and run:
```console
$ sudo dmidecode -t 4
```
This command will display information about the physical characteristics of the CPU sockets, including socket designation, type, and more.
**4. Using the i7z Tool:**
The i7z tool is designed for Intel Core i3/i5/i7 CPUs and provides detailed information about their features and status. Install it if necessary and run:
```console
$ i7z
```
This command will display CPU temperature, multiplier, core frequency, and more information.
**5. Using the sysctl Command:**
The sysctl command allows you to view and modify kernel parameters. Open a terminal and run:
```console
$ sysctl -a | grep machdep.cpu
```
This command will display CPU-related kernel parameters, including features, capabilities, and cache information.
Utilizing these methods lets you easily retrieve CPU information on your Linux system. Each command or tool provides different levels of detail, allowing you to choose the one that best suits your needs. Understanding your CPU's capabilities and specifications can be beneficial for system optimization, troubleshooting, or hardware compatibility purposes.
Whether you prefer a command-line approach or a graphical tool, Linux offers a variety of options to obtain CPU information. These versatile methods cater to different user preferences, making gathering the necessary information for your specific requirements easier.
Checking CPU information on Linux is crucial for understanding your system's hardware configuration and capabilities. By using various commands and tools such as lscpu, cat /proc/cpuinfo, top, htop, nproc, hardinfo, hwinfo, dmidecode, getconf, inxi, lshw, and more, you can gather detailed information about your CPU, including its model, architecture, clock speed, cache size, and supported features. This knowledge is valuable for system optimization, troubleshooting, resource allocation, and software development. Choose the method that suits your needs and explore the capabilities of your CPU on Linux.
#### Conclusion
- Checking CPU information on Linux is crucial for understanding your system's hardware configuration and capabilities.
- The lscpu command provides a concise overview of CPU specifications, including the model, family, clock speed, and cache size.
- The cat /proc/cpuinfo command offers detailed information about each CPU core, such as the model name, vendor, cache size, and supported features.
- The top and htop commands provide real-time CPU utilization, load average, and core usage information.
- The nproc command quickly determines the total number of CPU cores without extensive specifications.
- Tools like hardinfo, hwinfo, dmidecode, getconf, inxi, and lshw provide comprehensive reports on CPU and system information.
- The cpufrequtils package allows the management of CPU frequency scaling settings.
- The sysfs filesystem provides access to CPU-related information, including current frequency and cache details.
- The **i7z tool** is designed for Intel Core i3/i5/i7 CPUs and provides detailed information about their features and status.
- The sysctl command lets you view and modify kernel parameters related to CPU information.
- Utilizing these methods and tools allows you to gather detailed CPU information for system optimization, troubleshooting, and software development purposes.
# How to Check CPU Temperature on Linux
Link: [https://phoenixnap.com/kb/linux-cpu-temp](https://phoenixnap.com/kb/linux-cpu-temp)
#### **Introduction**
Like any electrical component, [CPUs](https://phoenixnap.com/glossary/cpu-definition) generate heat when being used. Some resource-demanding programs cause the CPU to increase the clock speed, which results in higher temperatures. Dust buildup also causes the CPU to overheat.
High temperatures shorten the lifespan of sensitive components, so keeping track of CPU temperatures is crucial. This way, you prevent performance throttling or component damage.
**In this tutorial, you will learn how to use different tools and in-built utilities to check CPU temperature on Linux machines.**
#### **Prerequisites**
- A machine running Linux
- An account with sudo/root privileges
#### Check CPU Temperature Using Lm-Sensors
**Lm-sensors** is a command-line utility for [hardware](https://phoenixnap.com/glossary/what-is-hardware) monitoring. Use the tool to check the temperature of the CPU and other components. Follow these steps to install and configure Lm-sensors:
1\. Open the terminal and install these packages using a package manager for your distribution. In Ubuntu, use the following command:
```
```
sudo apt install hddtemp lm-sensors
```
```
Wait for the **lm-sensors** and **hddtemp** to finish downloading and installing.
2\. Execute the **`sensors`** command to see the CPU temperature. The output shows the current temperature readings of all sensors in the machine. The results include the temperature of each core and maximum thresholds.
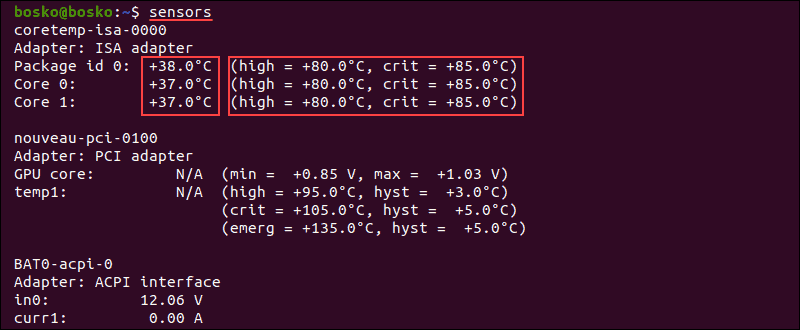
3\. To check SSD and hard drive temperatures, execute the following command:
```
```
sudo hddtemp /dev/sda
```
```

The output shows the temperature of the selected disk.
4\. To see which system components you can monitor, run **`sudo sensors-detect`**.
Answer **YES** to multiple scanning requests until the system scan is complete.
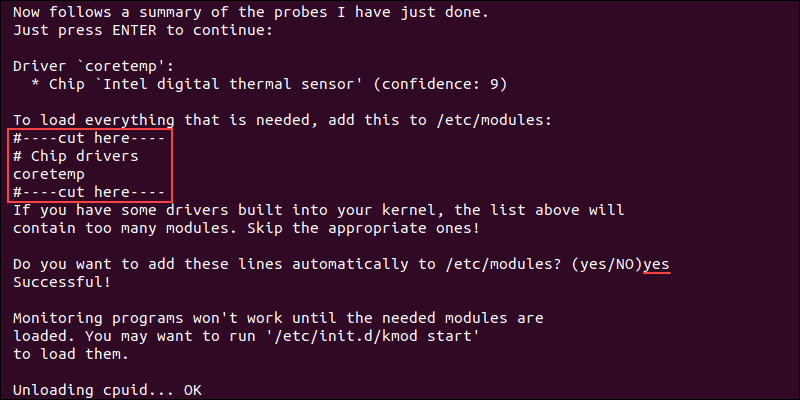
When the scan completes, the output shows the summary.
5\. To ensure that system monitoring works, load the needed modules using the following command:
```
```
/etc/init.d/kmod start
```
```

6\. To run the **`sensors`** command repeatedly and get real-time data in the terminal, execute the following command:
```
```
watch sensors
```
```
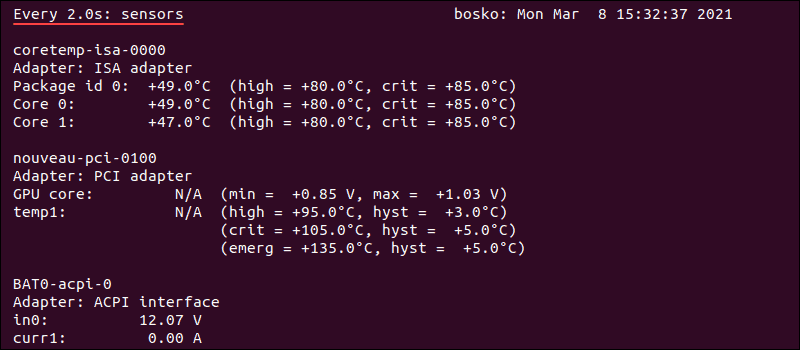
The output refreshes every two seconds and displays the current CPU temperature reading.
**Note:** To check CPU usage on Linux, read our tutorial on [How to check CPU usage](https://phoenixnap.com/kb/check-cpu-usage-load-linux).
#### Check CPU Temperature Using Psensor
Psensor is a **GUI app** that allows you to monitor the temperature of various system components. This utility also allows you to monitor CPU usage and fan speed.
Psensor includes an [applet](https://phoenixnap.com/glossary/applet) indicator for Ubuntu, allowing you to display the temperature in the top panel to notify you when the temperatures get too high.
##### Install Psensor
Before installing Psensor, you need to install and configure Lm-sensors.
1\. Run this command to install the necessary packages:
```
```
sudo apt install lm-sensors hddtemp
```
```
2\. Next, scan for sensors in your machine:
```
```
sudo sensors-detect
```
```
Answer **YES** to any scan requests until the scan is completed.
3\. To make sure the packages are installed, execute the **`sensors`** command.

4\. Update the package repository with **`sudo apt update`**.
5\. Install Psensor using the following command:
```
```
sudo apt install psensor
```
```
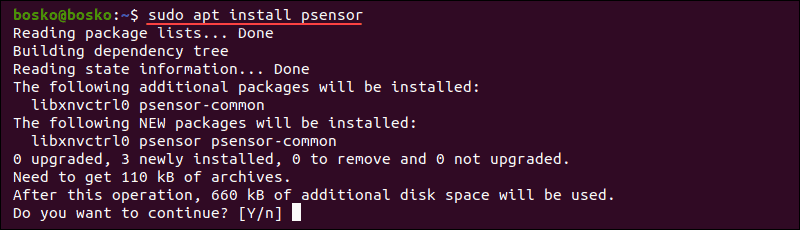
Answer **YES** and wait for the installation to finish.
### Using Psensor
Search for **Psensor** in the app menu and open the utility. The app displays a graph of the selected values and shows the CPU temperature, CPU and memory usage, free RAM, GPU temperature, and [HDD](https://phoenixnap.com/glossary/what-is-hdd) temperature.
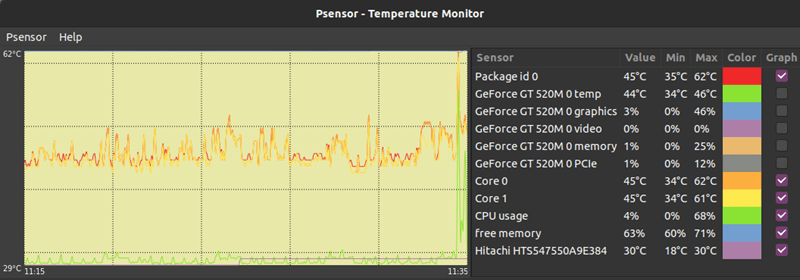
To configure Psensor and set which stats you want to see, follow these steps:
1\. Click **Psensor** in the menu bar, followed by **Preferences**.
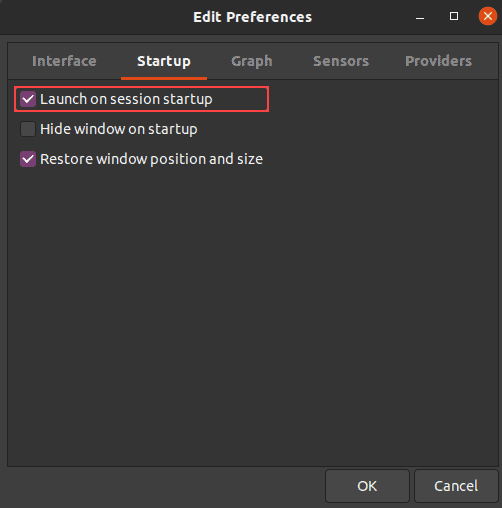
2\. Check off the boxes for the options you want – whether Psensor launches on system startup, the update interval, graph colors, etc.
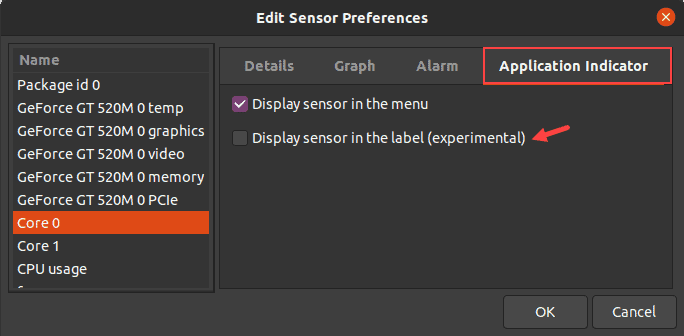
3\. To show CPU or HDD temperatures in the top panel, go to **Sensor Preferences** under the **Application Indicator.** Enable the **Display sensor in the label** option.
**Note:** Learn more about monitoring CPU performance by referring to our article on [Linux perf](https://phoenixnap.com/kb/linux-perf), a lightweight command-line utility.
#### Check Temperature Without Third-Party Utilities
There is a way to use the in-built utilities to check the CPU temperature if you don’t want to use third-party apps.
1\. To check the CPU temperature without installing a third-party app, use the following command:
```
```
cat /sys/class/thermal/thermal_zone*/temp
```
```

The output shows the CPU temperature in the five-digit format. Here, 49000 means 49C.
2\. If you get several thermal zones and different temperatures, execute the following command to see what a single thermal zone represents:
```
```
cat /sys/class/thermal//type
```
```
For example, run **`cat /sys/class/thermal/thermal_zone2/type`** to see the type of thermal zone 2.
The CPU temperature is in the zone labeled **x86\_pkg\_temp**.
3\. To see what all the thermal zones are referring to, use:
```
```
paste <(cat /sys/class/thermal/thermal_zone*/type) <(cat /sys/class/thermal/thermal_zone*/temp) | column -s $'\t' -t | sed 's/\(.\)..$/.\1°C/'
```
```

The output shows the last stored temperature for that thermal zone in degrees Celsius. In this example, there is only one thermal zone, labeled **x86\_pkg\_temp**, which represents the CPU temperature.
Conclusion
You now know how to check CPU temperature on Linux using various utilities. The guide also showed how to configure the tools to display other information, such as GPU and HDD temperature.
**Next you should read**
[Bare Metal Servers](https://phoenixnap.com/kb/category/bare-metal-servers) [SysAdmin](https://phoenixnap.com/kb/category/sysadmin)
[How to Install IPMItool on Centos 7/8 & Ubuntu 18.04/20.04](https://phoenixnap.com/kb/install-ipmitool-ubuntu-centos)
August 27, 2020
---
**This article helps you install IPMItool on your CentOS or Ubuntu system. Download, install and enable...**
[DevOps and Development](https://phoenixnap.com/kb/category/devops-and-development) [Virtualization](https://phoenixnap.com/kb/category/virtualization)
[How to Set Docker Memory and CPU Usage Limit](https://phoenixnap.com/kb/docker-memory-and-cpu-limit)
December 6, 2023
---
**Docker containers have unlimited access to RAM and CPU memory of the host. This is not the recommended...**
[How to Check CPU Utilization in Linux with Command Line](https://phoenixnap.com/kb/check-cpu-usage-load-linux)
March 6, 2024
# Comandos IPMITOOL
Link: [https://wiki.joeplaa.com/applications#ipmitool](https://wiki.joeplaa.com/applications#ipmitool)
## Installation
```shellsession
apt update && apt install ipmitool
```
## Configuration
Create a user with ipmi permissions only in Dell iDrac or HP iLO
## Commands
> [https://www.tzulo.com/crm/knowledgebase/47/IPMI-and-IPMITOOL-Cheat-sheet.html](https://www.tzulo.com/crm/knowledgebase/47/IPMI-and-IPMITOOL-Cheat-sheet.html)
### Get all sensor data
```shellsession
ipmitool -I lanplus -H -U -P sdr list full
```
### Get temperature(s)
```shellsession
ipmitool -I lanplus -H -U -P sdr type Temperature
```
### Get fanspeed(s)
```shellsession
ipmitool -I lanplus -H -U -P sdr type Fan
```
Or
```shellsession
ipmitool -I lanplus -H -U -P sdr get Fan1 Fan2 | grep "Sensor Reading"
```
### Get power supply info
```shellsession
ipmitool -I lanplus -H -U -P sdr type 'Power Supply'
```
### Enable auto fan control / disable static mode (Dell)
```shellsession
ipmitool -I lanplus -H -U -P raw 0x30 0x30 0x01 0x01
```
### Enable static fan control / disable auto mode (Dell)
```shellsession
ipmitool -I lanplus -H -U -P raw 0x30 0x30 0x01 0x00
```
### Set fanspeed 20% (Dell)
See the script for other speeds. The last 4 characters differ.
```shellsession
ipmitool -I lanplus -H -U -P raw 0x30 0x30 0x02 0xff 0x14
```
### Change system state
```shellsession
ipmitool -H -U -P chassis power
```
# Recommended operating range for Core temperature
Link: [https://forums.tomshardware.com/threads/what-happens-if-cpu-temp-hits-90%C2%B0c-or-more.3028572/#post-18951574](https://forums.tomshardware.com/threads/what-happens-if-cpu-temp-hits-90%C2%B0c-or-more.3028572/#post-18951574)
Coolers with 92mm fans are low-end to mid-range, which may be somewhat inadequate, since your processor's Thermal Design Power (TDP) is 120 Watts.
What is your ambient temperature? Normal or "Standard" room temperature is 22°C or 72°F, so high ambient temperature will adversely affect Core temperatures.
Although your Xeon X5460 has Thermal Specifications of Tcase 63°C and Tj Max 100°C, Tcase is *not* the limiting Thermal Specification; Tj Max *is*, which is the temperature that your processor will "Throttle" or reduce Core speed to prevent thermal damage.
Tcase is a misleading Specification because it's a *factory only* measurements on the surface of the Integrated Heat Spreader, so Tcase is *not* Core temperature, which is considerably higher. Further, Tcase is only relevant to the stock cooler.
Although 90°C Core temperature isn't quite hot enough to cause Throttling, it’s not advisable to push your CPU to the thermal limit, just as you wouldn't operate a vehicle with the temperature gauge pegged in the red “hot” zone.
If your hottest Core is within a few degrees of Throttle temperature, your CPU is already too hot. The consensus among highly experienced and well informed system builders and overclockers, is that cooler is better for ultimate stability, performance and longevity.
As such, all agree it's wise to observe a reasonable thermal limit below Tj Max. So regardless of your rig's environmental conditions, system configuration, workloads or any other variables, *sustained* Core temperatures above 80°C aren't recommended.
Here's the recommended operating range for Core temperature:
**80°C** **Hot** (100% Load)
**75°C** **Warm**
**70°C** **Warm** (Heavy Load)
**60°C** **Norm**
**50°C** **Norm** (Medium Load)
**40°C** **Norm**
**30°C** **Cool** (Idle)
Also, you might want to read this Sticky: **Intel Temperature Guide** - [http://www.tomshardware.com/forum/id-1800828/intel-temperature-guide.html](http://www.tomshardware.com/forum/id-1800828/intel-temperature-guide.html)
# O comando HTOP no Linux
Link: [https://blog.ironlinux.com.br/o-comando-htop-no-linux/](https://blog.ironlinux.com.br/o-comando-htop-no-linux/)
- 17 de maio de 2022
Está com o seu servidor Linux lento e precisa de comandos para ajudar a descobrir o motivo? O comando htop pode ser um grande aliado na análise de processos e recursos.
O comando **HTOP** é um utilitário de linha de comando que tem como objetivo auxiliar o usuário a monitorar de forma interativa e em tempo real os recursos de seu sistema operacional Linux.
## 1| Instalar htop no Ubuntu
[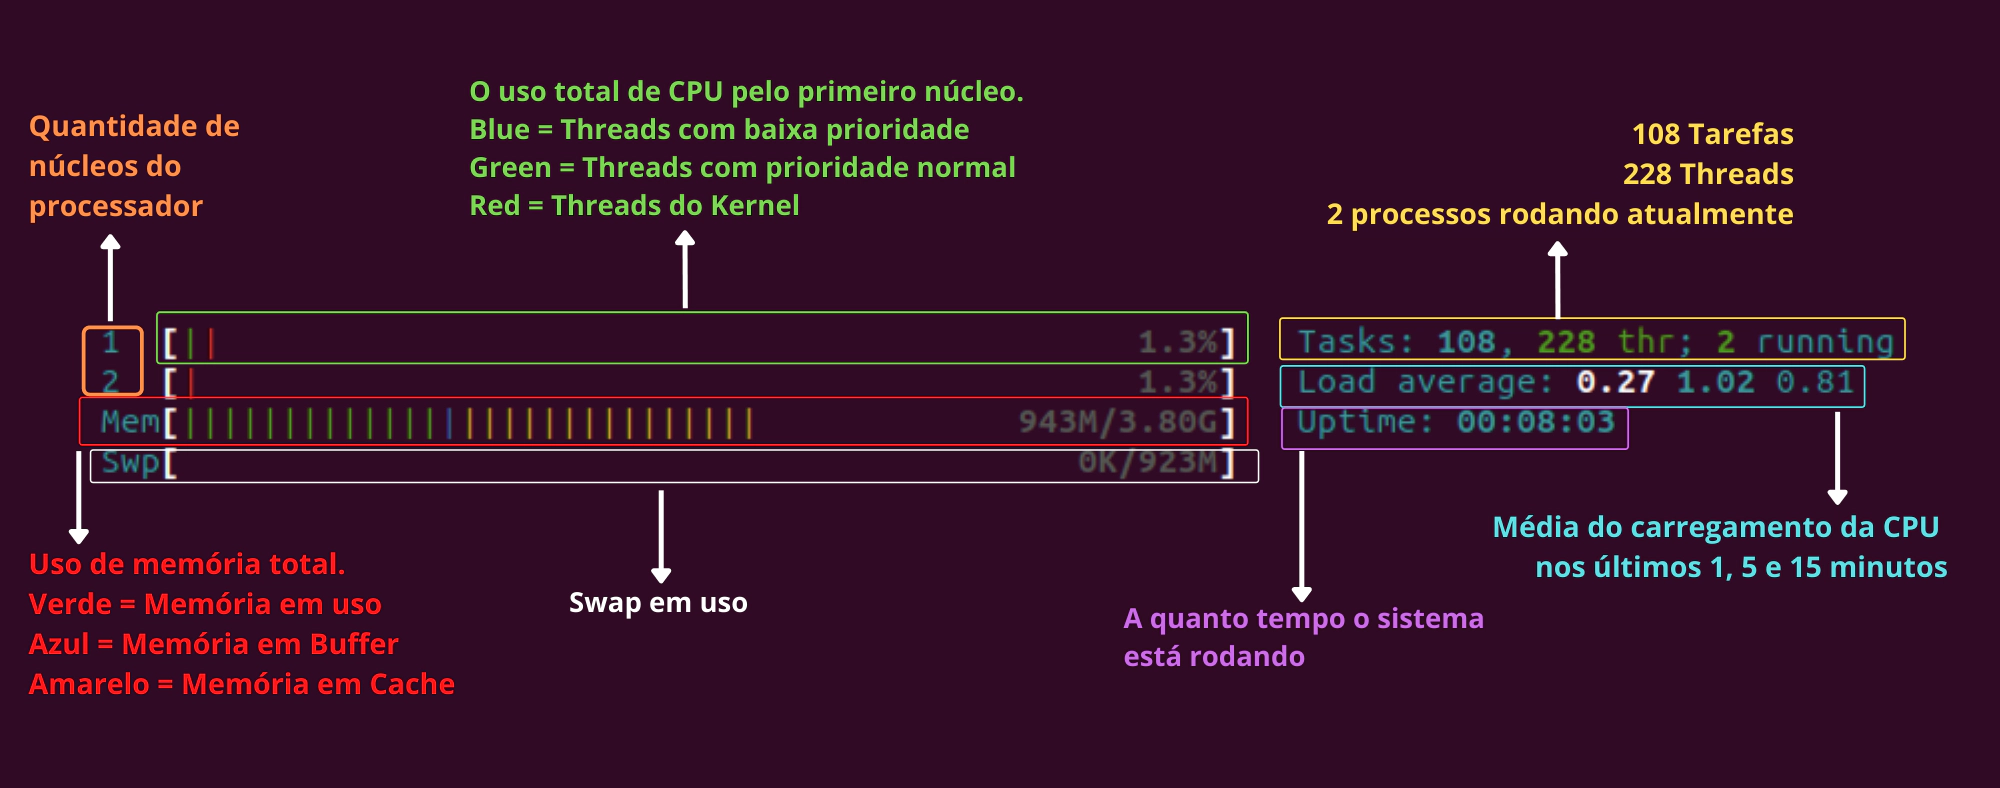](https://blog.ironlinux.com.br/images/blog-posts/uploads/2022/05/htop_imagem1.png)
### Bloco Inferior
[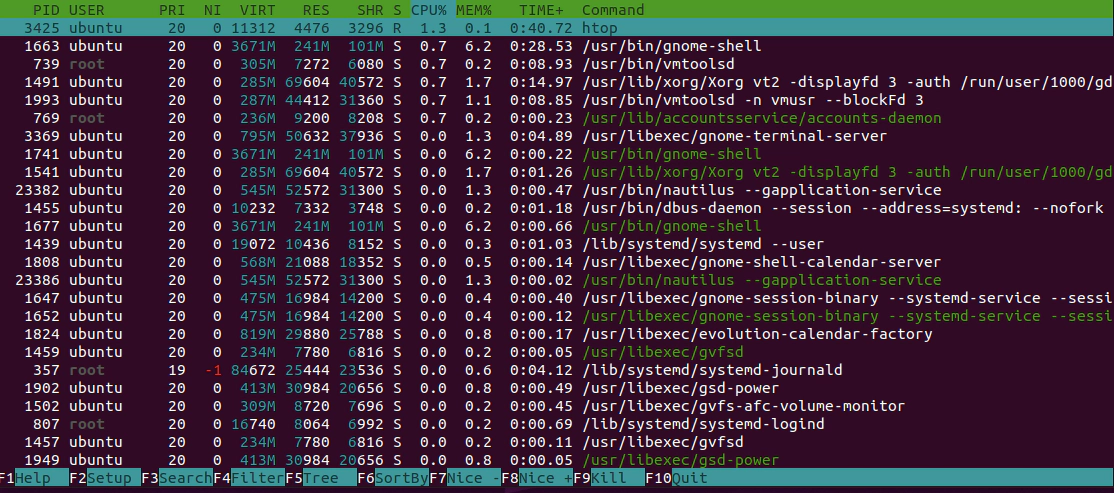](https://blog.ironlinux.com.br/images/blog-posts/uploads/2022/05/htop3.png)
### Descrição dos Campos
Campo
Descrição
PID
ID do processo
USER
Dono do processo
PRI
Prioridade do processo (Varia de 0 a 139, sendo que quanto menor mais prioridade)
NI
“Nices Values” afeta o valor da prioridade do processo (Varia de -20 a 19)
VIRT
Total de memória requerida pelo processo (não necessariamente está toda em uso)
RES
Quantidade de memória RAM que o processo está utilizando
SHR
Total de memória Compartilhada usada pelo processo
S
Estado atual do processo
CPU %
Percentual de tempo de CPU que o processo está utilizando
MEM %
Percentual de Memória RAM que o processo está utilizando
TIME +
Tempo de processador que o processo está utilizando
COMMAND
Comando que iniciou o processo
## 5| Opções via CommandLine
O htop permite que você passe opções/ argumentos na execução dele para ajudar na análise
## 5.1| Delay
O comando htop muda as informações apresentadas rapidamente, pois os processos estão constatemente sendo atualizados. Com o comando abaixo o resultado é atualizado com o Delay (atraso) que você definir:
```bash
htop -d 15
```
O argumento acima tem o delay de 1 segundo, pois é calculado em décimo de segundo.
### 5.2| Filtro com PID
É possível filtrar com um determinado PID e exibir as informações deles
```bash
htop -p 1,19296
```
[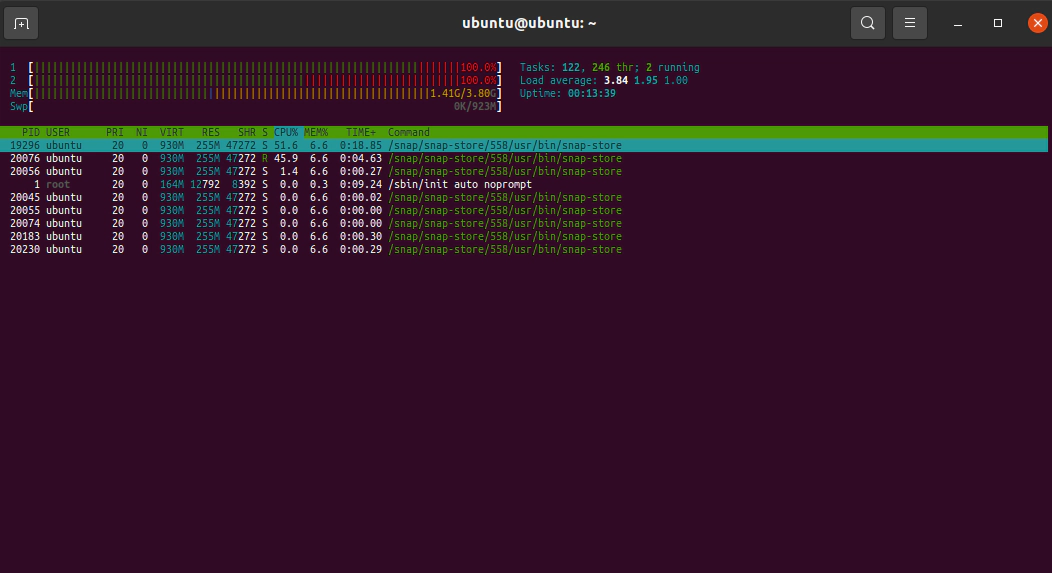](https://blog.ironlinux.com.br/images/blog-posts/uploads/2022/05/htop10.png)
## Conclusão
Assim como o gerenciador de tarefas no Windows, o comando htop é realmente muito poderoso e com certeza irá lhe ajudar na análise de qualquer caso.
Por fim, agradecemos a leitura e esperamos que este post tenha te ajudado de alguma maneira! Caso tenha alguma dúvida, entre em contato conosco pelo [Telegram](https://t.me/ironlinux) , [Facebook](https://www.facebook.com/ironlinuxoficial) ou [Instagram](https://www.instagram.com/ironlinux_/) ! Veja mais posts no [IronLinux](https://blog.ironlinux.com.br/) !
# CTOP para verificação de uso de containers Docker
sudo wget https://github.com/bcicen/ctop/releases/download/v0.7.7/ctop-0.7.7-linux-amd64 -O /usr/local/bin/ctop
sudo chmod +x /usr/local/bin/ctop
# Dicas Linux
Dicas para Linux
# Como descobrir (listar) o UUID e LABEL de todas as partições?
Link: [https://bistrunka.net/2012/09/22/como-descobrir-listar-o-uuid-e-label-de-todas-as-particoes/](https://bistrunka.net/2012/09/22/como-descobrir-listar-o-uuid-e-label-de-todas-as-particoes/)
( How to find out (list) the UUID and LABEL all the partitions? )
Para listar o código UUID (universally unique identifier) e LABEL (rótulo/nome) de todas as partições de todos os discos do computador com um único comando basta utilizar, como root, o comando blkid:
**sudo blkid**
Olhe a saída no meu computador:
**zumm@destino:~$ sudo blkid**
/dev/sda1: LABEL=”Ubuntu-12.10″ UUID=”98e6d91d-9b8b-46e5-8429-e492044cbbd5″ TYPE=”ext4″
/dev/sda2: LABEL=”Vídeos” UUID=”457fce87-b36d-4364-971a-afaa11e39357″ TYPE=”ext4″
/dev/sda3: LABEL=”Backup” UUID=”ae9f9aeb-ae10-4e70-b680-396e0dd1c320″ TYPE=”ext4″
/dev/sda5: UUID=”c526a707-a8bb-431a-a2ea-398bb59f8146″ TYPE=”swap”
/dev/sda6: LABEL=”AMD64″ UUID=”a1d9c813-b4e7-4331-b4eb-6a08e44938e8″ TYPE=”ext4″
/dev/sda7: LABEL=”Gentoo” UUID=”9daf9b72-ec06-4175-b484-01ff1add6a37″ TYPE=”ext4″
/dev/sda8: LABEL=”Mint” UUID=”417d751e-faf9-4abc-ac43-271d47c973c6″ TYPE=”ext4″
/dev/sdb1: LABEL=”Ubuntu-11.04″ UUID=”0a3b9f72-bbd6-4e7f-bf11-6ef2043cf973″ TYPE=”ext4″
/dev/sdb2: LABEL=”Dados” UUID=”9100787c-03bf-4e22-8080-bd9a586fa2fe” TYPE=”ext3″
/dev/sdb3: LABEL=”Músicas” UUID=”4d759fd5-5ab2-4b92-b6b6-c015507672ce” TYPE=”ext3″
/dev/sdb4: UUID=”bdf9c723-c739-4e53-8810-a4e98c9ea8f5″ TYPE=”swap”
/dev/sdc1: LABEL=”Debian” UUID=”09aefbca-ddea-4068-be78-380fd959c658″ TYPE=”ext4″
/dev/sdc2: LABEL=”Arch” UUID=”1e2b868a-c634-4f3b-81b6-0e22e33552b3″ TYPE=”ext4″
/dev/sdc5: UUID=”d6609dbc-1720-4e3d-b316-730fcd87d6b4″ TYPE=”swap”
/dev/sdc6: LABEL=”Music” UUID=”414d9df7-1cdd-47e5-bda3-523b0a1f0a53″ TYPE=”ext4″
/dev/sdc7: LABEL=”Video” UUID=”356f8f81-8569-46ef-9fbe-fd8837bb6538″ TYPE=”ext4″
## Outros comandos:
### Para listar o UUID:
**zumm@destino:~$ ls -l /dev/disk/by-uuid**
total 0
lrwxrwxrwx 1 root root 10 2012-09-21 20:06 0a3b9f72-bbd6-4e7f-bf11-6ef2043cf973 -> ../../sdb1
lrwxrwxrwx 1 root root 10 2012-09-21 20:05 417d751e-faf9-4abc-ac43-271d47c973c6 -> ../../sda8
lrwxrwxrwx 1 root root 10 2012-09-21 20:06 457fce87-b36d-4364-971a-afaa11e39357 -> ../../sda2
lrwxrwxrwx 1 root root 10 2012-09-21 20:06 4d759fd5-5ab2-4b92-b6b6-c015507672ce -> ../../sdb3
lrwxrwxrwx 1 root root 10 2012-09-21 20:06 9100787c-03bf-4e22-8080-bd9a586fa2fe -> ../../sdb2
lrwxrwxrwx 1 root root 10 2012-09-21 20:05 98e6d91d-9b8b-46e5-8429-e492044cbbd5 -> ../../sda1
lrwxrwxrwx 1 root root 10 2012-09-21 20:05 9daf9b72-ec06-4175-b484-01ff1add6a37 -> ../../sda7
lrwxrwxrwx 1 root root 10 2012-09-21 20:05 a1d9c813-b4e7-4331-b4eb-6a08e44938e8 -> ../../sda6
lrwxrwxrwx 1 root root 10 2012-09-21 20:06 ae9f9aeb-ae10-4e70-b680-396e0dd1c320 -> ../../sda3
lrwxrwxrwx 1 root root 10 2012-09-21 20:05 bdf9c723-c739-4e53-8810-a4e98c9ea8f5 -> ../../sdb4
lrwxrwxrwx 1 root root 10 2012-09-21 20:05 c526a707-a8bb-431a-a2ea-398bb59f8146 -> ../../sda5
### Para listar o LABEL:
**zumm@destino:~$ ls -l /dev/disk/by-label**
total 0
drwxr-xr-x 2 root root 220 2012-09-22 16:37 .
drwxr-xr-x 6 root root 120 2012-09-21 20:05 ..
lrwxrwxrwx 1 root root 10 2012-09-21 20:05 AMD64 -> ../../sda6
lrwxrwxrwx 1 root root 10 2012-09-21 20:06 Backup -> ../../sda3
lrwxrwxrwx 1 root root 10 2012-09-21 20:06 Dados -> ../../sdb2
lrwxrwxrwx 1 root root 10 2012-09-21 20:05 Livre -> ../../sda7
lrwxrwxrwx 1 root root 10 2012-09-21 20:05 Mint -> ../../sda8
lrwxrwxrwx 1 root root 10 2012-09-21 20:06 Músicas -> ../../sdb3
lrwxrwxrwx 1 root root 10 2012-09-21 20:06 Ubuntu-11.04 -> ../../sdb1
lrwxrwxrwx 1 root root 10 2012-09-21 20:05 Ubuntu-12.10 -> ../../sda1
lrwxrwxrwx 1 root root 10 2012-09-21 20:06 Vídeos -> ../../sda2
### Listando os UUID’s de apenas um disco:
**zumm@destino:~$ blkid /dev/sda\[1-9\]**
/dev/sda1: LABEL=”Ubuntu-12.10″ UUID=”98e6d91d-9b8b-46e5-8429-e492044cbbd5″ TYPE=”ext4″
/dev/sda2: LABEL=”Vídeos” UUID=”457fce87-b36d-4364-971a-afaa11e39357″ TYPE=”ext4″
/dev/sda3: LABEL=”Backup” UUID=”ae9f9aeb-ae10-4e70-b680-396e0dd1c320″ TYPE=”ext4″
/dev/sda5: UUID=”c526a707-a8bb-431a-a2ea-398bb59f8146″ TYPE=”swap”
/dev/sda6: LABEL=”AMD64″ UUID=”a1d9c813-b4e7-4331-b4eb-6a08e44938e8″ TYPE=”ext4″
/dev/sda7: LABEL=”Gentoo” UUID=”9daf9b72-ec06-4175-b484-01ff1add6a37″ TYPE=”ext4″
/dev/sda8: LABEL=”Mint” UUID=”417d751e-faf9-4abc-ac43-271d47c973c6″ TYPE=”ext4″
### Listando organizado por colunas
**zumm@destino:~$ sudo blkid -o list -c /dev/null**
### Obtendo todas as informações de uma partição com o TUNE2FS
**zumm@destino:~$ sudo tune2fs /dev/sda2**
tune2fs 1.41.14 (22-Dec-2010)
Filesystem volume name: Vídeos
Last mounted on: /media/Vídeos
Filesystem UUID: 457fce87-b36d-4364-971a-afaa11e39357
Filesystem magic number: 0xEF53
Filesystem revision #: 1 (dynamic)
Filesystem features: has\_journal ext\_attr resize\_inode dir\_index filetype needs\_recovery extent flex\_bg sparse\_super large\_file huge\_file uninit\_bg dir\_nlink extra\_isize
Filesystem flags: signed\_directory\_hash
Default mount options: (none)
Filesystem state: clean
Errors behavior: Continue
Filesystem OS type: Linux
Inode count: 59375616
Block count: 237497855
Reserved block count: 11874892
Free blocks: 175586011
Free inodes: 59374910
First block: 0
Block size: 4096
Fragment size: 4096
Reserved GDT blocks: 967
Blocks per group: 32768
Fragments per group: 32768
Inodes per group: 8192
Inode blocks per group: 512
RAID stride: 32750
Flex block group size: 16
Filesystem created: Tue Nov 1 00:13:51 2011
Last mount time: Fri Sep 21 20:06:02 2012
Last write time: Fri Sep 21 20:06:02 2012
Mount count: 16
Maximum mount count: 32
Last checked: Mon Sep 17 08:18:46 2012
Check interval: 15552000 (6 months)
Next check after: Sat Mar 16 08:18:46 2013
Lifetime writes: 251 GB
Reserved blocks uid: 0 (user root)
Reserved blocks gid: 0 (group root)
First inode: 11
Inode size: 256
Required extra isize: 28
Desired extra isize: 28
Journal inode: 8
Default directory hash: half\_md4
Directory Hash Seed: d714b716-999e-4eb1-b4b8-a27ae6964d3b
Journal backup: inode blocks
**zumm@destino:~$**
Já dá para brincar um pouquinho.
# Introduction to fstab
Link: [https://help.ubuntu.com/community/Fstab](https://help.ubuntu.com/community/Fstab)
The configuration file /etc/fstab contains the necessary information to automate the process of mounting partitions. In a nutshell, mounting is the process where a raw (physical) partition is prepared for access and assigned a location on the file system tree (or mount point).
- In general fstab is used for internal devices, CD/DVD devices, and network shares (samba/nfs/sshfs). Removable devices such as flash drives \*can\* be added to fstab, but are typically mounted by gnome-volume-manager and are beyond the scope of this document.
- Options for mount and fstab are similar.
- Partitions listed in fstab can be configured to automatically mount during the boot process.
- If a device/partition is not listed in fstab ONLY ROOT may mount the device/partition.
- Users may mount a device/partition if the device is in fstab with the proper options.
 For usage with network shares, see [SettingUpNFSHowTo](https://help.ubuntu.com/community/SettingUpNFSHowTo) , [SettingUpSamba](https://help.ubuntu.com/community/SettingUpSamba) and [SSHFS](http://www.debuntu.org/2006/04/27/39-mounting-a-fuse-filesystem-form-etcfstab).
# Fstab File Configuration
 The syntax of a fstab entry is :
```
[Device] [Mount Point] [File System Type] [Options] [Dump] [Pass]
```
**fields**
**description**
<device>
The device/partition (by /dev location or UUID) that contain a file system.
<mount point>
The directory on your root file system (aka mount point) from which it will be possible to access the content of the device/partition (note: swap has no mount point). Mount points should not have spaces in the names.
<file system type>
Type of file system (see [LinuxFilesystemsExplained](https://help.ubuntu.com/community/LinuxFilesystemsExplained)).
<options>
Mount options of access to the device/partition (see the man page for mount).
<dump>
Enable or disable backing up of the device/partition (the command *dump*). This field is usually set to 0, which disables it.
<pass num>
Controls the order in which *fsck* checks the device/partition for errors at boot time. The root device should be 1. Other partitions should be 2, or 0 to disable checking.
Please refer to the examples section for sample entries. We have provided you some detailed explanations of each field:
## Device
By default, Ubuntu now uses [UUID](http://en.wikipedia.org/wiki/UUID) to identify partitions.
UUID=xxx.yyy.zzz
To list your devices by UUID use blkid
```
sudo blkid
```
Alternative ways to refer to partitions:
- Label : LABEL=label
- Network ID
- Samba : //server/share
- NFS : server:/share
- SSHFS : sshfs#user@server:/share
- Device : /dev/sdxy (not recommended)
## Mount point
A mount point is a location on your directory tree to mount the partition. The default location is /media although you may use alternate locations such as /mnt or your home directory.
You may use any name you wish for the mount point, but you must create the mount point before you mount the partition.
For example : /media/windows
```
sudo mkdir /media/windows
```
## File System Type
You may either use auto or specify a file system. Auto will attempt to automatically detect the file system of the target file system and in general works well. In general auto is used for removable devices and a specific file system or network protocol for network shares.
Examples:
- auto
- vfat - used for FAT partitions.
- ntfs, ntfs-3g - used for ntfs partitions.
- ext4, ext3, ext2, jfs, reiserfs, etc.
- udf,iso9660 - for CD/DVD.
- swap.
## Options
Options are dependent on the file system.
You may use "defaults" here and some typical options may include :
- **Ubuntu 8.04** and later uses **relatime** as default for linux native file systems. You can find a discussion of relatime here : [http://lwn.net/Articles/244829](http://lwn.net/Articles/244829). This relates to when and how often the last access time of the current version of a file is updated, i.e. when it was last read.
- defaults = rw, suid, dev, exec, auto, nouser, and async.
- ntfs/vfat = permissions are set at the time of mounting the partition with umask, dmask, and fmask and can not be changed with commands such as chown or chmod.
- I advise dmask=027,fmask=137 (using umask=000 will cause all your files to be executable). More permissive options would be dmask=000,fmask=111.
- For mounting samba shares you can specify a username and password, or better a **credentials file**. The credentials file contains should be owned by root.root with permissions = 0400 .
Common options :
- sync/async - All I/O to the file system should be done (a)synchronously.
- auto - The filesystem can be mounted automatically (at bootup, or when mount is passed the -a option). This is really unnecessary as this is the default action of mount -a anyway.
- noauto - The filesystem will NOT be automatically mounted at startup, or when mount passed -a. You must explicitly mount the filesystem.
- dev/nodev - Interpret/Do not interpret character or block special devices on the file system.
- exec / noexec - Permit/Prevent the execution of binaries from the filesystem.
- suid/nosuid - Permit/Block the operation of suid, and sgid bits.
- ro - Mount read-only.
- rw - Mount read-write.
- user - Permit any user to mount the filesystem. This automatically implies noexec, nosuid,nodev unless overridden.
- nouser - Only permit root to mount the filesystem. This is also a default setting.
- defaults - Use default settings. Equivalent to rw, suid, dev, exec, auto, nouser, async.
- \_netdev - this is a network device, mount it after bringing up the network. Only valid with fstype nfs.
For specific options with specific file systems see:
- [man mount](http://manpages.ubuntu.com/mount "Manpage")
## Dump
This field sets whether the backup utility dump will backup file system. If set to "0" file system ignored, "1" file system is backed up.
Dump is seldom used and if in doubt use 0.
## Pass (fsck order)
Fsck order is to tell fsck what order to check the file systems, if set to "0" file system is ignored.
Often a source of confusion, there are only 3 options :
- 0 == do not check.
- 1 == check this partition first.
- 2 == check this partition(s) next
In practice, use "1" for your root partition, / and 2 for the rest. All partitions marked with a "2" are checked in sequence and you do not need to specify an order.
Use "0" to disable checking the file system at boot or for network shares.
You may also "tune" or set the frequency of file checks (default is every 30 mounts) but in general these checks are designed to maintain the integrity of your file system and thus you should strongly consider keeping the default settings.
# Examples
 The contents of the file will look similar to following:
```
# /etc/fstab: static file system information.
#
#
proc /proc proc defaults 0 0
# /dev/sda5
UUID=be35a709-c787-4198-a903-d5fdc80ab2f8 / ext3 relatime,errors=remount-ro 0 1
# /dev/sda6
UUID=cee15eca-5b2e-48ad-9735-eae5ac14bc90 none swap sw 0 0
/dev/scd0 /media/cdrom0 udf,iso9660 user,noauto,exec,utf8 0 0
```
NOTE: These network share examples (samba, nfs, and sshfs) assume you have already set up the appropriate server.
```
# FAT ~ Linux calls FAT file systems vfat)
# /dev/hda1
UUID=12102C02102CEB83 /media/windows vfat auto,users,uid=1000,gid=100,dmask=027,fmask=137,utf8 0 0
# NTFS ~ Use ntfs-3g for write access (rw)
# /dev/hda1
UUID=12102C02102CEB83 /media/windows ntfs-3g auto,users,uid=1000,gid=100,dmask=027,fmask=137,utf8 0 0
# Zip Drives ~ Linux recognizes ZIP drives as sdx'''4'''
# Separate Home
# /dev/sda7
UUID=413eee0c-61ff-4cb7-a299-89d12b075093 /home ext3 nodev,nosuid,relatime 0 2
# Data partition
# /dev/sda8
UUID=3f8c5321-7181-40b3-a867-9c04a6cd5f2f /media/data ext3 relatime,noexec 0 2
# Samba
//server/share /media/samba cifs user=user,uid=1000,gid=100 0 0
# "Server" = Samba server (by IP or name if you have an entry for the server in your hosts file
# "share" = name of the shared directory
# "user" = your samba user
# This set up will ask for a password when mounting the samba share. If you do not want to enter a password, use a credentials file.
# replace "user=user" with "credentials=/etc/samba/credentials" In the credentials file put two lines
# username=user
# password=password
# make the file owned by root and ro by root (sudo chown root.root /etc/samba/credentials && sudo chmod 400 /etc/samba/credentials)
# NFS
Server:/share /media/nfs nfs rsize=8192 and wsize=8192,noexec,nosuid
# "Server" = Samba server (by IP or name if you have an entry for the server in your hosts file
# "share" = name of the shared directory
#SSHFS
sshfs#user@server:/share fuse user,allow_other 0 0
# "Server" = Samba server (by IP or name if you have an entry for the server in your hosts file
# "share" = name of the shared directory
```
## File System Specific Examples
 Here are a couple of basic examples for different file system types. I will use /dev/sdb1 or /dev/hda2 for simplicity, but remember that any /dev location, UUID=<some\_id>, or LABEL=<some\_label> can work.
### Extended file systems (ext)
Specifically, these are the [ext2](https://en.wikipedia.org/wiki/Ext2), [ext3](https://en.wikipedia.org/wiki/Ext3), and [ext4](https://en.wikipedia.org/wiki/Ext4) filesystems that are common as root filesystems in Linux. The main difference between ext2 and ext3 is that ext3 has journaling which helps protect it from errors when the system crashes. The more modern ext4 supports larger volumes along with other improvements, and is backward compatible with ext3.
A root filesystem:
```
UUID=30fcb748-ad1e-4228-af2f-951e8e7b56df / ext3 defaults,errors=remount-ro,noatime 0 1
```
A non-root file system, ext2:
```
/dev/sdb1 /media/disk2 ext2 defaults 0 2
```
### File Allocation Table (FAT)
Specifically, [fat16 and fat32](https://en.wikipedia.org/wiki/File_Allocation_Table), which are common for USB flash drives and flash cards for cameras and other devices.
```
/dev/hda2 /media/data1 vfat defaults,user,exec,uid=1000,gid=100,umask=000 0 0
```
```
/dev/sdb1 /media/data2 vfat defaults,user,dmask=027,fmask=137 0 0
```
### New Technology File System (NTFS)
[NTFS](https://en.wikipedia.org/wiki/NTFS) is typically used for a Windows partition.
```
/dev/hda2 /media/windows ntfs-3g defaults,locale=en_US.utf8 0 0
```
For a list of locales available on your system, run
- ```
locale -a
```
### Hierarchical File System (HFS)
[HFS](https://en.wikipedia.org/wiki/Hierarchical_File_System), or more commonly, [HFS+](https://en.wikipedia.org/wiki/HFS_Plus), are filesystems generally used by Apple computers.
For Read/Write mounting:
```
/dev/sdb2 /media/Macintosh_HD hfsplus rw,exec,auto,users 0 0
```
Note: if you want to write data on this partition, you **must** disable the journalization of this partition with **diskutil** under Mac OS.
For Read only:
```
/dev/sda2 /media/Machintosh_HD hfsplus ro,defaults 0 2
```
Note: if you want to have access to your files on Ubuntu, you must change the permission of the folders and contained files you want to access by doing in the apple terminal:
```
sudo chmod -R 755 Folder
```
"Staff" group should have appeared in this folder's info. You can do this on Music and Movies to access these files from Ubuntu.
# Editing fstab
 Please, before you edit system files, **make a backup**. The -B flag with nano will make a backup automatically.
To edit the file in Ubuntu, run:
```
gksu gedit /etc/fstab
```
To edit the file in Kubuntu, run:
```
kdesu kate /etc/fstab
```
To edit the file directly in terminal, run:
```
sudo nano -Bw /etc/fstab
```
- -B = Backup origional fstab to /etc/fstab~ .
- -w = disable wrap of long lines.
Alternate:
```
sudo -e /etc/fstab
```
## Useful Commands
 To view the contents of /etc/fstab, run the following terminal command:
```
cat /etc/fstab
```
To get a list of all the UUIDs, use one of the following two commands:
```
sudo blkid
ls -l /dev/disk/by-uuid
```
To list the drives and relevant partitions that are attached to your system, run:
```
sudo fdisk -l
```
To mount all file systems in /etc/fstab, run:
```
sudo mount -a
```
Remember that the mount point must already exist, otherwise the entry will not mount on the filesystem. To create a new mount point, use root privileges to create the mount point. Here is the generalization and an example:
```
sudo mkdir /path/to/mountpoint
sudo mkdir /media/disk2
```
# Other Resources
 Here are some more links for your convenience:
- [UsingUUID](https://help.ubuntu.com/community/UsingUUID)
- [How to fstab](http://ubuntuforums.org/showthread.php?t=283131) (from the Ubuntu Forums)
- [http://en.wikipedia.org/wiki/Fstab](http://en.wikipedia.org/wiki/Fstab)
- [SettingUpNFSHowTo](https://help.ubuntu.com/community/SettingUpNFSHowTo)
- [SettingUpSamba](https://help.ubuntu.com/community/SettingUpSamba)
- [LinuxFilesystemsExplained](https://help.ubuntu.com/community/LinuxFilesystemsExplained)
- [AutomaticallyMountPartitions](https://help.ubuntu.com/community/AutomaticallyMountPartitions)
- [HowtoPartition](https://help.ubuntu.com/community/HowtoPartition)
# EXECUTAR COMANDOS AO EFETUAR LOGIN OU LOGOUT NO LINUX
Link: [https://www.vivaolinux.com.br/dica/Executar-comandos-ao-efetuar-login-ou-logout-no-Linux#google\_vignette](https://www.vivaolinux.com.br/dica/Executar-comandos-ao-efetuar-login-ou-logout-no-Linux#google_vignette)
Para que um comando seja executado quando o usuário efetua LOGIN (iniciar uma sessão) ou LOGOUT (finalizar a sessão), insira o seu comando nos respectivos arquivos que devem estar localizados no HOME de cada usuário:
- .bash\_login
- .bash\_logout
Obs.: Se estes arquivos não existirem, você deve criá-los.
Exemplos:
1\) Exibir uma mensagem quando o usuário efetua LOGIN (adicionar em .bash\_login):
echo "Bem-vindo(a) ao [Linux](https://www.vivaolinux.com.br/linux/)!"
2\) Limpar a tela quando o usuário efetua LOGOUT (adicionar em .bash\_logout):
clear
Para que os novos usuários herdem estes arquivos de configuração, copie-os para a pasta /etc/skel. Assim sempre que um novo usuário for criado, serão copiados os arquivos .bash\_login e .bash\_logout para sua pasta HOME.
Espero que seja útil!
# O comando AWK com if, else e outras opções
Link: [https://blog.ironlinux.com.br/o-comando-awk/](https://blog.ironlinux.com.br/o-comando-awk/)
Assim como o [SED](https://blog.ironlinux.com.br/o-comando-sed-no-linux) , o AWK é uma ferramenta para manipulação de texto. No entanto, o AWK também é considerado uma linguagem de programação. Com ele é possível pesquisar palavras num arquivo, identificar padrões, realizar substituições e muito mais! Além disso, o AWK suporta expressões regulares, o que permite realizar matches de padrões complexos.
## Output de exemplo
Antes de tudo, para realizarmos as operações/exemplos com o AWK, vamos utilizar a saída do comando **ps u**:
```bash
ps u
```
[](https://blog.ironlinux.com.br/images/blog-posts/uploads/2022/04/ps.png)
## 1 | Utilizações básicas
### 1.1 | Printar a primeira coluna
Para apresentar apena a primeira coluna é possível utilizar o comando abaixo. A primeira coluna é representada por **$1**:
```bash
ps u | awk '{print $1}'
```
[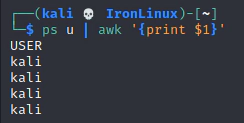](https://blog.ironlinux.com.br/images/blog-posts/uploads/2022/04/ps1.png)
### 1.2 | Printar múltiplas colunas
É possível trazer múltiplas colunas utilizando o comando abaixo. OBS: A vírgula neste exemplo representará um espaço comum na saída final:
```bash
ps u | awk '{print $1,$2,$3}'
```
[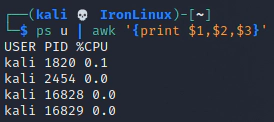](https://blog.ironlinux.com.br/images/blog-posts/uploads/2022/04/ps2.png)
### 1.3 | Printar múltiplas colunas separadas por Tab
Utilizando **"\\t"** é possível separar as colunas com Tab:
[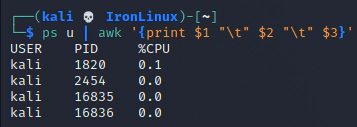](https://blog.ironlinux.com.br/images/blog-posts/uploads/2022/04/ps3.png)
### 1.4 | Printar o último elemento
Utilizando **$NF** é possível trazer o último elemento (neste caso é a coluna COMMAND):
```bash
ps u | awk '{print $NF}'
```
[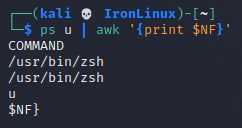](https://blog.ironlinux.com.br/images/blog-posts/uploads/2022/04/ps4.png)
### 1.5 | Ignorar a primeira linha
É comum precisar remover a primeira linha de um arquivo para depois trabalhar com os dados. Para fazer isso, basta utilizar o comando abaixo:
```bash
ps u | awk 'NR!=1'
```
[](https://blog.ironlinux.com.br/images/blog-posts/uploads/2022/04/awk-1linha.png)
### 1.6 | Substituir texto
Para substituir um texto, podemos utilizar a função **sub()**, conforme o exemplo abaixo, que substitui a string “**kali**” por “**outro-usuario**”:
```bash
ps u | awk -e 'sub(/kali/, "outro-usuario")'
```
[](https://blog.ironlinux.com.br/images/blog-posts/uploads/2022/04/awksub.png)
OBS: A função **sub()** substitui apenas a primeira ocorrência, uma vez por linha. Caso queira substituir mais de uma ocorrência, utilize a função **gsub()**.
## 2 | Utilizando um outro delimitador
Por padrão, o delimitador do AWK é o espaço (ou tab). No entanto, em alguns casos, você precisará indicar um outro delimitador (como por exemplo **vírgula** ou **ponto e vírgula**). Desta forma, no exemplo abaixo, estamos utilizando **;** como delimitador e printando o segundo elemento:
## 3 | Condicionais
### 3.1 | AWK com if
Para exemplificar o uso de condicionais (if) vamos utilizar o arquivo **notas.txt** que possui o seguinte conteúdo:
[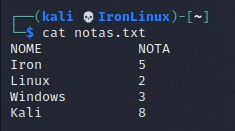](https://blog.ironlinux.com.br/images/blog-posts/uploads/2022/04/notas-awk.png)
Por exemplo, para printar a linha inteira se a primeira coluna for a string **Iron**:
[](https://blog.ironlinux.com.br/images/blog-posts/uploads/2022/04/if1.png)
Por exemplo, para printar a nota do aluno **Iron** em uma frase:
```bash
awk '{ if ($1 == "Iron") print "A nota do Aluno", $1, "foi", $2}' notas.txt
```
[](https://blog.ironlinux.com.br/images/blog-posts/uploads/2022/04/if2.png)
### 3.2 | AWK com if/else
No exemplo abaixo estamos utilizando if/else para determinar quais alunos reprovaram ou passaram (com nota maior que 5). Também estamos utilizando **NR!=1** para ignorar a primeira linha:
[](https://blog.ironlinux.com.br/images/blog-posts/uploads/2022/04/ifelse.png)
## 3.3 | Cheatsheet de condicionais
Condicionais
Descrição
if ($5 >= 10)
Se a quinta coluna for maior ou igual a 10
if ($3 == 10)
Se a terceira coluna for igual a 10
if ($1 == “Linux”)
Se a primeira coluna for igual a string **Linux**
if ($1 == “Linux”
if ($1 ==“Linux” && $2 > 5)
Se a primeira coluna for igual a string **Linux** **e** a segunda coluna for **maior** que **5**
## 4 | Utilizando REGEX
### 4.1 | Exemplos com REGEX
Na regex abaixo, estamos printando a linha inteira caso a segunda coluna se inicie com o número 1:
```bash
ps u | awk -e '$2 ~ /^1/ {print $0}'
```
[](https://blog.ironlinux.com.br/images/blog-posts/uploads/2022/04/awk-regex.png)
Na regex abaixo estamos printando todas as linhas cuja coluna 2 **não** comecem com o número 1:
```bash
ps u | awk -e '$2 !~ /^1/ {print $0}'
```
[](https://blog.ironlinux.com.br/images/blog-posts/uploads/2022/04/awk-regex2.png)
### 4.2 | Cheatsheet de REGEX
Regex
Descrição
\[mr\]
Letras\*\* m\*\* ou **r**
\[a-z\]
Qualquer letra de **a** à **z**
\[a-zA-Z\]
Qualquer letra de **A** à **Z** (maiúsculo ou minúsculo)
\[A-Z0-9\]{5}
5 caracteres, podendo ser qualquer letra de A à Z ou números de 0 a 9
## 5 | Alguns outros usos interessantes
### 5.1 | Pegar linhas entre dois padrões
Vamos utilizar o arquivo **padrao.txt** abaixo para realizar as operações:
[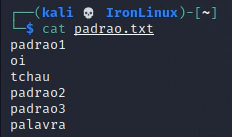](https://blog.ironlinux.com.br/images/blog-posts/uploads/2022/04/padrao.png)
Caso você queira printar, todas as linhas entre “**padrao1**” e “**padrao2**”:
[](https://blog.ironlinux.com.br/images/blog-posts/uploads/2022/04/sempadroes.png)
Caso queira que “**padrao1**” e “**padrao2**” também seja printado:
[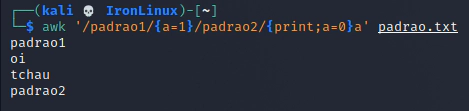](https://blog.ironlinux.com.br/images/blog-posts/uploads/2022/04/incluindo-awk.png)
### 5.2 | Adicionar um prefixo nas linhas
Para adicionar um prefixo nas linhas pode-se utilizar a função **gensub()**, veja o exemplo abaixo, onde adicionamos a palavra “Prefixos” em todas as linhas que comecem com caracteres alfanuméricos:
[](https://blog.ironlinux.com.br/images/blog-posts/uploads/2022/04/awkprefixos.png)
Por fim, agradecemos a leitura e esperamos que este post tenha te ajudado de alguma maneira! Caso tenha alguma dúvida, entre em contato conosco pelo [Telegram](https://t.me/ironlinux) , [Facebook](https://www.facebook.com/ironlinuxoficial) ou [Instagram](https://www.instagram.com/ironlinux_/) ! Veja mais posts no [IronLinux](https://blog.ironlinux.com.br/) !
##### Tags:
[](https://blog.ironlinux.com.br/redirecionar-saida-padrao-e-de-erros/)
#### [Redirecionar a saída padrão e de erros](https://blog.ironlinux.com.br/redirecionar-saida-padrao-e-de-erros/)
Quando é executado um comando ou algum script no Linux é possível redirecionar a saída padrão e de erros para não ser printado em tela ou que seja direcionado à algum lugar especifico.
[Ler post completo](https://blog.ironlinux.com.br/redirecionar-saida-padrao-e-de-erros/)
[](https://blog.ironlinux.com.br/o-comando-sed-no-linux/)
#### [O comando SED no Linux](https://blog.ironlinux.com.br/o-comando-sed-no-linux/)
O comando SED é uma ótima ferramenta de edição de arquivos ou de formatação de resultados de comandos, com ele você pode pesquisar, localizar e substituir, inserir ou excluir palavras, números e etc.
[Ler post completo](https://blog.ironlinux.com.br/o-comando-sed-no-linux/)
[![Estressando MEM, DISCO e CPU com Stress-ng [Debian9]](https://blog.ironlinux.com.br/images/blog-posts/uploads/2020/04/Stress-ng-1_hu20ef07f6d87399612b4205b98ee978d4_28688_1110x0_resize_q100_h2_lanczos_2.webp)](https://blog.ironlinux.com.br/estressando-mem-disco-e-cpu-com-stress-ng-debian9/)
#### [Estressando MEM, DISCO e CPU com Stress-ng \[Debian9\]](https://blog.ironlinux.com.br/estressando-mem-disco-e-cpu-com-stress-ng-debian9/)
O STRESS-NG Com a ferramenta Stress-ng podemos literalmente realizar o Stress de alguns recursos do seu servidor, sendo eles: Cpu, memória e disco.
[Ler post completo](https://blog.ironlinux.com.br/estressando-mem-disco-e-cpu-com-stress-ng-debian9/)
# Verificar vida útil de um hard disk
Link: [https://www.hdsentinel.com/hard\_disk\_sentinel\_linux.php](https://www.hdsentinel.com/hard_disk_sentinel_linux.php)
## Hard Disk Sentinel Linux Edition (FREE)
[](https://www.hdsentinel.com/hard_disk_sentinel_linux.php#download)
By using Hard Disk Sentinel Linux console edition, it is possible to examine the temperature and health information (and more) of **IDE, S-ATA (SATA II also), SCSI and [USB](https://www.hdsentinel.com/compatibility_usbharddisks.php)** hard disks connected to motherboard or external controller cards. **The user must be root to use this software or start it with sudo.**
To display hard disk / SSD status in a graphical interface, download [Hard Disk Sentinel Linux GUI (Graphical User Interface)](https://www.hdsentinel.com/hard_disk_sentinel_linux_gui.php) package. Thanks for Gregory25!
To simplify starting Hard Disk Sentinel Linux Edition, it is possible to use one of the [Linux Desktop Installers](https://www.hdsentinel.com/add-on-linux-installers.php) for the actual Linux distribution which allows starting directly from the desktop without the need of starting manually from a console. Thanks for Marc Sayer for these packages!
To receive daily status reports, please check the [HDSentinel\_EmailUtil.zip](https://www.hdsentinel.com/hdslin/hdsentinel_emailutil.zip) package. Thanks for Raul del Cid Lopez for this script!
[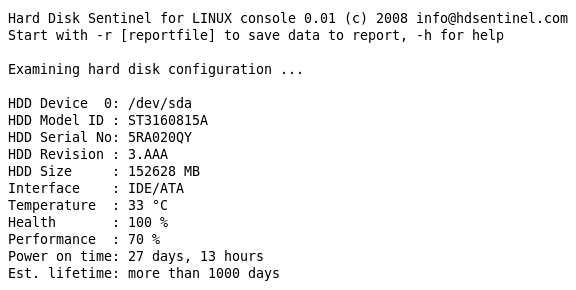](https://www.hdsentinel.com/hdslin/hdslin.jpg)
### List of features
- display hard disk / solid state disk information on the terminal
- create comprehensive report about the disk system, including both hard disk and SSD specific features (for example, media rotation rate, TRIM command, etc.)
- display and manage acoustic setting of hard disks (on supported USB disks also)
- offers outputs for both users and scripts/other applications to process
The following information are displayed:
- detected hard disk number and device name (for example /dev/sda)
- size, model ID, serial number, revision and interface of all detected hard disks
- temperature, health and performance values
- power on time (days, hour, minutes - if supported)
**Note**: this is for informational purposes only, the value displayed under Windows (after some minutes of testing) may be more accurate
- acoustic management settings (if supported and **-aam** or **-setaam** option is used
### Command line switches
The switches are NOT case sensitive. Upper and lower case can be used to specify them.
- **-h** - displays help and usage information
- **-r \[report file\]** - automatically save report to filename (default: report.txt)
- **-html** - use with -r to save HTML format report (-html -r report.html)
- **-mht** - use with -r to save MHT format report (-mht -r report.mht)
- **-autosd** - detect industrial SD card type and save flag file (see [How to: monitor (micro) SD card health and status](https://www.hdsentinel.com/how_to_monitor_sd_card_health_status.php) for more details)
- **-dev /dev/sdX** - detect and report only the specified device without accessing others
- **-devs d1,d2** - detect (comma separated) devices in addition to default ones eg. /dev/sda,/dev/sdb,/dev/sdc
- **-onlydevs d1,d2** - detect (comma separated) devices only eg. /dev/sda,/dev/sdb,/dev/sdc
- **-nodevs d1,d2** - exclude detection of (comma separated) devices eg. /dev/sda,/dev/sdb,/dev/sdc
- **-dump** - dump report to stdout (can be used with -xml to dump XML output instead of text)
- **-xml** - create and save XML report instead of TXT
- **-solid** - solid output (drive, tempC, health%, power on hours, model, S/N, size)
- **-verbose** - detailed detection information and save temporary files (only for debug purposes)
- **-aam** - display acoustic management settings (current and recommended level)
- **-setaam drive\_num|ALL level(hex)80-FE|QUIET|LOUD** - set acoustic level on drive 0..n (or all)
80 or QUIET is the lowest (most silent) setting, FE or LOUD is the highest (fastest) setting
For example: **hdsentinel -setaam 0 loud** - Configures drive 0 to fastest (loud) setting. Same as **hdsentinel -setaam 0 FE**
Please send saved XML or TXT reports, questions or ideas to to help improving this tool.
### License
Hard Disk Sentinel Linux edition is **FREE**. You can freely distribute and use it to analyse hard disk status. However, if you like this tool and would like to keep it updated, please support further development by registering the Windows version of the software.
### Usage of Hard Disk Sentinel Linux version
After downloading the file below, please follow these steps to use it:
- double click to open and decompress it to any folder
- open a terminal window and navigate to the folder
- change file permissions to make it executable by using **chmod 755 HDSentinel**
- launch it by entering **sudo ./HDSentinel \[options\]**
*sudo* is not required if you logged in as "root".
### Examples
Optimize complete system for silence: **hdsentinel -setaam all quiet**
Optimize complete system for high performance (but louder disk access): **hdsentinel -setaam all loud**
Select a balanced level between silence and performance on drive 0: **hdsentinel -setaam 0 C0**
Note: some disks do not support balanced settings and they may select the most silent (80) or high performance (FE) setting instead.
Please start **hsentinel** without parameters to see drive assignments (eg. /dev/sda) to drive indexes.
Due to the high amount of requests, it is possible to create minimal output which can be easily parsed and processed for further use. Some examples are:
List disk drives, temperature (in Celsius), health %, power on hours, disk model, disk serial, size:
**hdsentinel -solid**. Sample results:
```
/dev/sda 42 3 4830 WDC_WD800JD-8LSA0 WD-WMAM9F937837 76324
/dev/sdb 30 100 6128 ST3250624A 5ND3J94R 238472
/dev/sdc 46 100 10982 WDC_WD2500JS-00MHB0 WD-WCANK8705209 238475
/dev/sdd ? ? ? GENERIC_CF_READER 9999 0
/dev/sde ? ? ? GENERIC_SD_READER 9999 1963
```
List only temperature, drive, size:
**hdsentinel -solid | awk '{print $2, $1, $7}'**
```
42 /dev/sda 76324
30 /dev/sdb 238472
46 /dev/sdc 238475
? /dev/sdd 0
? /dev/sde 1963
```
List only temperature, drive, model ID, highest temperature on top, drives without temperature information (for example card readers) removed:
**hdsentinel -solid | awk '{print $2, $1, $5}' | grep -v "^?" | sort -nr**
```
46 /dev/sdc WDC_WD2500JS-00MHB0
42 /dev/sda WDC_WD800JD-8LSA0
30 /dev/sdb ST3250624A
```
List only health, temperature, drive, lowest health on top, drives without temperature information (for example card readers) removed:
**hdsentinel -solid | awk '{print $3, $2, $1}' | grep -v "^?" | sort -n**
```
3 42 /dev/sda
100 30 /dev/sdb
100 46 /dev/sdc
```
Note that the spaces in hard disk model ID and serial number are replaced with underscore (\_).
If you have any ideas, thoughts about the automatic processing of output or if you have complete script(s) you want to share with other users, please [send a mail](mailto:info@hdsentinel.com) and it will be published on this page with the name and credits of the sender of the script.
### Download Hard Disk Sentinel Linux
[Hard Disk Sentinel 32-bit Linux console version - **executable, gzip-compressed**](https://www.hdsentinel.com/hdslin/hdsentinel-019b.gz)
[Hard Disk Sentinel 64-bit Linux console version - **executable, zip-compressed**](https://www.hdsentinel.com/hdslin/hdsentinel-020c-x64.zip)
[Hard Disk Sentinel Linux console version for Raspberry PI (ARM CPU) - **executable, gzip-compressed**](https://www.hdsentinel.com/hdslin/hdsentinel-020-arm.gz)
[Hard Disk Sentinel Linux console version for NAS boxes (ARMv5 CPU) - **executable, non-compressed**](https://www.hdsentinel.com/hdslin/armv5/hdsentinelarm) (see notes below)
[Hard Disk Sentinel Linux console version for NAS boxes / Raspberry PI 4 (ARMv7 CPU) - **executable, gzip-compressed**](https://www.hdsentinel.com/hdslin/hdsentinel-armv7.gz)
[Hard Disk Sentinel Linux console version for NAS boxes / Raspberry PI 4 64-bit (ARMv8 / ARM64 CPU) - **executable, zip-compressed**](https://www.hdsentinel.com/hdslin/hdsentinel-armv8.zip)
Can be used with Synology D220j and other [Synology NAS models](https://github.com/SynoCommunity/spksrc/wiki/Architecture-per-Synology-model) with ARMv8 CPU
### Compatibility
Kernel support is required to detect and display information about SATA hard disks. This version was successfully tested under the following systems:
- blackPanther OS v16.2 SE
- CentOS 5, 6 and newer
- Fedora 5, 6, 7, 8, 9, 10, 15 and newer
- Ubuntu 8.04 server kernel 2.6.24-16-server, 9.04
- Kubuntu 8.04
- Xubuntu 8.04
- Slackware 11.0
- UHU Linux 2.1
- SuSe 10.2, SuSe 10.3 (SuSe 10.0 - NOT working, reports wanted)
- Debian Lenny 5.0
- Debian GNU/Linux 6.0.1 Squeez
- Raspberry PI (ARM CPU)
- NAS boxes (ARM CPU): WD MyBook Live, D-Link DNS-320LW two bay Sharecenter, D-Link DNS-327L two bay Sharecenter, Seagate FreeAgent DockStar, Zyxel NSA320, Synology DS211. DSM 5.0-4493 update 3
Successfully tested with Adaptec SCSI controllers and SCSI hard disks, and with external enclosures built with different USB-ATA bridge in chips [USB Hard disks, hard disk enclosures](https://www.hdsentinel.com/compatibility_usbharddisks.php). Supports LSI / Intel / IBM RAID controllers too.
### Updates
**0.20**
7/7/2023
- added -devs, -onlydevs, -nodevs command line switches to control which drives should be detected
- added support of Kingston DataTraveler MAX : detect health, temperature, S.M.A.R.T. status of Kingston DataTraveler MAX series pendrives
- added support of DockCase DSWC1P USB-M.2 (NVMe/SATA) adapter
- added support of ASUS Tuf Gaming A1 USB 3.2 NVMe adapter
- added support of ACOS SATA SSDs, Fanxiang S101, Go-Infinity SSD, ZOZT G3000, SQUARE ES 550, Ramsta R900 SSDs
- improved support and reporting of 22 TB WD hard disk drives, Toshiba 18 TB hard disk drives
- improved support/health display of SanDisk SDSSDH3 models when new/unused
- improved support of various SAS drives
- improved compatibility with various USB devices
- improved Health % reporting for intensively used Indilinx Barefoot SSD
- improved compatibility with GLOWAY SSD, HP SSD 600, Patriot Burst Elite SSD, Patriot P220 SSD, Patriot P210 SSD, PNY SSD, PNY ELITE SSD, Toshiba SATA SSD, Kingston SSD, Swissbit SSD
- improved support of some Sandisk, Intel, LiteOn SATA SSDs, Transcend TS120GSSD220S SSD, WDS120G2G0A-00, Lexar SATA SSD, XRAYDISK SATA SSD, KINGSPEC SATA SSD, WALRAM SSD
- improved support of Intel Pro 5400s SSDs
- improved support and Health % calculation / text reports for various Sandisk SSDs
- improved support and Health % calculation / text reports for various Patriot SSDs
- improved support and Health % calculation / text reports for various DELL-specific SSDs
- added support of Apricorn Fortress L3 and Padlock 3 external hard disk drives and Apricorn ASK3 or ASK3z Secure Key pendrives: in addition to the robust design and security functions the hard disk drives and pendrives supported by Hard Disk Sentinel: complete health, temperature, self-monitoring S.M.A.R.T. status detected and displayed.
- added support of SSK USB 3.1 / 3.2 Gen 2 (10 Gbps) NVMe adapter: detect NVMe SSD status
- added support of Kingston XS2000 SSD, Goodram CX400 G2, Zadak SSD
- improved support of some Acer SSDs, Sandisk SSDs, Lite-on SSDs
- added support of Kingston Design-In SSDs (OMSP0S3, OM4P0S3, OM8P0S3, OCP0S3)
- improved health/status reporting for PNY SATA SSDs
- improved display of power on time, health, status of newer WD / Hitachi SAS hard disk drives
- improved text description of NVMe SSDs upon different problems / error conditions
- adjusted calculation and reporting lower health on failing / problematic NVMe SSDs
- improved support and detection with Synology NAS devices
**0.19**
28/2/2021
- added support of newer SATA, SAS, NVMe M.2 PCie SSDs: detect health, temperature, and complete self-monitoring S.M.A.R.T. status
- added support of newer hard disk drives, hybrid drives: detect health, temperature, and complete self-monitoring S.M.A.R.T. status
- added support of newer NVMe-USB adapters / converters
- added support of ORICO 3559U3 5-bay external USB 3.0 hard disk enclosure
- added support of Yottamaster 4-bay and FS5U3 5-bay external USB 3.0 hard disk enclosure
- improved **detection of NVMe M.2 SSDs** under Linux. Detect health, temperature and complete self-monitoring S.M.A.R.T. status of NVMe M.2 SSDs connected to motherboard (nvme0, nvme1, etc... devices)
**0.18**
7/11/2019
- added **detection of NVMe M.2 SSDs** under Linux. Detect health, temperature and complete self-monitoring S.M.A.R.T. status of NVMe M.2 SSDs connected to motherboard (nvme0, nvme1, etc... devices)
- added detection of NVMe M.2 SSDs with USB-NVMe adapters based on ASMEDIA ASM236x and JMicron JMS583 chipsets
- added detection of SAS hard disk drives and SSDs configured as RAID with LSI, Intel, Dell SAS RAID controllers
- added support for new hard disk and SSD models, identify self-monitoring status of Kingston, Intel, Samsung, KingDian, Sandisk, LiteOn, ADATA, Crucial, Corsair, Lenovo, Apacer, WD SSDs
- added/improved support of various Western Digital, Hitachi, Seagate, Toshiba hard disk drives
- added/improved support of Helium (He) filled hard disk drives
- added/improved support of numerous external USB adapters, USB-ATA bridges, docking stations
- fixed bug with empty memory card readers
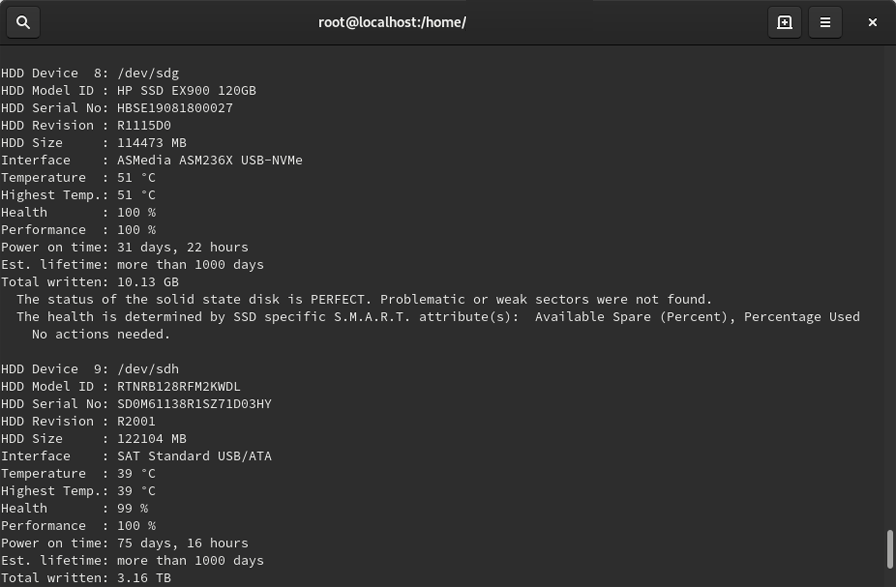
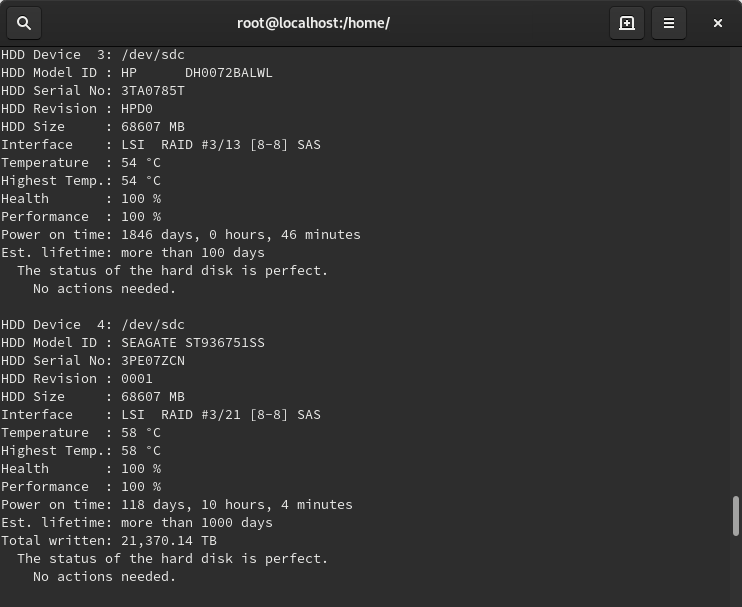
**0.17**
30/8/2017
- added **detection of industrial micro SD cards** under Linux. Detect status immediately if the detection method of the micro SD card previously configured under the Windows - or if **-autosd** command line parameter specified to detect and save the detection method and use in all sub-sequent detections under Windows or Linux.
Note: with Raspberry PI, it is not possible to detect internal memory card status, just status of card in external USB memory card reader.
- added support of ASMedia ASM1352R dual drive (RAID) enclosures: detection of complete status of both hard disks
- added **-html** command line option to save HTML format report (-html -r reportfile.html)
- added **-mht** command line option to save MHT format report (-mht -r reportfile.mht)
- added support of more than 26 drives, detection of additional drives when required
- added support for new hard disk and SSD models, identify self-monitoring status
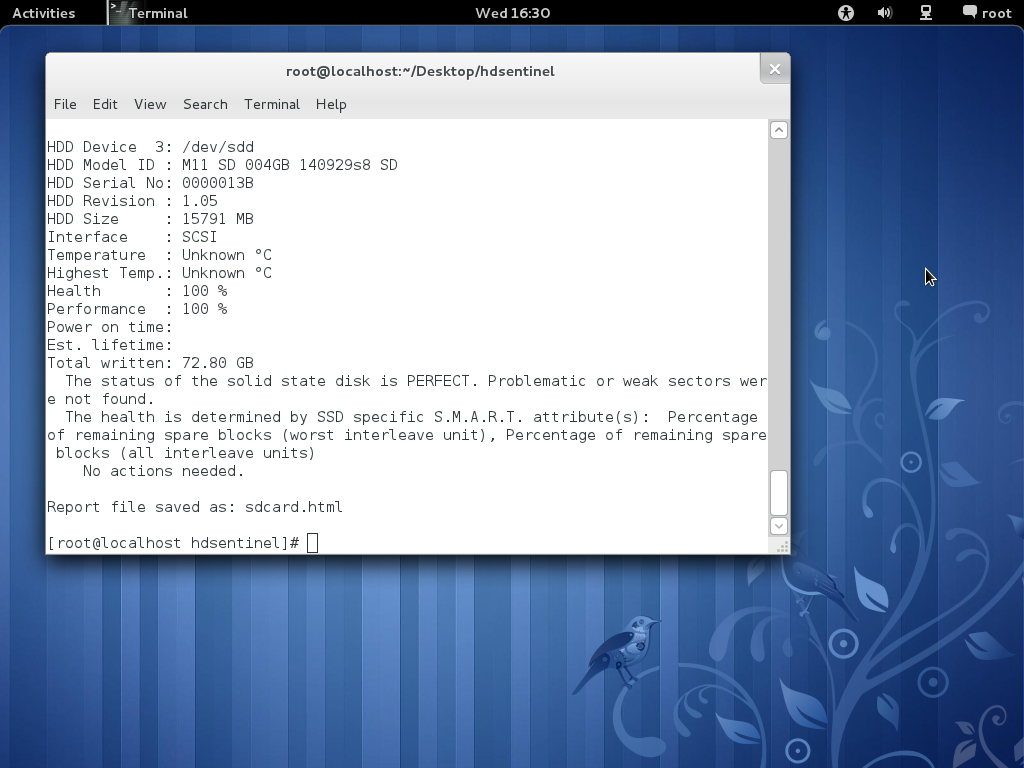
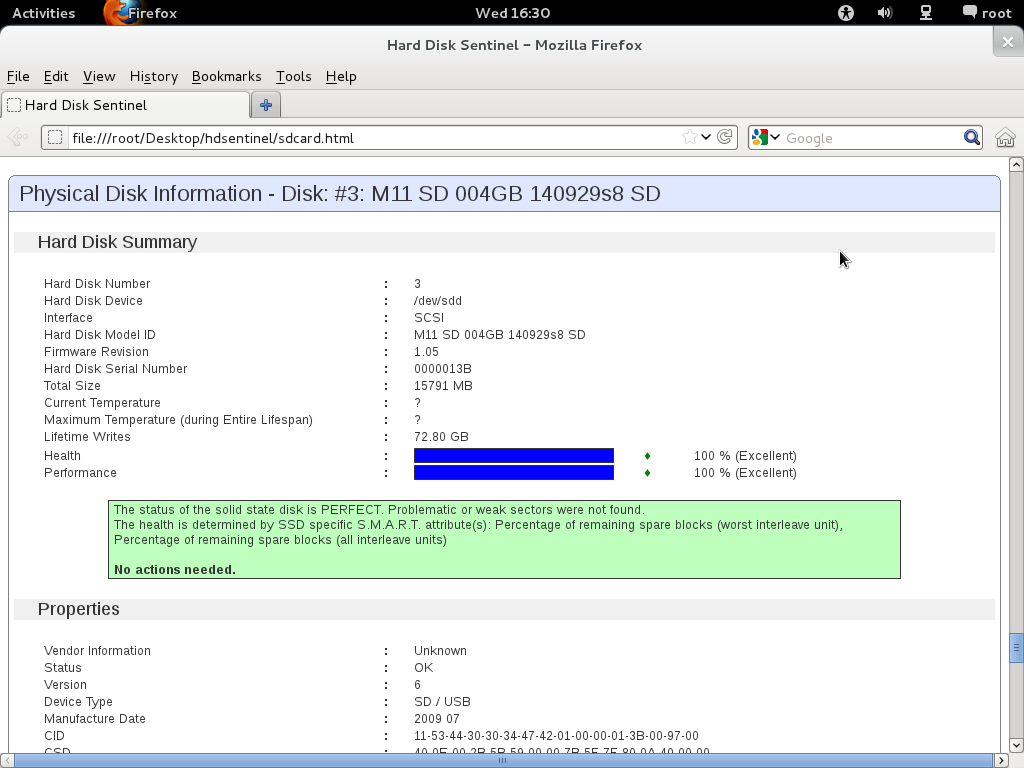
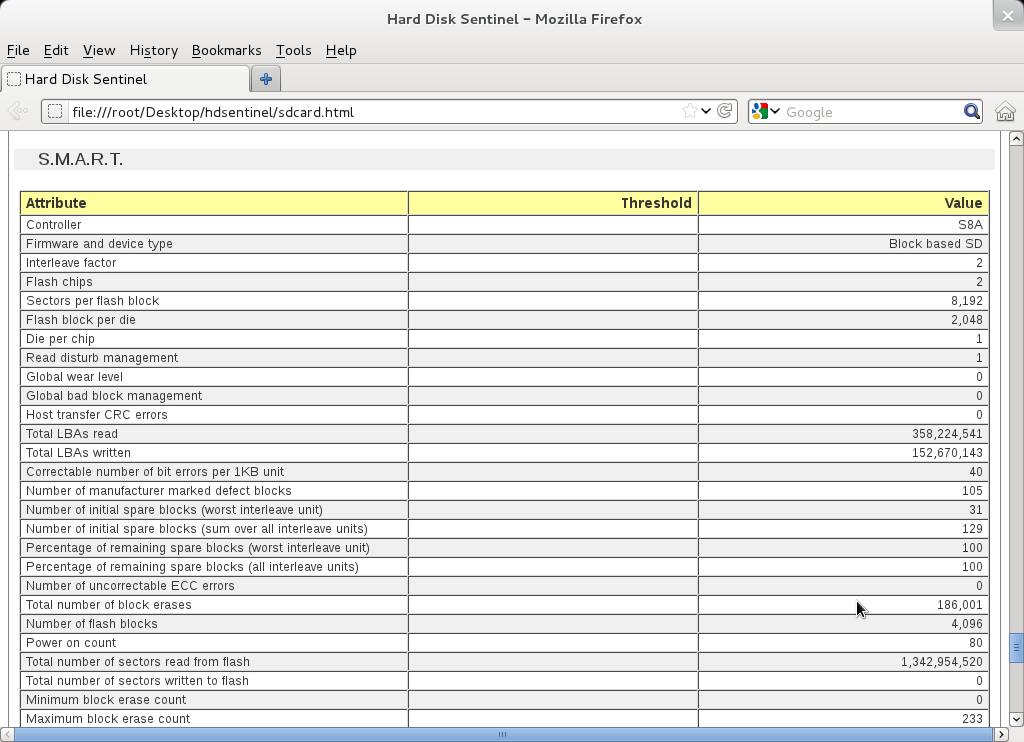
**0.16**
13/9/2016
- added support for Intel, IBM, LSI RAID controllers
- experimental support of JMicron external USB RAID boxes (contact for assistance)
- added support for 4000+ hard disk and SSD models, interpreting and displaying their self-monitoring status
- displaying lifetime writes for SSDs
**0.08 - [Download Hard Disk Sentinel Linux 0.08 version](https://www.hdsentinel.com/hdslin/hdsentinel_008.zip)**
6/3/2012
- more hard disk drive / solid state disk details saved to report
- improved compatibility with USB hard disks and various disk controllers
- true 64 bit version released
**0.03 - [Download this version](https://www.hdsentinel.com/hdslin/hdsentinel003.gz)**
21/7/2009
- more hard disk drive / solid state disk details saved to report
- -aam and -setaam commands to modify acoustic level of disk drives
- -dump to dump report to stdout
- -solid option to create solid output for further processing
- improved power on time detection for Samsung, Maxtor, Toshiba, Fujitsu models
- improved detection of SCSI and USB drives
- detection of SCSI and USB drive capacities
**0.02 - [Download this version](https://www.hdsentinel.com/hdslin/hdsentinel002.gz)**
25/7/2008
- added support for SCSI and [USB hard disks](https://www.hdsentinel.com/compatibility_usbharddisks.php)
- improved temperature detection on Fujitsu hard disks
**0.01 - [Download this version](https://www.hdsentinel.com/hdslin/hdsentinel001.gz)**
29/4/2008
- first initial version
### Raspberry PI
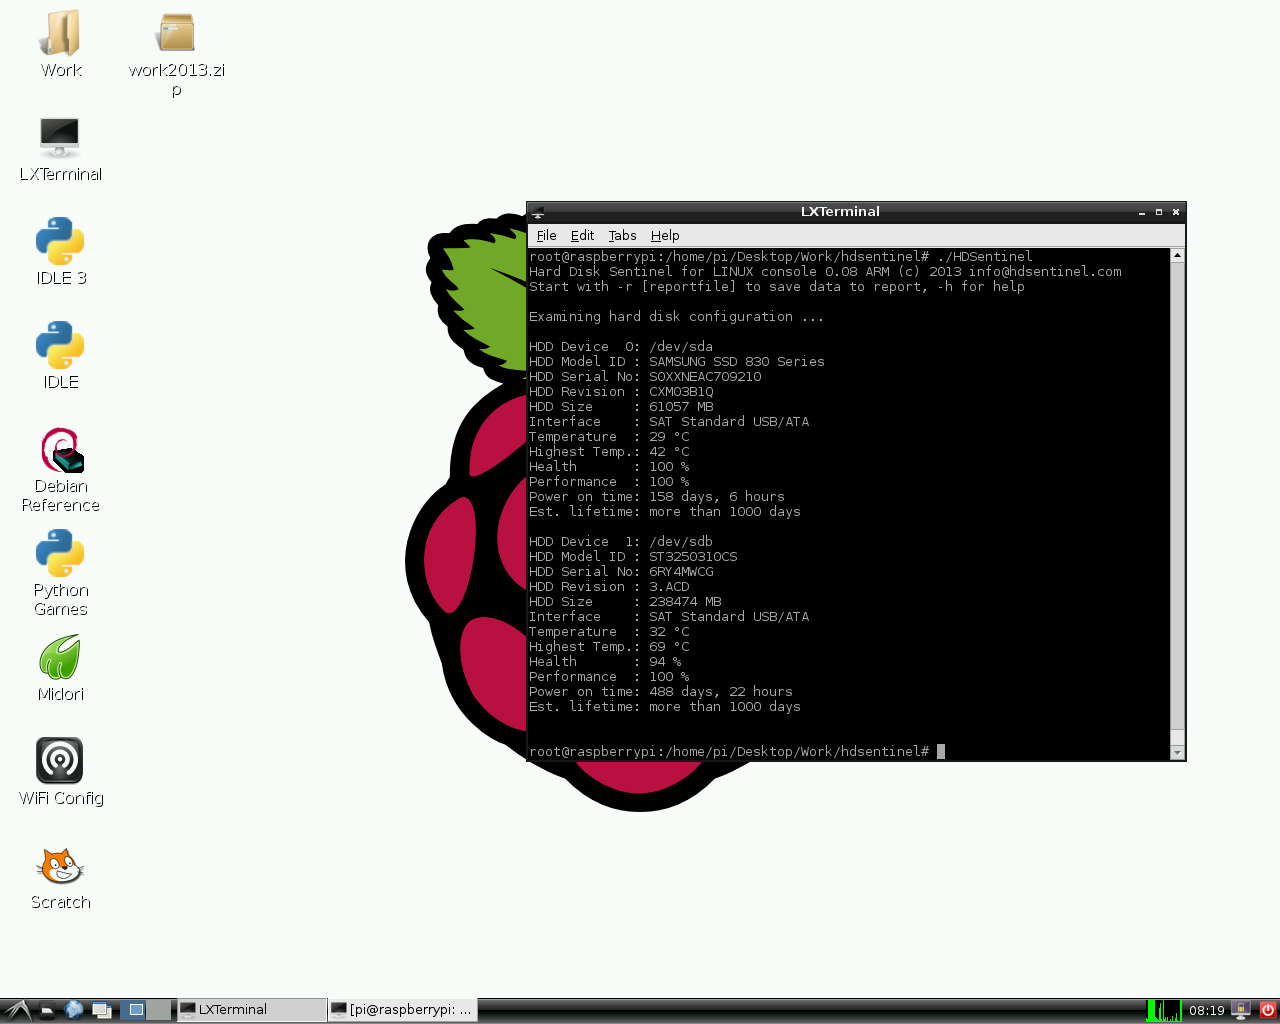
### NAS boxes with ARM CPU
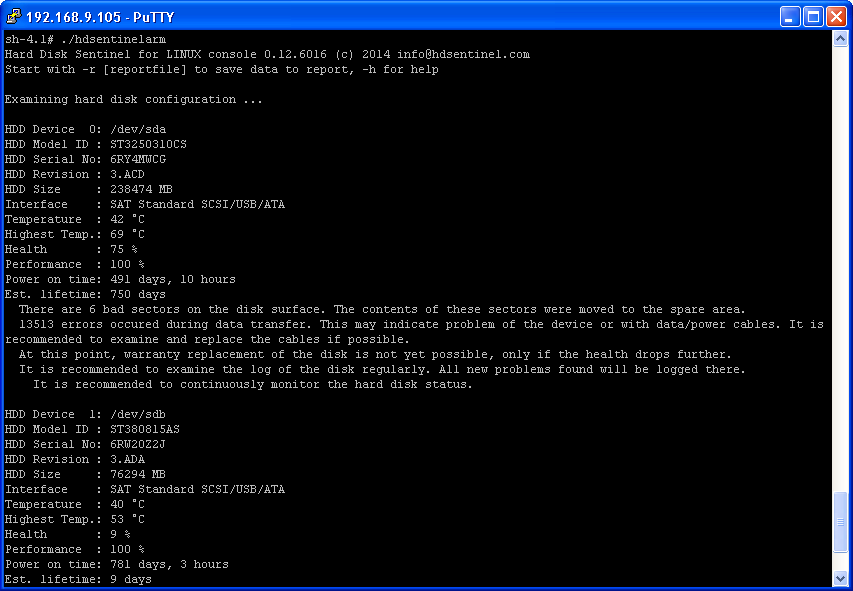
The Linux version of Hard Disk Sentinel also available for NAS boxes built with ARM CPUs. The NAS box should have telnet / SSH access in order to download and use this tool.
To get Telnet / SSH access, special firmware version(s) or additional packages (like the [fun\_plug](http://nas-tweaks.net/371/hdd-installation-of-the-fun_plug-0-7-on-nas-devices/) may be required. **Putty** tool is also required to connect the NAS box and access its console.
**Usage:**
- get Telnet / SSH access to the NAS box and log-in to your device by using putty.exe
- enter **wget http://www.hdsentinel.com/hdslin/armv5/hdsentinelarm** to download the latest ARMv5 CPU build.
To simplify things, the file is not compressed.
- enter **chmod 755 hdsentinelarm** to set the proper permission (executable). You may use **chmod +x hdsentinelarm** instead.
- enter **./hdsentinelarm** to start the Hard Disk Sentinel on the NAS and get hard disk status information.
**Tested on:**
- WD MyBook Live
- D-Link DNS-320LW two bay Sharecenter
- Seagate FreeAgent DockStar
# Some useful ssh config option
Link: [https://taozhi.medium.com/some-useful-ssh-config-option-7858a58c5e7b](https://taozhi.medium.com/some-useful-ssh-config-option-7858a58c5e7b)
When managing multiple Linux servers, we use SSH for logging in and performing tasks. Understanding how to configure SSH properly is essential for efficient server management.
# Basic Config
```
Host my_jump identityfile "~/.ssh/my_jump" hostname 47.254.197.212 hostkeyalias my_jump user root port 22
```
In the above config, “my\_jump” is the hostname supporting wildcards to match multiple servers simultaneously.
The identityfile specifies the authorized private keys, hostname is the server’s IP address, and hostkeyalias is useful for connecting to the server when its IP address changes without needing to update known\_hosts. The user and port specify the SSH login credentials.
# Reuse the sock
Upon relogging into the server, how can we bypass entering the password and reuse the previous session to quickly reconnect? We should the control setting in ssh config.
```
Host * serveraliveinterval 60 keepalive yes controlmaster auto controlpath ~/.ssh/socks/%h-%k-%p-%r controlpersist yes
```
By using the above configuration, we set the controlpath for all servers using the ‘\*’ symbol in the Host field. The controlpath specifies the socket path.
%h represents the host IP.
%k represents the hostname.
%p represents the port.
%r represents the username.
When you connect to a server using ssh, you should see a socket file present. `~/.ssh/socks`.
# Set Jump Server
To secure production servers inaccessible for direct login, we can first connect to a jump server, then use SSH through the jump server to access the production server. Automating this process is possible by configuring ProxyCommand or ProxyJump in the SSH settings.
Config the jump server a and b first.
```
Host jump-server-a HostKeyAlias jump-server-a Hostname 100.97.200.66
Host production-server-* LogLevel ERROR UserKnownHostsFile /dev/null StrictHostKeyChecking no Port 22 User root IdentityFile ~/.ssh/id_taozhi controlmaster no setenv LC_ALL=C.UTF-8
```
Following configuration, we can login to the production server locally.
```
ssh -o Hostname=172.16.28.19 production-server-a
```
You can log in to the production server with one command now.
# Conclusions
SSH is a versatile command with numerous configuration options. More options can be found for reading [here](https://linux.die.net/man/5/ssh_config). If you have any useful ssh config you are using, please comment it, let using it together.
# Acesso SSH via web
Link: [https://github.com/butlerx/wetty/tree/main](https://github.com/butlerx/wetty/tree/main)
# WeTTY = Web + TTY.
[](https://github.com/butlerx/wetty#contributors-)
[](https://github.com/butlerx/wetty/tree/main/docs) [](https://github.com/butlerx/wetty/blob/main/LICENSE)
> Terminal access in browser over http/https
[](https://github.com/butlerx/wetty/blob/main/docs/terminal.png?raw=true)
Terminal over HTTP and https. WeTTY is an alternative to ajaxterm and anyterm but much better than them because WeTTY uses xterm.js which is a full fledged implementation of terminal emulation written entirely in JavaScript. WeTTY uses websockets rather than Ajax and hence better response time.
## Prerequisites
```
$ wetty --help
Options:
--help, -h Print help message [boolean]
--version Show version number [boolean]
--conf config file to load config from [string]
--ssl-key path to SSL key [string]
--ssl-cert path to SSL certificate [string]
--ssh-host ssh server host [string]
--ssh-port ssh server port [number]
--ssh-user ssh user [string]
--title window title [string]
--ssh-auth defaults to "password", you can use "publickey,password"
instead [string]
--ssh-pass ssh password [string]
--ssh-key path to an optional client private key (connection will be
password-less and insecure!) [string]
--ssh-config Specifies an alternative ssh configuration file. For further
details see "-F" option in ssh(1) [string]
--force-ssh Connecting through ssh even if running as root [boolean]
--known-hosts path to known hosts file [string]
--base, -b base path to wetty [string]
--port, -p wetty listen port [number]
--host wetty listen host [string]
--command, -c command to run in shell [string]
--allow-iframe Allow wetty to be embedded in an iframe, defaults to allowing
same origin [boolean]
```
Open your browser on `http://yourserver:3000/wetty` and you will prompted to login. Or go to `http://yourserver:3000/wetty/ssh/` to specify the user beforehand.
If you run it as root it will launch `/bin/login` (where you can specify the user name), else it will launch `ssh` and connect by default to `localhost`. The SSH connection can be forced using the `--force-ssh` option.
If instead you wish to connect to a remote host you can specify the `--ssh-host` option, the SSH port using the `--ssh-port` option and the SSH user using the `--ssh-user` option.
Check out the [Flags docs](https://butlerx.github.io/wetty/flags) for a full list of flags
### Docker container
To use WeTTY as a docker container, a docker image is available on [docker hub](https://hub.docker.com/r/wettyoss/wetty). To run this image, use
```
docker run --rm -p 3000:3000 wettyoss/wetty --ssh-host=
```
and you will be able to open a ssh session to the host given by `YOUR-IP` under the URL [http://localhost:3000/wetty](http://localhost:3000/wetty).
It is recommended to drive WeTTY behind a reverse proxy to have HTTPS security and possibly Let’s Encrypt support. Popular containers to achieve this are [nginx-proxy](https://github.com/nginx-proxy/nginx-proxy) and [traefik](https://traefik.io/traefik/). For traefik there is an example docker-compose file in the containers directory.
## FAQ
[](https://github.com/butlerx/wetty#faq)
Check out the [docs](https://github.com/butlerx/wetty/tree/main/docs)
- [Running as daemon](https://butlerx.github.io/wetty/service)
- [HTTPS Support](https://butlerx.github.io/wetty/https)
- [Using NGINX](https://butlerx.github.io/wetty/nginx)
- [Using Apache](https://butlerx.github.io/wetty/apache)
- [Automatic Login](https://butlerx.github.io/wetty/auto-login)
- [Downloading Files](https://butlerx.github.io/wetty/downloading-files)
### What browsers are supported?
Contributions, issues and feature requests are welcome!
Feel free to check [issues page](https://github.com/butlerx/wetty/issues).
Please read the [development docs](https://butlerx.github.io/wetty/development) for installing from source and running is dev node
Thanks goes to these wonderful people ([emoji key](https://allcontributors.org/docs/en/emoji-key)):
# Como baixar repositórios de imagens do Bitnami
Informação extraída do ChatGPT
O endereço que você passou:
> `https://github.com/bitnami/containers/tree/main/bitnami/suitecrm/8/debian-12`
...é uma **página de diretório no GitHub**, não um servidor de arquivos direto. Portanto, você **não pode usar `wget` ou `curl`** para baixar o diretório diretamente.
Mas há **duas formas corretas** de baixar esse conteúdo:
---
## ✅ Opção 1: Clonar apenas esse diretório com `git sparse-checkout` (recomendado)
Se você **não quiser baixar o repositório todo**, mas apenas esse diretório, use `git sparse-checkout`.
### Passos:
\# 1. Clone o repositório, mas sem o conteúdo
git clone --depth 1 --filter=blob:none --sparse https://github.com/bitnami/containers.git
\# 2. Vá para a pasta clonada
cd containers
\# 3. Ative sparse-checkout para baixar só o diretório desejado
git sparse-checkout set bitnami/suitecrm/8/debian-12
### Resultado:
Você terá **somente a pasta `bitnami/suitecrm/8/debian-12`** localmente, sem baixar o repositório completo (~centenas de MB normalmente).
---
## ✅ Opção 2: Baixar o repositório inteiro (caso aceite o tamanho maior)
Se preferir baixar tudo (incluindo outras imagens), use:
git clone [https://github.com/bitnami/containers.git](https://github.com/bitnami/containers.git)
Depois navegue até:
cd containers/bitnami/suitecrm/8/debian-12
## ❌ Por que `wget` ou `curl` não funciona?
- GitHub **não oferece diretórios como arquivos ZIP automaticamente** via URL de pasta.
- `wget` baixaria o HTML da página, não os arquivos reais do diretório.
#### **Shell Script para baixar aplicativos pelo caminho no Bitnami**
\#!/bin/bash
echo "🔧 Exemplo de caminho: bitnami/suitecrm/8/debian-12"
read -p "Digite o caminho completo do diretório no repositório Bitnami Containers: " TARGET\_DIR
\# Repositório Bitnami Containers
REPO\_URL="https://github.com/bitnami/containers.git"
REPO\_DIR="bitnami-containers"
\# Limpar se pasta já existir
if \[ -d "$REPO\_DIR" \]; then
echo "Removendo pasta existente: $REPO\_DIR"
rm -rf "$REPO\_DIR"
fi
echo -e "\\n📦 Iniciando download do diretório '$TARGET\_DIR'...\\n"
\# Clonar com sparse-checkout
git clone --depth 1 --filter=blob:none --sparse "$REPO\_URL" "$REPO\_DIR" || {
echo "❌ Falha ao clonar repositório."
exit 1
}
cd "$REPO\_DIR" || {
echo "❌ Erro ao acessar diretório $REPO\_DIR"
exit 1
}
\# Baixar apenas o diretório informado
if git sparse-checkout set "$TARGET\_DIR"; then
echo -e "\\n✅ Diretório '$TARGET\_DIR' baixado com sucesso!"
echo "📁 Caminho local: $REPO\_DIR/$TARGET\_DIR"
else
echo -e "\\n❌ Diretório '$TARGET\_DIR' não encontrado no repositório."
exit 1
fi
# Links para Ícones e Logotipos
LInk: [https://iconduck.com/](https://iconduck.com/)
# Configurações Linux
Ferramentas para administração Linux
# How to Use the Linux rsync Command
Link: [https://www.hostinger.com/tutorials/how-to-use-rsync](https://www.hostinger.com/tutorials/how-to-use-rsync)
Copying files from one device to another can be a cumbersome task. Fortunately, you can simplify this process on Linux using the **rsync** command.
**rsync**, short for remote sync, lets you transfer and synchronize files or folders between local devices and remote Linux-based servers. Whether you’re a pro or just getting started, mastering the **rsync** command can streamline your Linux file management.
This article will delve deep into the **rsync** command and how it works. We’ll also demonstrate how to use the **rsync** command through practical examples.
## What Is rsync?
**rsync** is a powerful and versatile [Linux command](https://www.hostinger.com/tutorials/linux-commands) for transferring and synchronizing files between local and remote devices. Unlike traditional copy commands, **rsync** uses a delta-transfer algorithm to only transmit the differences between the source and destination files. This approach drastically reduces bandwidth usage and speeds up transfers.
**rsync** also has robust features for transferring files to a backup server and mirroring tasks. It preserves file attributes and supports secure transfers over SSH, making it suitable for both local and remote file transfers.
## How Does rsync Work?
This section will explore various **rsync** options and basic syntax for different purposes.
### rsync Options and Parameters
**rsync** has numerous command line options, parameters, and configuration files to tailor its behavior. Here are some commonly used ones:
- **-v or –verbose** – Increase verbosity, providing more detailed output during the transfer.
- **-a or –archive** – Archive mode, which includes recursive copying and preserving file permissions, timestamps, [symbolic links](https://www.hostinger.com/tutorials/how-to-create-symbolic-links-in-linux), and device files.
- **-r or –recursive** – Recursively copy directories.
- **–delete** – Delete excluded files from the destination directory.
- **–exclude=PATTERN** – Exclude files or directories matching the specified pattern.
- **–include=PATTERN** – Include files or directories matching the specified pattern.
- **-z or –compress** – Compress file data during the transfer to reduce bandwidth usage.
- **-s or –sparse** – Generate a summary of synchronized files and directories, including sparse files, after a sync operation.
- **–dry-run** – Perform a trial run without making any actual changes.
- **–temp-dir** – Specify a directory to store temporary files.
- **-u or –update** – Skip files on the destination side that are newer than the source files so only older files are updated.
- **-h or –human-readable** – Output numbers in a human-readable format.
- **-i or –itemize-changes** – Output a list of changes made during the transfer.
- **–progress** – Show progress during the transfer.
- **–stats** – Provides file transfer stats after it is complete.
- **-e or –rsh=COMMAND** – Specify which remote shell to use.
- **–bwlimit=RATE** – Limit the bandwidth to increase network efficiency.
- **-P or –partial –progress** – Keep partially transferred files and show progress.
For a comprehensive list of all available **rsync** options, run the following command:
```
man rsync
```
You will see detailed information about each option and parameter.
### Basic Syntax
The basic syntax of an **rsync** command is as follows:
```
rsync [OPTIONS] SOURCE DESTINATION
```
- **\[OPTIONS\]** – This is the section where you can include **rsync** options. You can add more than one option.
- **SOURCE** – This is the source directory or file you want to copy or synchronize. Specify the path to the source data here.
- **DESTINATION** – The destination directory where the source data will be copied or synchronized. Specify the path to the destination directory or file here.
### Basic Syntax for Remote Shell
When using **rsync** to transfer data from a local computer to a Linux [virtual private server](https://www.hostinger.com/tutorials/what-is-vps-hosting) (VPS), communication relies on the **rsync** daemon. The **rsync** syntax for the remote shell is as follows:
```
rsync [OPTIONS] -e "SSH_COMMAND" SOURCE DESTINATION
```
The **-e** option is used to specify the remote shell. In most cases, you’ll use **ssh** to connect to the remote host using the **rsync** remote update protocol.
Let’s explore two common scenarios.
Use the following command to pull data from a remote system to your local machine:
```
rsync -avz -e ssh user@remote_host:/path/to/source/ /path/to/local/destination/
```
Use the following command to push data from your local file system to a remote directory using the **CVS** protocol:
```
rsync -avz /path/to/local/source/ user@remote_host:/path/to/remote/destination/
```
## How to Check the rsync Version
**rsync** is typically included by default in many [Linux distributions](https://www.hostinger.com/tutorials/best-linux-distro). Let’s check whether **rsync** is already installed on your system.
For Windows users working with [VPS Hosting](https://www.hostinger.com/vps-hosting), [use PuTTY SSH](https://www.hostinger.com/tutorials/how-to-use-putty-ssh) to log in. If you’re using macOS or Linux, access Terminal.
Once logged in, execute the command below:
```
rsync --version
```
You’ll receive an output similar to the following:
```
rsync version 3.2.7 protocol version 31
```
## How to Install rsync
If **rsync** isn’t pre-installed on your local or remote machine, go ahead and install it manually. Here are the installation commands for different operating systems:
For Debian-based distributions, including Ubuntu:
```
sudo apt-get install rsync
```
For Fedora-based distributions, such as CentOS:
```
sudo dnf install rsync
```
For macOS:
```
brew install rsync
```
## How to Use rsync Commands
Before learning to use **rsync**, let’s prepare two test directories named **original** and **duplicate**. The **original** directory will contain three sample files, while the **duplicate** directory will start out empty.
To create these directories, follow these commands:
```
cd
mkdir original
mkdir duplicate
```
Next, create three sample files inside the **original** folder:
```
touch original/file{1..3}
```
To make sure all the sample files are created, list all the files in the **original** directory and observe the file system using this command:
```
rsync original/
```
### Most Common rsync Commands
One of the most essential use cases for **rsync** is to replicate data between two directories within the same system. To do this, use the following command:
```
rsync original/* duplicate/
```
The contents inside the **original** directory will be mirrored in the **duplicate** directory. If you add a new file or update existing files in the **original** directory, only the new or changed files will be transferred. However, if the **duplicate** folder doesn’t exist, it will result in an error.
To synchronize files and create a new folder simultaneously, use this command instead:
```
rsync original/ duplicate/
```
### How to Use rsync Commands With Subdirectories
To synchronize folders and subdirectories between two locations, use this **rsync** copy directory command:
```
rsync -r original/*/ duplicate/
```
To synchronize a specific subdirectory, type the command below:
```
rsync -r original/subdirectory_name/ duplicate/
```
Replace **subdirectory\_name** with the name of the subfolder you want to synchronize.
You may want to exclude a particular subdirectory from synchronization. In this case, enter the following command to do it:
```
rsync -r --exclude=subdirectory_name original/ duplicate/
```
### How to Synchronize Files
To sync or update files between two folders, use this command:
```
rsync -av original/ duplicate/
```
To copy the files from the **original** directory to a remote server, enter this command:
```
rsync -av -e ssh original/ username@remote_host:/path/to/destination/
```
Replace **username, remote\_host,** and **/path/to/destination/** with the appropriate values.
### How to Combine rsync Commands
As you become more familiar with **rsync**, let’s explore its capability to combine multiple commands for complex file management tasks.
You can combine synchronization and exclusion features to achieve precise results.
The example below shows how you can synchronize all files from the **original** **rsync** directory while excluding **TXT** files:
```
rsync -av --exclude='*.txt' original/ duplicate/
```
Combine the **-r** option with synchronization commands to ensure that **rsync** directories and their contents are recursively synchronized.
```
rsync -av -r original/ duplicate/
```
Before synchronizing an actual **rsync** folder, you can use the **–dry-run** option to preview the changes **rsync** would make without making any actual modifications.
```
rsync -av --dry-run original/ duplicate/
```
### Other Options for rsync Commands
The **–delete** option allows you to delete files from the destination directory that no longer exist in the source directory. To use this option, include it in your **rsync** command like this:
```
rsync -av --delete original/ duplicate/
```
**rsync** supports synchronizing specified files or file types using patterns and wildcards. For example, to only synchronize **TXT** files, enter:
```
rsync -av original/*.txt duplicate/
```
You can also exclude files based on specific patterns in their names. To exclude a file named **example.txt**, type the following command:
```
rsync -av --exclude=example.txt original/ duplicate/
```
Combine the **–include** and **–exclude** options to include multiple files or directories while excluding others. Here’s an example to include files beginning with the letter **L** and exclude all the other files:
```
rsync -av --include='L*' --exclude='*' original/ duplicate/
```
To limit synchronization to files below a specific size, use the **–max-size** option followed by the size limit. The **rsync** command to only synchronize files smaller than **10 MB** is as follows:
```
rsync -av --max-size=10M original/ duplicate/
```
### How to Add a Progress Bar
Monitoring synchronization progress can be helpful, especially for large file transfers. **rsync** allows you to include a progress bar using the **–progress** option. Here’s the command you can employ:
```
rsync -av --progress original/ duplicate/
```
The output will look something like this:
```
file1.txt
5,120,000 100% 50.00MB/s 0:00:00 (xfr#1, to-chk=2/3)
file2.txt
5,345,678 100% 55.67MB/s 0:00:00 (xfr#2, to-chk=1/3)
```
To add a progress bar and keep partially transferred files instead of deleting them upon interruption, use the **-P** option:
```
rsync -av -P original/ duplicate/
```
### How to Create an rsync Backup
Lastly, **rsync** provides a convenient way to create backup files using the **–backup** option. This option lets you back up files to a server, preventing overwriting during synchronization.
To create a remote backup and specify its directory, use the following command:
```
rsync -av --backup --backup-dir=/path/to/backup/ original/ duplicate/
```
When executed, the **rsync** backup option generates an incremental file list and appends a tilde (**~**) to the original file name, such as **important.txt.**
## Conclusion
**rsync** is a powerful remote synchronization, data transfer, and file mirroring tool. In this guide, we’ve covered everything you need to get started with the tool, from installation to practical **rsync** examples you can apply via the command line. Mastering **rsync** will enhance your Linux file management, making it more efficient and reliable.
#### Discover Other Linux Commands for Server Management
[How to Check Disk Space on Linux](https://www.hostinger.com/tutorials/vps/how-to-check-and-manage-disk-space-via-terminal)
[How to Transfer Data With Curl Command](https://www.hostinger.com/tutorials/curl-command-with-examples-linux/)
[How to Calculate Process Execution With Time Command](https://www.hostinger.com/tutorials/linux-time-command/)
[How to Transfer Files Using Scp Command](https://www.hostinger.com/tutorials/using-scp-command-to-transfer-files/)
[How to Monitor Changes With Watch Command](https://www.hostinger.com/tutorials/linux-watch-command/)
[How to Shutdown and Restart the Server](https://www.hostinger.com/tutorials/linux-shutdown-command/)
[How to List Services in Linux](https://www.hostinger.com/tutorials/manage-and-list-services-in-linux)
[How to Write and Display to File With Tee Command](https://www.hostinger.com/tutorials/linux-tee-command-with-examples/)
## rsync FAQ
This section will answer the most common questions about **rsync.**
### What Operating Systems Are Compatible With rsync?
**rsync** is primarily designed for Unix-like operating systems, including Linux and macOS. However, it can also be used on Windows systems with the help of third-party **rsync** client applications like Cygwin or Windows Subsystem for Linux (WSL). This makes **rsync** a versatile choice for file synchronization across various operating systems.
### How Does rsync Differ From Other File Transfer Methods?
Instead of transferring entire file systems, **rsync** only sends the differences between destination and source files, reducing bandwidth usage. It can work over secure SSH connections, offer flexible file compression, and resume interrupted transfers. It’s particularly handy when dealing with a large number of files in a remote system.
### Are There Any Limitations or Drawbacks to Using rsync?
While **rsync** is a powerful tool, it has some limitations. First, it may not be suitable for real-time synchronization as it operates in batch mode. Additionally, it doesn’t provide native encryption, as users often rely on SSH for secure transfers. Lastly, **rsync** can be complex for beginners, requiring a learning curve to master its extensive options.
# Como recuperar a senha de root no Linux
Link: [https://www.alura.com.br/artigos/como-recuperar-senha-de-root-no-linux](https://www.alura.com.br/artigos/como-recuperar-senha-de-root-no-linux)
Existem algumas maneiras de se recuperar a **senha do usuário administrador (ou do super usuário) no Linux**. Uma muito comum é alterar o modo que o sistema inicia, ou seja, quando realiza o [**boot**](https://pt.wikipedia.org/wiki/Boot). Dessa forma, acessamos o sistema como superusuário e alterar a senha.
Para isso, precisamos antes entender melhor o que seria o boot!
## Entendendo o boot
Boot nada mais é do que o momento em que sua máquina está sendo ligada. Nesse momento, um programa chamado [**BIOS**](https://pt.wikipedia.org/wiki/BIOS) carrega algumas informações sobre o hardware do computador e o checa. Após esse processo ela chama o gerenciador de boot **(boot loader)** que carrega o sistema operacional.
Existem diversos gerenciadores disponíveis. No caso do Linux, esse gerenciador mais comum é o [**GRUB**](https://pt.wikipedia.org/wiki/GNU_GRUB), porém existem [outros](https://en.wikipedia.org/wiki/Comparison_of_boot_loaders).
Utilizando o GRUB nós conseguimos acessar o sistema como superusuário executar alguns comando, como trocar a senhas de usuários.
Mas como consigo acessar o GRUB?
## Acessando o GRUB
Conseguimos acessar o GRUB no momento em que a máquina está ligando. Basta apertar a tecla Esc, ou Shift. Após um tempo, uma tela parecida com está deve aparecer:
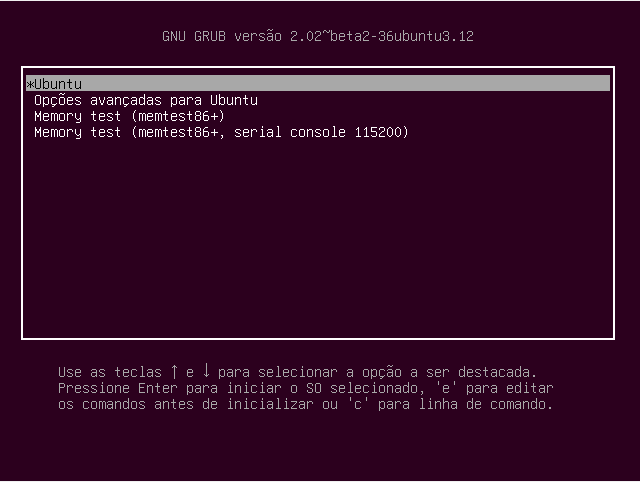
Queremos falar para o GRUB que desejamos acessar o sistema como usuário administrador, dessa forma conseguimos modificar a senha.
Para dizer isso ao GRUB, temos que editar uma linha em sua configuração. Logo, pressionamos `e` (edit) para editar essas informações:
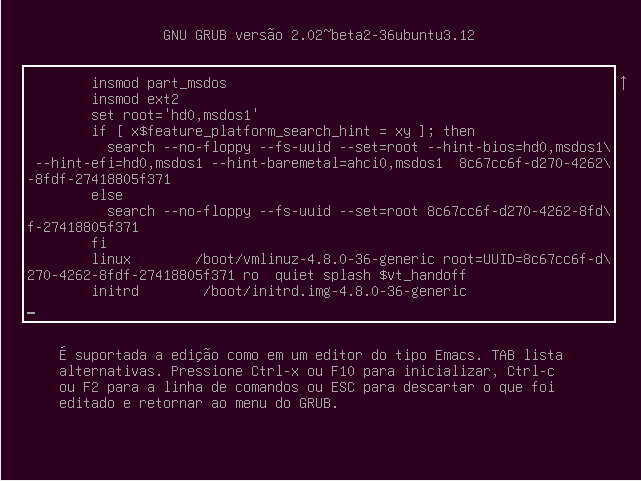
Neste arquivo, o GRUB passa algumas informações (parâmetros) para o [**kernel**](https://pt.wikipedia.org/wiki/N%C3%BAcleo_(sistema_operacional)), isto é, o núcleo do sistema operacional. Algumas dessas informações são: o sistemas de arquivos do root, o tipo de montagem de uma partição, entre outros.
Queremos entrar como super usuário no momento em que o Linux é carregado. Logo, vamos até a linha `linux` para colocar essa configuração:

Essa linha nos mostra quando o boot começar.
O GRUB tentará carregar o arquivo do kernel que está em `/boot/vmlinuz-4.8.0-36-generic` como usuário `root` (super usuário), em **modo de leitura** (`ro`, read only), sem escrever na tela (`quiet`), apresentando uma tela de carregamento (`splash`) e o modo gráfico (`$vt_randoff`).
Mas eu quero poder alterar a senha do meu usuário quando o sistema iniciar. Isto é, quero poder escrever as configurações, então vamos alterar a opção **`ro` (read only) para `rw` (read and write)**.
O sistema será acessado via o terminal. Então podemos retirar essas opções que mostram a tela de carregamento e o modo gráfico:

Bem, vamos acessar o sistema pelo terminal… Mas qual terminal?
Precisamos dizer para o GRUB iniciar um terminal assim que o sistema carregar, dessa forma conseguiremos realizar as alterações.
Para isso falaremos para ele iniciar (`init`) um [**Shell**](https://pt.wikipedia.org/wiki/Shell_script), como o [**Bash**](https://pt.wikipedia.org/wiki/Bash), um shell muito comum para os sistemas Linux, que está localizado na pasta `bin`:

Pronto! Configurações realizadas! Vamos dizer para o sistema iniciar com essas configurações. Para isso nós pressionamos `Ctrl + x` ou simplesmente `F10`.
O sistema irá iniciar com essas configurações em um terminal já logado como super usuário:

Agora resta apenas alterar a senha do usuário.
No meu caso vou alterar a senha do usuário administrador `yuri`, então posso dizer para o terminal: "Por favor, altere a senha (`passwd`) do usuário `yuri`":
`passwd yuri`
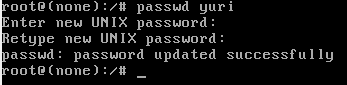
Vamos informar a nova senha e pronto! Vamos reiniciar o computador para instalar nosso programa. Já que vamos reiniciar a máquina podemos utilizar o comando **`reboot`**:

Hum… Deu um erro, não conseguimos reiniciar o computador. :(
Quando estamos como monousuário no GRUB, não conseguimos reiniciar o computador com esses comando como `reboot`.
Então, como podemos reiniciar nosso computador?
Bem, podemos desligá-lo da energia e ligá-lo novamente. Ou, podemos utilizar outro comando.
Existe um comando chamado `init`. Com este comando conseguimos mudar o nível de execução do sistema. Isto é, podemos desligá-lo, reiniciá-lo, entre outras coisas.
Cada nível possui um [**código**](https://www.lifewire.com/how-to-use-the-init-command-in-linux-4066930), como por exemplo o nível 6, que reinicia o sistema.
Já que queremos reiniciar o sistema, vamos falar para o `init` fazer isso para a gente:

Humm… outro erro. O sistema não conseguiu se comunicar com o comando desta forma. Vamos tentar passar o caminho até o local onde o comando está localizado para conseguir executá-lo.
Queremos executar (`exec`) o comando `init`, que está localizado na pasta `/sbin/init`, passando como parâmetro o nível 6 (reiniciar):

Quando o computador reiniciar podemos usar essa nova senha para instalar o Docker:
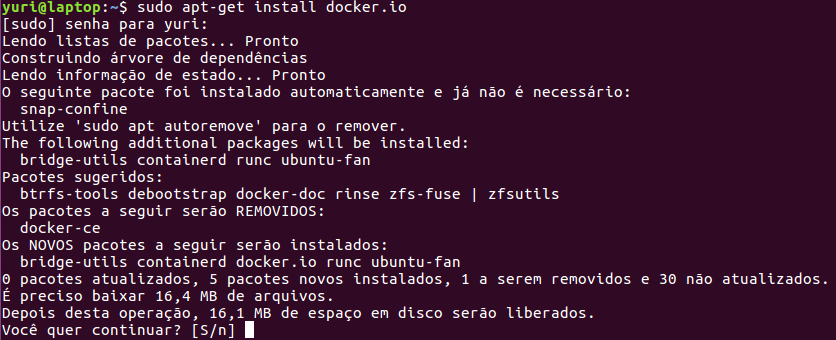
Funcionou! Conseguimos alterar a senha com sucesso.
## Para saber mais
Neste caso, eu utilizei o GRUB para mudar a senha do usuário administrador do sistema, mas poderia ter usado para modificar a senha do superusuário (root).
Essas mudanças feitas no GRUB são temporárias. Isto é, só valem na vez que foram configuradas no boot. Caso queira que as mudanças sejam permanentes é necessário alterar o arquivo do GRUB.
Esse é apenas um dos muitos jeitos de recuperar a senha do usuário administrador ou do usuário root no Linux. Além desse, outro muito utilizado é usando um **pendrive inicializável com um sistema operacional**. Dessa forma conseguimos montar uma partição e utilizá-la para alterar as senhas.
Veja que conseguimos acessar o sistema como root apenas com uma configuração no gerenciador de boot. Isso pode ser muito perigoso caso alguém com más intenções tenha acesso a máquina. Por isso existem algumas formas de [**proteger**](https://www.vivaolinux.com.br/artigo/GRUB-e-a-senha-de-root-como-atacar-e-proteger-seu-sistema?pagina=2) o GRUB desse tipo de ataque.
Nós acessamos o sistema como super usuário, por isso, **cuidado!** Caso não tenha certeza do que um comando faz, não o execute.
# Como acessar a partição e os dados do Linux EXT4 no Windows 11/10/8/7 [2024 atualizado]
Link: [https://br.easeus.com/partition-manager-tips/acessar-ext4-windows.html](https://br.easeus.com/partition-manager-tips/acessar-ext4-windows.html)
Escrito por [Jacinta](https://br.easeus.com/author/jacinta.html) Atualizado em 23/07/2024
Nesta página, você revelará 6 métodos práticos para acessar a partição EXT4 do Windows 11/10/8/7 em duas partes. Siga para saber como acessar e ler dados de partição Linux EXT4 no Windows com facilidade:
CONTEÚDO DA PÁGINA:
[Parte 1. Posso ler ext4 no Windows](https://br.easeus.com/partition-manager-tips/acessar-ext4-windows.html#part1)
[Parte 2. Como acessar dados EXT4 do Windows 11/10/8/7](https://br.easeus.com/partition-manager-tips/acessar-ext4-windows.html#part2)
[Parte 3. Como montar EXT4 no Windows 11/10/8/7](https://br.easeus.com/partition-manager-tips/acessar-ext4-windows.html#part3)
Se você estiver inicializando o Windows e o Linux em dual-boot em seu notebook ou computador desktop, você provavelmente pode querer acessar arquivos em sua partição Linux como EXT4 no Windows em algum momento. Confira como acessar e abrir arquivos de partição EXT4 no seu PC com Windows com facilidade.
## Parte 1. Posso ler EXT4 no Windows
*"Olá, recentemente mudei meu antigo disco rígido do computador Linux para meu laptop Windows 10 atual. Estou pensando em usar o disco rígido Linux como uma unidade de dados. Alguém sabe como ler e acessar a partição EXT4 do Windows 10?"*
Você está tendo um problema semelhante que não pode acessar nem montar uma partição Linux EXT4 no Windows 10/8/7? Para fazer isso, você precisará primeiro descobrir as duas perguntas a seguir:
**1. O que é EXT4?**
EXT4, conhecido como o quarto sistema de arquivos estendido, o sucessor do EXT3, é um dos sistemas de arquivos mais recentes usados pelos usuários do Linux. É o sistema de arquivos padrão para muitas distribuições Linux, incluindo Debian e Ununtu.
**2. O Windows 10 ou Windows 8/7 pode ler EXT4?**
Embora o EXT4 seja o sistema de arquivos Linux mais comum, ele não é compatível com o Windows por padrão. Portanto, a resposta para "o Windows pode ler EXT4" é não. Você pode facilmente visitar uma partição Windows NTFS do Linux. No entanto, o Windows não pode ler partições do Linux diretamente.
Mas isso não significa que não há como abrir ou acessar o EXT4 a partir do Windows. Para fazer isso, você precisará de ferramentas e resoluções de terceiros para obter ajuda.
Continue lendo e siga os métodos fornecidos na Parte 2 e na Parte 3, você aprenderá como acessar e ler dados de partição Linux EXT4 no Windows.
## Parte 2. Como acessar o Ext4 no Windows 11/10/8/7
Nesta parte, você aprenderá:
1. 1. Uma maneira rápida de visualizar o conteúdo da partição EXT4;
2. 2. Como acessar os dados da partição EXT4 e torná-los acessíveis pelo Windows.
Para usar o disco rígido Linux como um disco de dados no Windows, tornando a partição EXT4 acessível no Windows, você precisará primeiro verificar se há dados importantes salvos na unidade usando uma ferramenta de visualização EXT4.
Se você salvou dados importantes, pode aplicar um leitor EXT4 confiável para acessar e restaurar dados da partição. Então você pode formatar e converter a partição EXT4 para NTFS com um formatador EXT4 profissional. Nenhuma perda de dados ocorrerá.
Passe pelo processo completo a seguir e você tornará o EXT4 acessível no Windows 11/10/8/7:
Observe que, se você não se importa com os dados, vá para o formatador EXT4 em #2 para obter ajuda.
### \#1. Visualize e leia o conteúdo da partição EXT4
**Aplica-se a:** Visualizar conteúdo e dados da partição EXT4 no Windows
**Ferramenta importante:** [software gerenciador de partição](https://br.easeus.com/partition-manager/partition-master.html) Linux EXT4 - EaseUS Partition Master
**Windows 11/10/8/7**100% Seguro
Antes de começar a converter ou acessar a partição EXT4 do Windows, é essencial visualizar e verificar o conteúdo salvo no volume. Aqui, gostaríamos de recomendar que você experimente o software gerenciador de partição EXT4 confiável - EaseUS Partition Master.
Etapa 1. Inicie o EaseUS Partition Master, localize a partição EXT4.
Etapa 2. Clique com o botão direito do mouse na partição EXT4 e selecione "Propriedades".
Etapa 3. Abra e expanda as pastas no painel esquerdo para verificar o conteúdo da partição EXT4.
Se a partição Linux EXT4 contiver alguns arquivos valiosos, passe para a próxima fase e você aprenderá como acessar e recuperar dados de uma partição Linux no Windows.
### \#2. Acesse dados de partição EXT4 do Windows 11/10/8/7
**Aplica-se a:** Ler e acessar dados da partição EXT no Windows, tornando a partição EXT4 acessível ao formatar EXT4 para NTFS.
**Ferramentas importantes:** 1. Leitor EXT4; 2. Ferramenta de formatação EXT4.
Para evitar problemas desnecessários de perda de dados, antes de converter a partição EXT4, sugerimos que você aplique um leitor EXT4 confiável para acessar os dados salvos antecipadamente. Siga para tornar a partição EXT4 acessível sem perder nenhum dado:
**Primeiro. Use o leitor EXT4 para ler e restaurar dados de partição EXT4**
Então, como recuperar dados da partição EXT4 inacessível no Windows? Você precisará de um leitor EXT4 confiável para obter ajuda. O EaseUS Data Recovery Wizard, como um [software de recuperação de dados de disco rígido](https://br.easeus.com/data-recovery-software/data-recovery-wizard.html) profissional, é capaz de ajudar.
Observe que, se você perdeu ou excluiu dados em outros tipos de dispositivos de armazenamento, como partições EXT2/EXT3, unidade USB FAT32 ou disco rígido externo exFAT, este software verificará rapidamente e restaurará tudo o que você perdeu imediatamente.
Aqui, você pode aplicar este software para digitalizar, visualizar e restaurar tudo salvo na partição EXT4 em apenas 3 etapas:
**Passo 1. Inicie o software de recuperação de disco rígido EaseUS.**
Execute o EaseUS Data Recovery Wizard no seu PC e selecione a unidade no seu disco rígido onde você perdeu ou excluiu arquivos. Clique em "Procurar Dados Perdidos" e deixe este programa verificar todos os dados e arquivos perdidos no disco rígido selecionado.
**Passo 2. Verifique e visualize todos os dados perdidos do disco rígido.**
Encontre dados perdidos do disco rígido em "Arquivos Excluídos", "Arquivos Perdidos" ou use "Filtro" para navegar rapidamente pelos dados perdidos. Marque e clique duas vezes para visualizar esses arquivos encontrados.
**Passo 3. Restaure os dados perdidos do disco rígido em um local seguro.**
Após a visualização, selecione os arquivos desejados que você perdeu na unidade e clique em "Recuperar" para salvá-los. Navegue para escolher um local seguro no seu PC ou em outros dispositivos de armazenamento externo para armazenar esses dados restaurados do disco rígido.
Lembre-se de salvar os dados da partição EXT4 restaurada em outro local seguro no disco rígido do Windows.
**Próximo. Use o formatador EXT4 para tornar a partição EXT4 acessível no Windows**
Como você sabe, o Windows não oferece suporte ao acesso a partições de sistema de arquivos baseadas em Linux, o que, como resultado, os usuários do Windows não podem visualizar nem fazer alterações nas partições EXT4/3/2 no PC com Windows.
A maneira mais fácil que você pode tentar é alterar o sistema de arquivos da partição Linux de EXT4/3/2 para um compatível com o Windows - NTFS ou FAT32, tornando uma partição EXT4/3/2 acessível no Windows. Aqui, recomendamos que você experimente um formatador EXT4 confiável - EaseUS Partition Master para obter ajuda.
**Windows 11/10/8/7**100% Seguro
Você pode converter facilmente uma partição EXT4 para NTFS com apenas alguns cliques simples, formatando:
**Etapa 1.** Inicie o EaseUS Partition Master, clique com o botão direito do mouse na partição que deseja formatar e escolha "Formatar".
**Etapa 2.** Na nova janela, insira o rótulo da partição, escolha o sistema de arquivos FAT32/EXT2/EXT3/EXT4 e defina o tamanho do cluster de acordo com suas necessidades e clique em "OK".
**Etapa 3.** Em seguida, você verá uma janela de aviso, clique em "OK" para continuar.
**Etapa 4.** Clique no botão "Executar operação" no canto superior esquerdo para revisar as alterações e clique em "Aplicar" para iniciar a formatação da partição para FAT32/EXT2/EXT3/EXT4.
[https://youtu.be/qQjVlBV7SJY](https://youtu.be/qQjVlBV7SJY)
[](https://capacita.siteinternet.com.br/uploads/images/gallery/2024-07/image.png)
**Você também pode gostar de:**
Como particionar o disco rígido no Windows 10
Depois de formatar a partição EXT4 para um sistema de arquivos normal, você também pode reparticionar o volume. Siga para saber como particionar um disco rígido por conta própria.
## Parte 3. Como montar EXT4 no Windows 11/10/8/7
Nesta parte, você aprenderá: Como montar a partição EXT4 no Windows, acessando arquivos EXT4 do Windows usando software de terceiros.
Se você pretende manter o Linux com Windows no computador, acessando arquivos EXT4 do Windows, você pode tentar montar a partição EXT4 no Windows 11/10/8/7. Mas como faço para montar uma unidade Linux no Windows 10?
Se você está com a mesma dúvida em mente, fique aqui. Nesta parte, apresentaremos a você 3 leitores Linux confiáveis, ajudando você a montar EXT4 no Windows 11/10/8/7:
Pegue uma ferramenta e siga os tutoriais abaixo para montar o EXT4 em seu computador Windows agora:
### \#1. Montar EXT4 no Windows usando Ext2Fsd
Ext2Fsd é um driver de sistema de arquivos do Windows, projetado para sistema de arquivos EXT4/3/2. Ele permite que usuários do Windows leiam e acessem sistemas de arquivos Linux como EXT4 montando a partição EXT4 no Windows.
Aqui estão as etapas:
Etapa 1. Instale e inicie o driver Ext2Fsd no seu PC com Windows.
Etapa 2. Vá para Ferramentas > Gerenciamento de serviços > Inicie o serviço Ext2Fsd antes de acessar os arquivos do Linux.
Etapa 3. Marque as caixas "Montar todos os volumes no modo somente leitura" e "Atribuir letra de unidade automaticamente" e clique em "Aplicar".
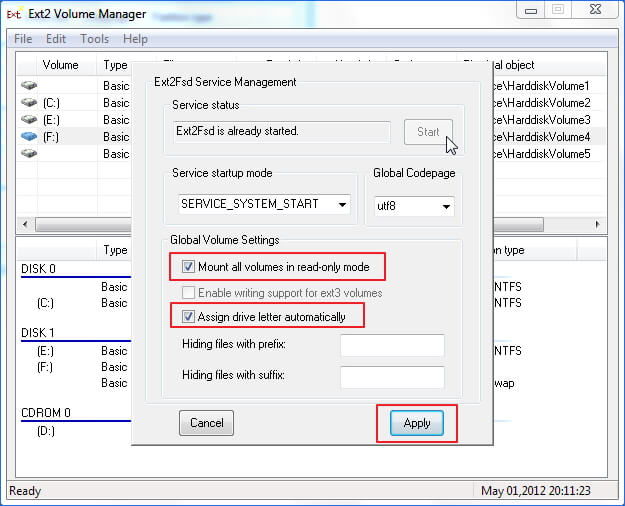
Depois disso, você pode encontrar suas partições EXT4 com suas próprias letras de unidade no Windows Explorer. Você pode até acessar diretamente os arquivos na partição EXT4.
### \#2. Montar a partição EXT4 no Windows 10 via DiskInternals Linux Reader
[DiskInternals Linux Reader](https://www.diskinternals.com/linux-reader/) suporta sistema de arquivos EXT4, ReFS, HFS e HFS+. Ao contrário do Ext2Fsd, o DiskInternals Linux Reader permite que os usuários do Windows visitem e naveguem nas partições do Linux dentro deste aplicativo.
Etapa 1. Instale e inicie o DiskInternals Linux Reader no Windows PC.
Etapa 2. Localize a partição EXT4 neste aplicativo.
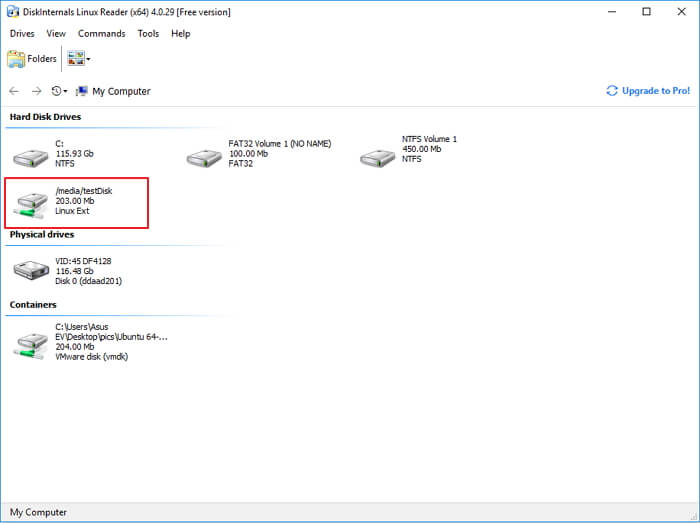
Etapa 3. Clique duas vezes para abrir a partição EXT4, visualizar e verificar os dados salvos na partição.
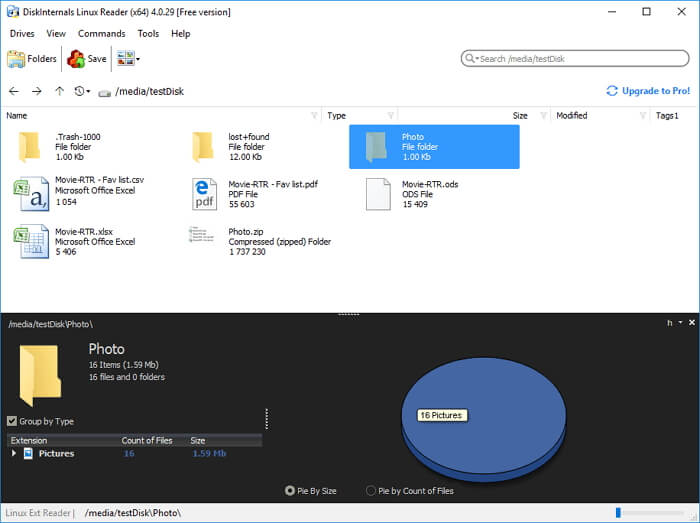
Etapa 4. Para usar os arquivos na partição EXT4, selecione os arquivos e clique em "Salvar" para armazená-los em outro local seguro no seu PC Windows.
### \#3. Montar EXT4 no Windows usando Ext2explore
[Ext2explore](https://sourceforge.net/projects/ext2read/) é um aplicativo de código aberto que funciona de forma semelhante ao DiskInternals Linux Reader. Ele permite que os usuários acessem o conteúdo da partição EXT4 apenas neste aplicativo.
Aqui estão as etapas que você pode aplicar para acessar o EXT4 do Windows via Ext2explore:
Etapa 1. Baixe o Ext2explore.ext e execute este programa no Windows PC.
Etapa 2. Uma vez iniciado, clique com o botão direito do mouse e selecione "Executar como administrador".
Você também pode clicar com o botão direito do mouse em ext2explore.exe e selecionar "Propriedades" > Compatibilidade > Marque "Executar este programa como administrador" > "OK".
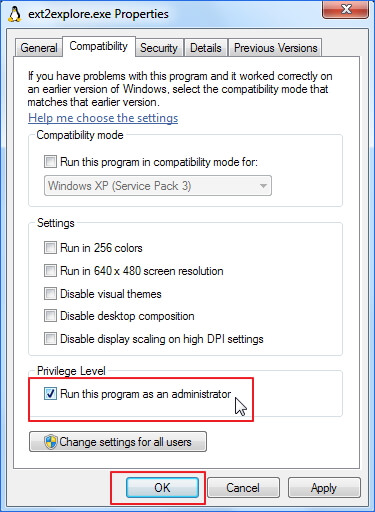
Etapa 3. Depois disso, você pode navegar pela partição Linux EXT4 e seu conteúdo.
Para usar os arquivos, clique com o botão direito do mouse nos arquivos e selecione "Salvar" > Navegue em outro local seguro para salvar os arquivos no computador Windows.
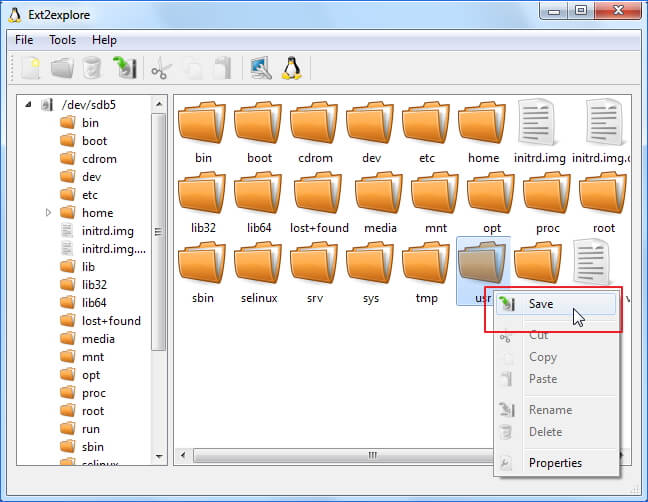
## Conclusão
Nesta página, você aprendeu o que é EXT4 e duas maneiras diferentes de acessar e abrir a partição EXT4 no Windows.
Para usar a partição Linux EXT4 como uma unidade de dados no Windows, você precisará exportar e restaurar os dados da partição EXT4 primeiro usando o EaseUS Data Recovery Wizard. Em seguida, converta a partição EXT4 em um sistema de arquivos reconhecido pelo Windows - NTFS ou FAT32 formatando via EaseUS Partition Master.
Para manter o Linux e o Windows em seu computador e acessar os arquivos EXT4 do Windows, você precisará montar a partição do Linux no Windows. Para fazer isso, você pode tentar as ferramentas recomendadas para obter ajuda. Para a maneira mais direta, sugerimos que você experimente o Ext2Fsd.
Se você tiver mais dúvidas sobre sistemas de arquivos EXT4 ou Linux, verifique as perguntas frequentes abaixo, você pode obter a resposta desejada.
### Perguntas Frequentes
1\. O Windows pode ler ext4?
Os sistemas operacionais Windows não são compatíveis com o sistema de arquivos Linux, incluindo EXT4. Como resultado, o Windows não pode ler ou detectar diretamente uma partição ou dispositivo EXT4. Mas se você quiser acessar o EXT4 do Windows, tente os métodos listados nesta página. Você tornará isso possível.
2\. Qual é melhor, NTFS ou EXT4?
Como NTFS e EXT4 são dois sistemas de arquivos diferentes projetados para dois sistemas operacionais, para testar o desempenho, você precisará fazer isso no sistema operacional nativo.
Conforme testado, o NTFS é muito mais rápido que o EXT4 no Windows. Além disso, se estiver no Linux, o EXT4 é mais rápido que o NTFS.
3\. O Windows pode gravar em EXT4?
Na verdade, se você estiver executando o Windows e o Linux no mesmo PC, é impossível acessar o EXT4 no Windows, o que, como resultado, você não pode fazer nada em uma partição EXT4 ou dispositivo de armazenamento.
Em uma palavra, o Windows não pode gravar em EXT4. Se você realmente precisa escrever coisas em EXT4 no sistema operacional Windows, precisará primeiro converter EXT4 em um dispositivo baseado em sistema de arquivos NTFS ou FAT32. Você pode executar o EaseUS Partition Master com seu recurso Formatar para obter ajuda, conforme mostrado nesta página na Parte 2.
4\. Como faço para abrir uma unidade Linux no Windows?
Sendo semelhante às formas mostradas nesta página, para abrir uma unidade Linux no Windows, você pode tentar alterar seu sistema de arquivos para NTFS/FAT32 ou montar a unidade Linux no Windows.
Se você preferir alterar o sistema de arquivos da unidade Linux para torná-lo legível e gravável, formate-o em NTFS ou FAT32 com as soluções da Parte 2 nesta página.
Se você quiser apenas visitar ou acessar arquivos salvos na unidade Linux a partir do Windows, monte-o no Windows usando os aplicativos recomendados na Parte 3.
# Como Acessar Arquivos do Linux Pelo Windows 10 [Guia Completo]
Link: [https://www.minitool.com/pt/particao-disco/accessar-arquivos-linux-pelo-win10.html](https://www.minitool.com/pt/particao-disco/accessar-arquivos-linux-pelo-win10.html)
O que é um sistema de arquivos Linux? Posso ler uma unidade Linux pelo Windows? Como faço para acessar arquivos do Linux pelo Windows 10? Muitos usuários procuram respostas para estas perguntas. Nesse artigo, a [MiniTool](https://www.minitool.com/pt/) vai analisar cada uma delas com você.
Se você utiliza uma distribuição Linux juntamente com um sistema Windows no seu notebook ou desktop, pode ser necessário acessar os arquivos Linux pelo Windows 10. Após analisarmos inúmeros relatos de usuários em fóruns, concluímos que as seguintes perguntas são feitas com maior frequência. Na parte seguinte, vamos explorá-las em detalhes.
## O Que é o Sistema de Arquivos Linux
Para acessar arquivos Linux pelo Windows com sucesso, a primeira coisa que você deve saber é qual sistema de arquivos é suportado pelo Linux. Os [Sistemas de Arquivos Linux](https://www.partitionwizard.com/partitionmagic/linux-file-system.html) mais comuns são Ext2, Ext3 e Ext4.
Atualmente, o Ext4 se tornou o sistema de arquivos padrão para a maioria das distribuições Linux, incluindo Debian e Ubuntu. Isso ocorre porque o Ext4 oferece mais flexibilidade para armazenar arquivos grandes do que outros sistemas de arquivos estendidos. Segundo o fabricante, o Ext4 pode suportar o armazenamento de um arquivo de até 16 TB e a criação de uma partição de até 1 EB.
## Posso Acessar Arquivos do Linux pelo Windows 10?
Muitos usuários têm máquinas que utilizam o Windows 10 e o Linux com inicialização dupla (*dual boot*) ou discos rígidos formatados em Ext4. Então, aqui vem uma nova pergunta. Posso acessar arquivos do Linux pelo Windows 10? Como discutido acima, o sistema de arquivos Linux mais comum é o Ext4. Ou seja, você precisa ler o Ext4 no Windows se quiser acessar os arquivos do Linux.
No entanto, o sistema de arquivos Ext4 não é suportado pelo Windows. Ao clicar com o botão direito do mouse na partição Ext4, você verá que os menus **Abrir** e outras funções ficam acinzentados. Obviamente, você não poderá acessar os arquivos do Ubuntu diretamente no Windows. O que fazer quando você precisar ler uma unidade Linux no Windows? Por favor, continue lendo a parte a seguir.
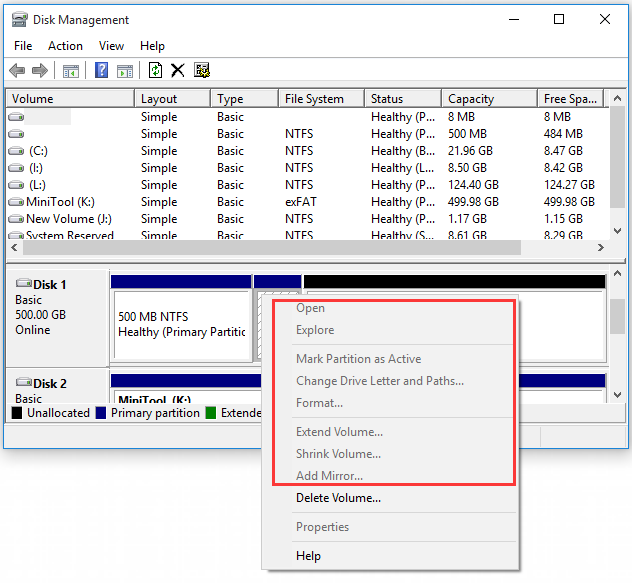
## Como Acessar Arquivos do Linux no Windows 10
Como o Windows 10 não oferece nenhum método direto para acessar Ext4, você precisa utilizar algumas ferramentas profissionais para acessar arquivos do Linux pelo Windows. Aqui, resumimos os 4 melhores leitores de partição Ext4 no Windows.
### 1º Método. Use o MiniTool Partition Wizard Para Ler a Partição Ext4
O MiniTool Partition Wizard é um gerenciador de partições completo que suporta muitos sistemas de arquivos, incluindo FAT16/32, NTFS, exFAT, Ext2/3/4 e Linux Swap. Com este poderoso software, você pode [formatar um disco rígido](https://www.partitionwizard.com/partitionmanager/how-to-format-a-hard-drive.html), converter NTFS em FAT, [converter MBR em GPT](https://www.minitool.com/pt/particao-disco/converter-mbr-em-gpt-apaga-todas-as-particoes.html), recuperar dados perdidos, [migrar SO para SSD/HD](https://www.minitool.com/pt/particao-disco/transferir-windows-10.html), reconstruir o MBR e muito mais.
[MiniTool Partition Wizard FreeClique para baixar100%Limpo e seguro](https://cdn2.minitool.com/?p=pw&e=pw-free)
Para acessar o Ext4 no Windows sem problemas, você pode torná-lo acessível formatando-o como NTFS. Embora a formatação exclua os dados do disco rígido, o MiniTool pode ajudá-lo a restaurar os dados da partição Ext4 para que você possa acessar os arquivos do Linux pelo Windows 10.
**Parte 1. Leia a Unidade Linux no Windows**
Siga as etapas abaixo para formatar a partição Ext4 como NTFS ou outros sistemas de arquivos suportados pelo Windows 10.
**Passo 1.** Inicie o MiniTool Partition Wizard para entrar em sua interface principal e, em seguida, clique com o botão direito do mouse na partição **Ext4** no mapa de disco e selecione **Formatar**.
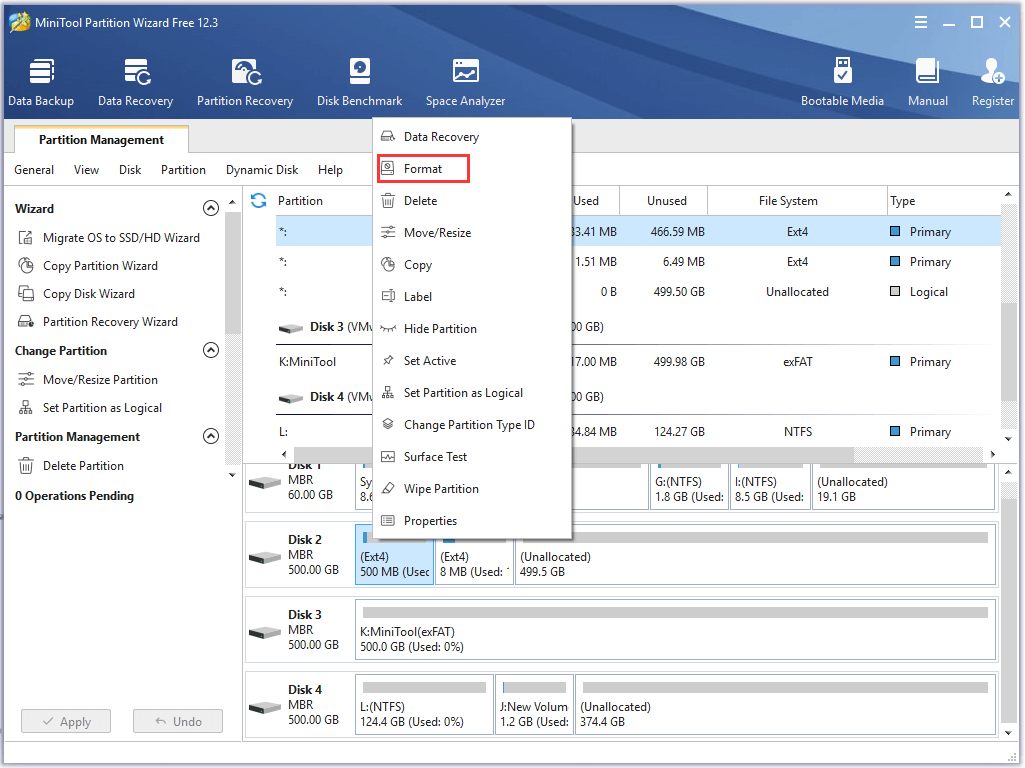
**Passo 2.** Na janela pop-up, selecione **NTFS** no menu suspenso e clique em **OK** para continuar.
**Passo 3.** Clique no botão **Aplicar** para executar a operação.
**Parte 2: Restaure os Dados da Partição Ext4**
Agora, é preciso tornar o Ext4 acessível no Windows 10. No entanto, antes de proceder, você deve querer saber como recuperar os dados da partição formatada. O MiniTool Partition Wizard também pode ser usado para restaurar os dados da partição Ext4. Continue lendo.
**Dicas:**
**Dica:** O MiniTool Partition Wizard Free Edition não oferece suporte à recuperação de dados. Você precisa instalar uma edição profissional ou uma edição mais avançada para recuperar a partição perdida.
**Passo 1.** Na interface principal, selecione a partição que você acabou de formatar para NTFS e clique em **Recuperação de Partição** na barra de ferramentas superior. Clique em **Avançar** na janela pop-up.
**Passo 2.** Escolha um intervalo de verificação com base em suas necessidades. Existem 3 opções de intervalos para verificar o disco, incluindo **Disco Inteiro, Espaço Não-Alocado** e **Intervalo Específico**. Aqui, usaremos **Disco Inteiro** como exemplo e clicamos em **Avançar** para continuar.
**Passo 3.** Selecione um método de verificação para fazer a varredura do disco e clique em **Avançar** para continuar.
**Passo 4.** Certifique-se de verificar todas as partições, incluindo partições existentes e partições excluídas/formatadas. Aguarde algum tempo até que a verificação seja concluída e clique no botão **Concluir**.
**Passo 5.** Clique no botão **Aplicar** para recuperar a partição formatada no disco rígido.
Agora, a partição formatada deve ser recuperada. Em seguida, você pode ler a partição Linux no Windows 10 e acessar seus arquivos.
Além disso, você pode experimentar mais outros três utilitários para acessar o Ext4 pelo Windows 10. Continue lendo!
### 2º Método. Use o Ext2Fsd
[Ext2Fsd](https://sourceforge.net/projects/ext2fsd/) é um driver de sistema de arquivos do Windows que suporta os sistemas de arquivos Ext2/3/4. Ele permite que você leia a partição Linux no Windows 10 e acesse os arquivos do Ubuntu montando a partição Ext4 e atribuindo uma letra de unidade. Você pode configurar o Ext2Fsd para abrir a cada inicialização ou apenas abri-lo quando precisar.
Para acessar o Ext4 no Windows, siga as etapas abaixo:
**Passo 1.** Instale esta ferramenta no seu PC com Windows 10 e inicie o driver.
**Observação:**
**Observação:** Se você não quiser iniciar o software automaticamente a cada inicialização, não marque a caixa de seleção **Iniciar Ext2Fsd automaticamente quando o sistema for inicializado**.
**Passo 2.** Na interface principal do Ext2Fsd, navegue até a aba **Ferramentas** e selecione **Gerenciamento de Serviço** no menu de contexto.
**Dicas:**
**Dica:** Se você não configurou o Ext2Fsd para iniciar automaticamente na inicialização, vá até **Ferramentas > Gerenciamento de Serviço > Iniciar serviço Ext2Fsd** antes de acessar os arquivos do Linux no Windows 10.
**Passo 3.** Na janela **Gerenciamento de Serviço do Ext2Fsd**, marque as caixas de seleção para **Montar todos os volumes no modo somente leitura** e **Atribuir letra da unidade automaticamente**. Em seguida, clique em **Aplicar** para executar a operação. Depois disso, essa ferramenta montará e atribuirá automaticamente as letras de unidade às partições do Linux.
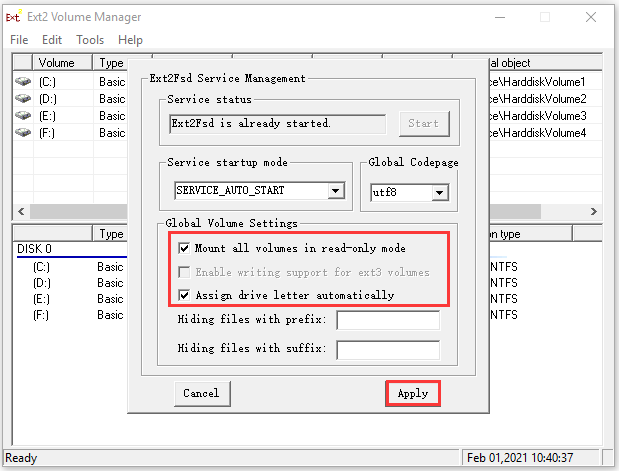
**Passo 4.** Pressione as teclas **Win + E** para abrir o **Explorador de Arquivos**. Você perceberá que as partições Ext4 estão montadas com suas próprias letras de unidade e você pode acessar diretamente os arquivos do Ubuntu pelo Windows.
### 3º Método. Use o DiskInternals Linux Reader
[DiskInternals Linux Reader](https://www.diskinternals.com/linux-reader/) é um utilitário gratuito para acessar arquivos do Linux pelo Windows 10. Esta ferramenta suporta o sistema de arquivos Ext4 além de [ReFS](https://www.minitool.com/lib/resilient-file-system-020.html), HFS e sistemas de arquivos HFS+. Diferente do Ext2Fsd, este programa permite que você leia o drive Linux no Windows dentro do próprio aplicativo.
**Passo 1.** Instale o DiskInternals Linux Reader no seu PC Windows e inicie o programa para entrar na interface principal.
**Passo 2.** Depois que o Linux Reader detectar todas as partições em seu disco rígido, navegue até a partição **Ext4** na lista de unidades.
**Passo 3.** Clique duas vezes na partição **Ext4** para abri-la e visualizar/acessar os dados salvos na unidade.
**Passo 4.** Se você quiser fazer uso total dos arquivos do Linux no Windows, será necessário transferir os arquivos da partição Ext4 para outro local compatível com o sistema de arquivos do Windows. Para isso, clique com o botão direito do mouse no arquivo que você precisa e clique em **Salvar** no menu de contexto.
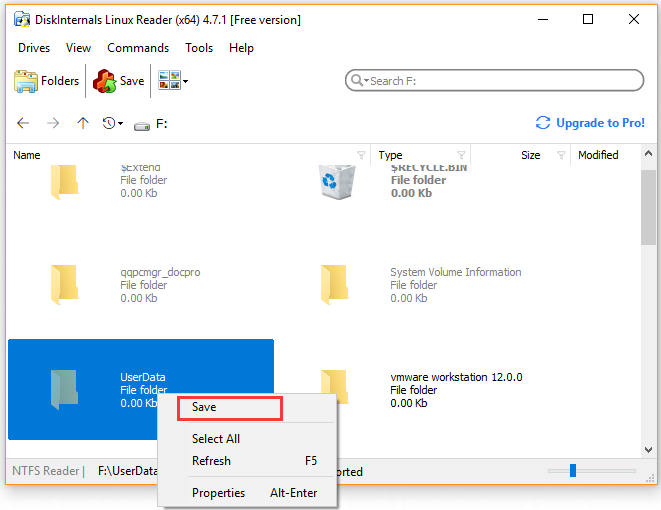
**Passo 5.** Selecione a opção **Salvar Arquivos** e clique no botão **Avançar**.
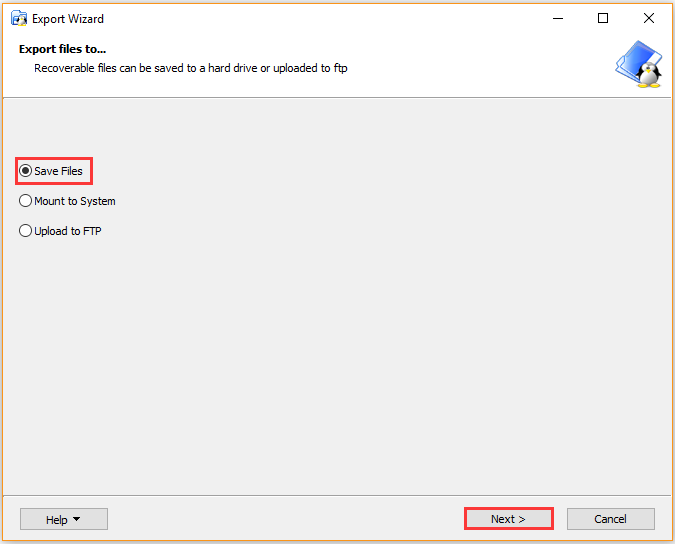
**Passo 6.** Clique no botão **Procurar** para selecionar um local onde você salvará o arquivo e clique em **OK**. Depois, clique em **Avançar**. Aguarde algum tempo até que o arquivo seja salvo no local selecionado.
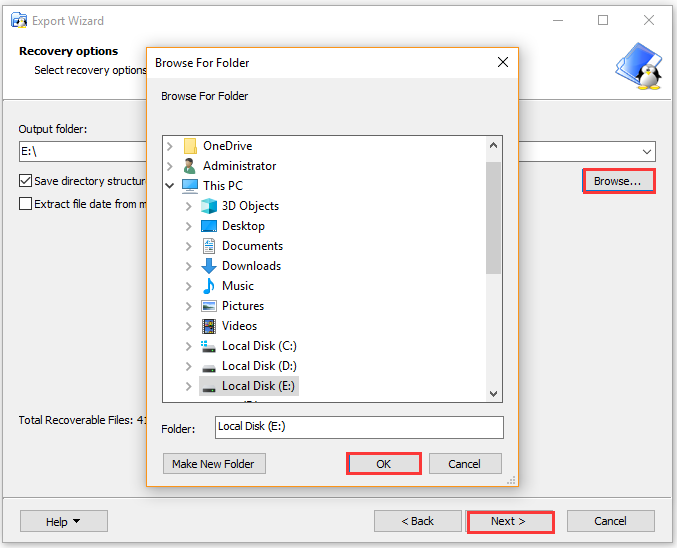
### 4º Método. Use o Ext2explore
[Ext2explore](https://sourceforge.net/projects/ext2read/) é um aplicativo explorador prático para acessar arquivos Ext2/3/4 no Windows 10. Ele funciona de forma semelhante ao DiskInternals Linux Reader, mas não permite visualizar arquivos. Este utilitário não precisa ser instalado, e você pode executar o arquivo .exe diretamente.
Lembre-se de que você deve executar o programa Ext2explore.exe como administrador ou receberá uma mensagem de erro.
**Passo 1.** Clique com o botão direito do mouse no arquivo **Ext2explore.exe** que você baixou no PC Windows e selecione **Executar como administrador**.
**Dicas:**
**Dica:** Se preferir, você pode clicar com o botão direito do mouse em **Ext2explore.exe** e selecionar **Propriedades**. Em seguida, vá para a aba **Compatibilidade** e marque a caixa de seleção **Executar este programa como administrador > OK**.
**Passo 2.** Agora você pode acessar a partição Ext4 e seus arquivos Linux. Para abrir os arquivos no sistema Windows, você precisa salvá-los na partição do Windows. Clique com o botão direito do mouse no arquivo, selecione **Salvar** e navegue para outro local para salvar os arquivos no sistema Windows.
[Eu uso o Windows 10 e o Linux um sistema de inicialização dupla. Embora a distribuição Linux tenha suporte interno para partição NTFS do Windows, o Windows não pode ler a unidade Linux. Felizmente, encontrei 4 métodos eficazes para acessar arquivos do Linux pelo Windows 10. Esse post também pode ser útil para você.Clique para tweetar](https://twitter.com/intent/tweet?url=https://www.minitool.com/pt/particao-disco/accessar-arquivos-linux-pelo-win10.html&text=Eu+uso+o+Windows+10+e+o+Linux+um+sistema+de+inicializa%C3%A7%C3%A3o+dupla.+Embora+a+distribui%C3%A7%C3%A3o+Linux+tenha+suporte+interno+para+parti%C3%A7%C3%A3o+NTFS+do+Windows%2C+o+Windows+n%C3%A3o+pode+ler+a+unidade+Linux.+Felizmente%2C+encontrei+4+m%C3%A9todos+eficazes+para+acessar+arquivos+do+Linux+pelo+Windows+10.+Esse+post+tamb%C3%A9m+pode+ser+%C3%BAtil+para+voc%C3%AA.&via=MiniTool_)
## Qual a Sua Opinião?
Este post se concentrou principalmente em como acessar arquivos Linux pelo Windows 10. Você pode escolher um dos 4 melhores utilitários mostrados aqui para acessar o Ext4 no Windows. Se tiver boas dicas para compartilhar sobre esse assunto, escreva para a gente na seção de comentários. Além disso, você pode enviar um e-mail para caso tenha alguma dúvida sobre o software MiniTool.
## Perguntas Frequentes – Como Acessar Arquivos do Linux pelo Windows 10
**Como transferir arquivos do Windows para o Linux?**
Após analisar um grande número de relatos e referências de usuários, resumimos os 5 métodos a seguir para transferir arquivos entre Windows e Linux.
1. Use o **Compartilhamento de pastas na rede**.
2. Transfira arquivos do Windows para o Linux por [FTP](https://www.minitool.com/lib/ftp-meaning.html).
3. Copie com segurança os arquivos ou pastas para o Linux usando [SSH](https://www.minitool.com/lib/what-is-ssh.html).
4. Compartilhe os arquivos com um software de sincronização.
5. Use a pasta compartilhada na máquina virtual Linux.
**Como montar uma pasta Linux no Windows?**
Aqui estão as etapas detalhadas para montar uma pasta Linux no Windows.
1. Pressione as teclas **Win + E** para abrir o **Explorador de Arquivos** e mapeie sua pasta ou diretório inicial do Linux no Windows.
2. Clique em **Ferramentas** no menu superior e selecione **Mapear unidade de rede**.
3. Selecione a letra da unidade no menu suspenso e clique em **Procurar** para selecionar a pasta que deseja montar.
4. Clique em **Concluir**
**Como acessar uma unidade de rede no Linux?**
1. Abra um terminal no seu Linux, digite **sudo apt-get install smbfs** e pressione **Enter**.
2. Digite a linha **sudo yum install cifs-utils** no terminal e pressione **Enter**.
3. Execute o **sudo chmod u+s /sbin/mount.cifs /sbin/umount.cifs**
4. Use o utilitário **cifs** para mapear uma unidade de rede para armazenamento.
**Como acessar uma pasta compartilhada no Linux?**
O método mais simples consiste em pressionar as teclas **Alt + F2** para abrir a caixa de diálogo **Executar** e digitar **smb://** seguido do **endereço IP** do seu servidor Linux e o **nome da pasta**. Em seguida, clique no botão **Executar**.
# Backup com Rsync e Rclone - Shell Script
**Gerado pelo ChatGPT**
Claro! Vou te mostrar um exemplo de shell script que usa `rsync` para fazer backup local e `rclone` para fazer backup em um serviço de armazenamento em nuvem. Esse script é útil para quem deseja manter backups locais e na nuvem com uma única execução.
\### Exemplo de Script de Backup com `rsync` e `rclone`Este script faz o backup de um diretório local para um local de backup e, em seguida, usa `rclone` para enviar o backup para um serviço de armazenamento em nuvem.```bash
**\#!/bin/bash**
**\# Configurações**
SOURCE\_DIR="/caminho/do/diretorio/origem" # Diretório que você deseja fazer backupLOCAL\_BACKUP\_DIR="/caminho/do/backup/local" # Diretório onde o backup local será salvoRCLONE\_REMOTE="nome\_do\_remote:backup" # Configuração do rclone (ex: gdrive:backup)
**\# Data e hora atuais para adicionar aos nomes dos arquivos**
now=$(date +"%Y-%m-%d\_%H-%M-%S")
**\# Nome do arquivo de backup**
BACKUP\_FILE="backup\_$now.tar.gz"
**\# Função para verificar se um comando está disponível**
check\_command() { command -v "$1" >/dev/null 2>&1 || { echo >&2 "O comando $1 não está instalado. Saindo."; exit 1; }}
**\# Verifica se rsync e rclone estão instalados**
check\_command rsynccheck\_command rclone
**\# Cria o diretório de backup local, se não existir**
mkdir -p "$LOCAL\_BACKUP\_DIR"
**\# Cria o backup local com rsync**
echo "Iniciando backup local com rsync..."rsync -avzhP --delete "$SOURCE\_DIR/" "$LOCAL\_BACKUP\_DIR/"echo "Backup local concluído."
**\# Compacta o backup local**
echo "Compactando o backup..."tar -czf "$LOCAL\_BACKUP\_DIR/$BACKUP\_FILE" -C "$LOCAL\_BACKUP\_DIR" "$(basename "$SOURCE\_DIR")"echo "Compactação concluída."
**\# Envia o backup para o serviço de armazenamento em nuvem usando rclone**
echo "Enviando o backup para o armazenamento em nuvem com rclone..."rclone copy "$LOCAL\_BACKUP\_DIR/$BACKUP\_FILE" "$RCLONE\_REMOTE/"echo "Backup na nuvem concluído."
**\# Limpa arquivos de backup antigos, mantendo os últimos 5 backups**
echo "Removendo backups antigos..."find "$LOCAL\_BACKUP\_DIR" -type f -name "backup\_\*.tar.gz" -mtime +30 -exec rm {} \\;echo "Limpeza concluída."
**\# Mensagem final**
echo "Processo de backup completo. Arquivo de backup local em: $LOCAL\_BACKUP\_DIR/$BACKUP\_FILE"```
**\### Como usar o script:**
1\. \*\*Crie o arquivo do script:\*\*
```bash
nano backup\_script.sh
```
2\. \*\*Cole o conteúdo do script no editor e salve o arquivo (Ctrl + X, depois Y, e Enter).\*\*
3\. \*\*Dê permissão de execução ao script:\*\*
```bash
chmod +x backup\_script.sh
```
4\. \*\*Execute o script:\*\*
```bash
sudo ./backup\_script.sh
```
**\### Explicação dos Comandos e Funções:**
\- \*\*`rsync -av --delete "$SOURCE\_DIR/" "$LOCAL\_BACKUP\_DIR/"`\*\*: Sincroniza o diretório de origem com o diretório de backup local. O `--delete` garante que os arquivos deletados no diretório de origem também sejam removidos do backup.
\- \*\*`tar -czf "$LOCAL\_BACKUP\_DIR/$BACKUP\_FILE"`\*\*: Compacta o diretório de backup local em um arquivo `.tar.gz`.
\- \*\*`rclone copy "$LOCAL\_BACKUP\_DIR/$BACKUP\_FILE" "$RCLONE\_REMOTE/"`\*\*: Envia o arquivo de backup compactado para o serviço de armazenamento em nuvem configurado no `rclone`.
\- \*\*`find "$LOCAL\_BACKUP\_DIR" -type f -name "backup\_\*.tar.gz" -mtime +30 -exec rm {} \\;`\*\*: Remove backups locais antigos, mantendo apenas os últimos 30 dias de backups.
**\### Configuração do `rclone`:**
1\. \*\*Instale o `rclone`:\*\*
```bash
sudo apt-get install rclone
```
2\. \*\*Configure o `rclone`:\*\*
```bash
rclone config
```
Siga as instruções para configurar o `rclone` para o serviço de armazenamento em nuvem de sua escolha.
3\. \*\*Verifique a configuração do `rclone`:\*\*
```bash
rclone ls nome\_do\_remote:
```
Substitua os caminhos e nomes conforme necessário para se adequar ao seu ambiente. Se precisar de mais ajustes ou tiver perguntas, estou à disposição!
# How to Upgrade Ubuntu 22.04 to 24.04 LTS: A Complete Guide
Link: [https://www.cyberciti.biz/faq/how-to-upgrade-from-ubuntu-22-04-lts-to-ubuntu-24-04-lts/](https://www.cyberciti.biz/faq/how-to-upgrade-from-ubuntu-22-04-lts-to-ubuntu-24-04-lts/)
Ubuntu 24.04 LTS (Noble Numbat) was launched on April 25th, 2024. This new version will be supported for five years until June 2029. The armhf architecture now provides support for the Year 2038 problem. The upgrades include significant updates to core packages like Linux kernel, systemd, Netplan, toolchain upgrades for better development support, enhanced security measures, and performance optimizations. It also has an updated GNOME desktop environment and other default applications. Let us see how to upgrade Ubuntu 22.04 LTS to Ubuntu 24.04 LTS using the CLI over ssh-based session.
Users of Ubuntu 23.10 will be offered an automatic upgrade to 24.04 shortly after its release. However, users of Ubuntu 22.04 LTS will only receive the automatic upgrade offer once **24.04.1 LTS becomes available, which is scheduled for August 29** . However, you can force an immediate upgrade using the -d option and jump from **22.04 to 23.10** and then finally to **24.04 LTS**. This is until August 29, 2024. After that date, you can directly jump from 22.04 to 24.04 LTS directly.
Tutorial details
Difficulty level
[Intermediate](https://www.cyberciti.biz/faq/tag/intermediate/ "See all Intermediate Linux / Unix System Administrator Tutorials")
Root privileges
[Yes](https://www.cyberciti.biz/faq/how-can-i-log-in-as-root/ "See how to login as root user")
Requirements
Linux terminal
Category
Server Upgrade
OS compatibility
[Linux](https://www.cyberciti.biz/faq/category/linux/ "See all Linux distributions tutorials") • [Ubuntu](https://www.cyberciti.biz/faq/category/ubuntu-linux/ "See all Ubuntu Linux tutorials")
Est. reading time
7 minutes
Advertisement
## Step 1 – Backup your system
Backing up your data before upgrading from Ubuntu 22.04 LTS to 24.04 LTS is vital for two reasons. First, even though thoroughly tested, unexpected issues can arise during the upgrade process. If something goes wrong, a backup ensures you can recover irreplaceable files like databases, code written in PHP/Perl/Python, documents, photos, or scripts. Second, upgrading to a new LTS version might introduce changes that cause some of your data incompatibility. A backup allows you to restore and migrate the data to a format compatible with the new Ubuntu version. Remember to back up your data before upgrading to Ubuntu. Don’t blame us if you lose everything!
### How do I backup important data or everything?
Cloud providers usually offer backup options, such as taking a snapshot of your cloud server (here is guide for [EC2](https://docs.aws.amazon.com/prescriptive-guidance/latest/backup-recovery/ec2-backup.html) and [Lightsail VM](https://docs.aws.amazon.com/lightsail/latest/userguide/understanding-instance-snapshots-in-amazon-lightsail.html)). Alternatively, you can use various backup tools like [rsnapshot](https://www.cyberciti.biz/faq/linux-rsnapshot-backup-howto/), [tarsnap](https://www.cyberciti.biz/faq/how-to-compile-and-install-tarsanp-on-a-ubuntudebian-linux/), [restic](https://restic.net/), [kbackup](https://apps.kde.org/kbackup/), [duplicity](https://duplicity.us/), [bacula](https://www.bacula.org/), and [Déjà Dup](https://apps.gnome.org/DejaDup/). Testing your backups and verifying that they can be restored is necessary, as is finding out how long it takes to restore the data.
## Step 2 – Update your system
Run the [apt command](https://www.cyberciti.biz/faq/ubuntu-lts-debian-linux-apt-command-examples/ "apt Command Examples for Ubuntu/Debian Linux") to upgrade all installed packages on the Ubuntu 22.04 LTS:
`$ sudo apt update$ sudo apt list --upgradable | more$ sudo apt upgrade`
[](https://www.cyberciti.biz/media/new/faq/2024/04/Upgrading-Ubuntu-22.04-LTS-apps-and-packages-to-the-latest-version.png)
Fig.01: Upgrading Ubuntu 22.04 LTS apps and packages to the latest version (click to enlarge)
You may see a message like this while patching 22.04 LTS system:
```
Newer kernel available
The currently running kernel version is 5.15.0-1030-aws which is not the expected kernel version 6.5.0-1018-aws.
Restarting the system to load the new kernel will not be handled automatically, so you should consider rebooting.
```
Hence, [reboot the Ubuntu Linux box](https://www.cyberciti.biz/faq/howto-reboot-linux/ "Reboot Linux System Command") using the [reboot](https://www.cyberciti.biz/faq/howto-reboot-linux/ "Reboot Linux System Command") or [shutdown](https://www.cyberciti.biz/faq/howto-shutdown-linux/ "How To Shutdown Linux Using Command Line"):
`$ sudo reboot`
[](https://www.cyberciti.biz/media/new/faq/2024/04/Rebooting-the-Ubuntu-22.04-LTS-machine.png)
Fig.02: Rebooting the Ubuntu 22.04 LTS machine (click to enlarge)
## Step 3 – Upgrading from 22.04 LTS or 24.04 LTS
You must install ubuntu-release-upgrader-core package:
`$ sudo apt install ubuntu-release-upgrader-core`
Ensure the **Prompt** line in /etc/update-manager/release-upgrades is set to ‘**lts**‘ using the “[grep](https://www.cyberciti.biz/faq/howto-use-grep-command-in-linux-unix/ "How to use grep command In Linux / UNIX with examples")” or “[cat](https://www.cyberciti.biz/faq/linux-unix-appleosx-bsd-cat-command-examples/ "cat Command in Linux / Unix with examples")”
`$ grep 'lts' /etc/update-manager/release-upgrades$ cat /etc/update-manager/release-upgrades`
[](https://www.cyberciti.biz/media/new/faq/2024/04/Check-to-see-if-LTS-prompt-set-or-not-on-Ubuntu-22.04-LTS.png)
Fig.03: Checking if the LTS prompt config is set or not on Ubuntu 22.04 LTS (click to enlarge)
### Opening up TCP port 1022 using the [ufw command](https://www.cyberciti.biz/faq/how-to-set-up-ufw-firewall-on-ubuntu-24-04-lts-in-5-minutes/ "How to Set Up UFW Firewall on Ubuntu 24.04 LTS in 5 Minutes") or [iptables command](https://www.cyberciti.biz/tips/linux-iptables-examples.html "Linux 25 Iptables Netfilter Firewall Examples")
For those using ssh-based sessions, open an additional SSH port using the ufw command, starting at port 1022. This is the default port set by the upgrade procedure as a fallback if the default SSH port dies during upgrades. The syntax for the [ufw command](https://www.cyberciti.biz/faq/how-to-set-up-ufw-firewall-on-ubuntu-24-04-lts-in-5-minutes/ "How to Set Up UFW Firewall on Ubuntu 24.04 LTS in 5 Minutes") to [open SSH alternative TCP/1022 port with ufw](https://www.cyberciti.biz/faq/ufw-allow-incoming-ssh-connections-from-a-specific-ip-address-subnet-on-ubuntu-debian/ "How to open ssh 22/TCP port using ufw on Ubuntu/Debian Linux") is as follows:
`$ sudo ufw allow 1022/tcp comment 'Open port ssh TCP/1022 as failsafe for upgrades'$ sudo ufw status`
Here is an example for iptables:
`$ sudo /sbin/iptables -I INPUT -p tcp --dport 1022 -j ACCEPT`
Open the TCP/1022 port using your cloud server firewall if you have one. Here is how to do it with the AWS [EC2 security groups](https://docs.aws.amazon.com/AWSEC2/latest/UserGuide/ec2-security-groups.html) or [Lightsail](https://docs.aws.amazon.com/lightsail/latest/userguide/understanding-firewall-and-port-mappings-in-amazon-lightsail.html) instance:
[](https://www.cyberciti.biz/media/new/faq/2024/04/Open-the-TCP-port-1022-using-the-CLOUD-server-firewall.png)
Fig. 04: Open the TCP port 1022 using the CLOUD server firewall (click to enlarge)
## Step 4 – Upgrading from Ubuntu 22.04 LTS to Ubuntu 24.04 LTS version
Finally, start the upgrade from Ubuntu 22.04 to 24.04 LTS version. Type:
`$ sudo do-release-upgrade -d`
Or you can try upgrading to the latest release using the upgrader from Ubuntu-proposed with version number. For example:
`$ sudo do-release-upgrade -p '24.04.1 LTS'`
### Are you still getting the following error **after August 29, 2024**?
```
There is no development version of an LTS available.
To upgrade to the latest non-LTS development release set Prompt=normal in
/etc/update-manager/release-upgrades.
```
There are multiple ways to upgrade Ubuntu 22.04 LTS before the release of 24.04.1 LTS, scheduled for August 29th, 2024. Here’s one safe method:
1. Edit the /etc/update-manager/release-upgrades file and set Prompt=normal. Run:
`$ sudo nano /etc/update-manager/release-upgrades`
Set: ```
Prompt=normal
```
Save and close the file.
2. Next, run:
`$ sudo do-release-upgrade`
Follow all onscreen instructions. This will get you **23.10 release** and reboot the system. Run:
`$ sudo reboot`
3. Then, again edit the /etc/update-manager/release-upgrades and set Prompt=lts. Type:
`$ sudo nano /etc/update-manager/release-upgrades`
Set: ```
Prompt=lts
```
Save and close the file.
4. Finally, type the following command and follow the rest of the guide to upgrade from 23.10 to 24.04 LTS:
`$ sudo do-release-upgrade -d`
This note will automatically disappear after August 29th, 2024, as there will be no need for this kind of workaround. As a seasoned sysadmin and developer, I recommend waiting until the release of 24.04.1 LTS (scheduled for August 29th, 2024) before upgrading from Ubuntu 22.04 LTS. This ensures superb stability and minimizes potential compatibility issues with your apps. However, you can use these instructions for testing purposes. This is a great way to check if your applications will work seamlessly with Ubuntu 24.04 LTS.
You will get welcome message as follows:
```
Checking for a new Ubuntu release
= Welcome to Ubuntu 24.04 LTS 'Noble Numbat' =
The Ubuntu team is proud to announce Ubuntu 24.04 LTS 'Noble Numbat'.
To see what's new in this release, visit:
https://wiki.ubuntu.com/NobleNumbat/ReleaseNotes
Ubuntu is a Linux distribution for your desktop or server, with a fast
and easy install, regular releases, a tight selection of excellent
applications installed by default, and almost any other software you
can imagine available through the network.
We hope you enjoy Ubuntu.
....
...
To sign up for future Ubuntu announcements, please subscribe to Ubuntu's
very low volume announcement list at:
http://lists.ubuntu.com/mailman/listinfo/ubuntu-announce
Continue [yN]
```
Then it will tell you about ssh port what you already opened:
```
Reading cache
Checking package manager
Continue running under SSH?
This session appears to be running under ssh. It is not recommended
to perform a upgrade over ssh currently because in case of failure it
is harder to recover.
If you continue, an additional ssh daemon will be started at port
'1022'.
Do you want to continue?
Continue [yN]
```
Finally, you need to confirm to start upgrade procedure:
[](https://www.cyberciti.biz/media/new/faq/2024/04/How-to-Upgrade-from-Ubuntu-22.04-LTS-to-Ubuntu-24.04-LTS-using-the-CLI.png)
Fig.05 : Upgrading Ubuntu from 23.04 or 22.04 to 24.04 (click to enlarge)
### Dealing with “Remove obsolete packages?” message
You will get message as follows:
```
Remove obsolete packages?
27 packages are going to be removed.
Continue [yN] Details [d]
```
You need to review those carefully and only remove those packages if you do not need them. Otherwise, choose ‘N’ option.
### System upgrade is complete
The movement has arrived. The system upgrade is complete. All you need to say ‘Y’ to reboot the system and pray that it comes online:
[](https://www.cyberciti.biz/media/new/faq/2024/04/Rebooting-into-Ubuntu-24.04-LTS-server.png)
Fig.06: Rebooting into Ubuntu 24.04 LTS server (click to enlarge)
## Step 5 – Verification
Use the command lsb\_release command or [cat command](https://www.cyberciti.biz/faq/linux-unix-appleosx-bsd-cat-command-examples/ "cat Command in Linux / Unix with examples") to check your Ubuntu Linux version. This command queries the /etc/os-release and provides you with the version information:
`$ cat /etc/os-release`
Here is what I see:
```
PRETTY_NAME="Ubuntu 24.04.1 LTS"
NAME="Ubuntu"
VERSION_ID="24.04"
VERSION="24.04.1 LTS (Noble Numbat)"
VERSION_CODENAME=noble
ID=ubuntu
ID_LIKE=debian
HOME_URL="https://www.ubuntu.com/"
SUPPORT_URL="https://help.ubuntu.com/"
BUG_REPORT_URL="https://bugs.launchpad.net/ubuntu/"
PRIVACY_POLICY_URL="https://www.ubuntu.com/legal/terms-and-policies/privacy-policy"
UBUNTU_CODENAME=noble
LOGO=ubuntu-logo
```
And:
`$ lsb_release -a`
Outputs:
```
No LSB modules are available.
Distributor ID: Ubuntu
Description: Ubuntu 24.04.1 LTS
Release: 24.04
Codename: noble
```
Check the Linux kernel version as follows using the uname command:
`$ uname -mrsOutputs:Linux 6.8.0-1014-aws x86_64`
[](https://www.cyberciti.biz/media/new/faq/2024/04/Ubuntu-24.04-LTS-SERVER.png)
Please note that the Linux kernel version may very from time to time as new patches are applied to Ubuntu 24.04.xx LTS release.
## Step 6 – Enabling 3rd party repos/mirros
After completing the upgrade to Ubuntu 22.04 LTS (or 23.10) to 24.04 LTS, ensure that you enable 3rd party mirrors and repositories; otherwise, you will not receive updates. Use the following [cd command](https://bash.cyberciti.biz/guide/Cd_command "Cd command - Linux Bash Shell Scripting Tutorial Wiki"):
`$ cd /etc/apt/sources.list.d$ ls -l`
For example, my app repo was disabled during updates:
`$ cat my-cool-apps.list`
Outputs:
```
#deb [arch=amd64] https://dl.www.cyberciti.biz/linux/deb/ stable main
```
To enable it again, I commented out the line by removing the #:
```
deb [arch=amd64] https://dl.www.cyberciti.biz/linux/deb/ stable main
```
Then run the apt command:
`$ sudo apt update$ sudo apt upgrade`
Finally, clean up unwanted and unused leftover packages:
`$ sudo apt autoremove --purge`
Make sure to remove the iptables/ufw firewall rule that was added earlier to open the alternate SSH port at TCP/1022. For example:
`$ sudo ufw show added# add the delete rule before the allow keyword$ sudo ufw delete allow 1022/tcp comment 'Open port ssh tcp port 1022 as failsafe option for upgrades'`
See “[How to delete a UFW firewall rule on Ubuntu / Debian Linux](https://www.cyberciti.biz/faq/how-to-delete-a-ufw-firewall-rule-on-ubuntu-debian-linux/ "How to delete a UFW firewall rule on Ubuntu / Debian Linux")” for more info.
## Wrapping up
Congratulations! You’ve successfully upgraded your Ubuntu system from 22.04 LTS or 23.10 to the latest 24.04 LTS using the command line. For in-depth details, explore the official Ubuntu 24.04 [release notes](https://discourse.ubuntu.com/t/noble-numbat-release-notes/39890) and read manual pages using “[man](https://bash.cyberciti.biz/guide/Man_command "Man command - Linux Bash Shell Scripting Tutorial Wiki")” or “[help](https://bash.cyberciti.biz/guide/Man_command "Man command - Linux Bash Shell Scripting Tutorial Wiki")“:
`$ man do-release-upgrade$ man apt$ man apt-get`
# Como adicionar espaço de swap no Ubuntu 20.04
Link: [https://www.digitalocean.com/community/tutorials/how-to-add-swap-space-on-ubuntu-20-04-pt](https://www.digitalocean.com/community/tutorials/how-to-add-swap-space-on-ubuntu-20-04-pt)
### [Introdução](https://www.digitalocean.com/community/tutorials/how-to-add-swap-space-on-ubuntu-20-04-pt#introducao)
Um das maneiras de se proteger contra erros de memória insuficiente em aplicativos é através da adição de um espaço de swap ao seu servidor. Neste guia, falaremos sobre como adicionar um arquivo swap a um servidor Ubuntu 20.04.
**Aviso:** embora o swap seja geralmente recomendado para sistemas que utilizam discos rígidos tradicionais, o uso do swap em SSDs pode causar problemas de degradação de hardware ao longo do tempo. Por este motivo, não recomendamos a habilitação do swap na DigitalOcean ou em qualquer outro provedor que utilize armazenamento SSD.
## [O que é o Swap?](https://www.digitalocean.com/community/tutorials/how-to-add-swap-space-on-ubuntu-20-04-pt#o-que-e-o-swap)
O *Swap* é uma parcela do armazenamento do disco rígido que foi reservada para o sistema operacional com o objetivo de armazenar temporariamente dados que ele não consegue mais reter na RAM. Isso permite que você aumente a quantidade de informações que seu servidor consegue manter em sua memória de trabalho, com algumas advertências. O espaço de swap no disco rígido será usado principalmente quando já não houver espaço suficiente em RAM para manter os dados do aplicativo em uso.
As informações gravadas no disco ficarão significativamente mais lentas do que as informações mantidas em RAM, mas o sistema operacional preferirá manter os dados do aplicativo em memória e usar o swap para os dados mais antigos. De maneira geral, ter espaço de swap como uma alternativa para quando a RAM do seu sistema estiver esgotada pode ser uma boa estratégia de segurança contra exceções de memória insuficiente nos sistemas com armazenamento disponível que não seja SSD.
## [Passo 1 – Verificando o Sistema em Relação às Informações de Swap (troca)](https://www.digitalocean.com/community/tutorials/how-to-add-swap-space-on-ubuntu-20-04-pt#passo-1-verificando-o-sistema-em-relacao-as-informacoes-de-swap-troca)
Antes de começarmos, podemos verificar se o sistema já tem algum espaço de swap (troca) disponível. É possível ter vários arquivos de swap ou partições de swap, mas geralmente um deve ser o suficiente.
Podemos descobrir se o sistema tem algum swap configurado digitando:
```
```
1. sudoswapon--show
```
```
Se você não receber nenhum resultado, isso significa que seu sistema não tem espaço de swap disponível atualmente.
Você pode verificar se não existe um swap ativo usando o utilitário `free`:
```
```
1. free-h
```
```
```
```
Output
```
total used free shared buff/cache available
Mem: 981Mi 122Mi 647Mi 0.0Ki 211Mi 714Mi
Swap: 0B 0B 0B
```
Como você pode ver na linha **Swap** do resultado, nenhum swap está ativo no sistema.
## [Passo 2 – Verificando o Espaço Disponível na Partição do Disco Rígido](https://www.digitalocean.com/community/tutorials/how-to-add-swap-space-on-ubuntu-20-04-pt#passo-2-verificando-o-espaco-disponivel-na-particao-do-disco-rigido)
Antes de criarmos nosso arquivo de swap, verificaremos o uso atual do disco para garantir que temos espaço suficiente. Faça isso digitando:
```
```
1. df-h
```
```
```
```
Output
```
Filesystem Size Used Avail Use% Mounted on
udev 474M 0 474M 0% /dev
tmpfs 99M 932K 98M 1% /run
/dev/vda1 25G 1.4G 23G 7% /
tmpfs 491M 0 491M 0% /dev/shm
tmpfs 5.0M 0 5.0M 0% /run/lock
tmpfs 491M 0 491M 0% /sys/fs/cgroup
/dev/vda15 105M 3.9M 101M 4% /boot/efi
/dev/loop0 55M 55M 0 100% /snap/core18/1705
/dev/loop1 69M 69M 0 100% /snap/lxd/14804
/dev/loop2 28M 28M 0 100% /snap/snapd/7264
tmpfs 99M 0 99M 0% /run/user/1000
```
O dispositivo com `/` na coluna `Mounted on` é o nosso disco neste caso. Temos bastante espaço disponível neste exemplo (apenas 1,4 GB usado). Seu uso provavelmente será diferente.
Apesar da divergência de opiniões quanto ao tamanho adequado de um espaço de swap, isso realmente dependerá de suas preferências pessoais e das exigências da sua aplicação. Geralmente, um espaço igual ou duas vezes o tamanho do espaço da RAM no seu sistema é um bom ponto de partida. Outra boa regra de ouro é que qualquer coisa acima de 4 GB de swap é provavelmente desnecessária se você somente estiver usando-o como uma alternativa para a RAM.
## [Passo 3 – Criando um Arquivo de Swap](https://www.digitalocean.com/community/tutorials/how-to-add-swap-space-on-ubuntu-20-04-pt#passo-3-criando-um-arquivo-de-swap)
Agora que sabemos qual é o espaço disponível em nosso disco rígido, podemos criar um arquivo de swap no nosso sistema de arquivos. Alocaremos um arquivo do tamanho que queremos que o swap tenha chamado de `swapfile` em nosso diretório raiz (`/`).
A melhor maneira de criar um arquivo de swap é com o programa `fallocate`. Este comando cria instantaneamente um arquivo do tamanho especificado.
Uma vez que o servidor no nosso exemplo tem 1 GB de RAM, criaremos um arquivo de 1 GB neste guia. Ajuste isso para atender às necessidades do seu próprio servidor:
```
```
1. sudo fallocate -l 1G /swapfile
```
```
Podemos verificar se a quantidade correta de espaço foi reservada digitando:
Nosso arquivo foi criado com a quantidade correta do espaço reservado.
## [Passo 4 – Habilitando o Arquivo de Swap](https://www.digitalocean.com/community/tutorials/how-to-add-swap-space-on-ubuntu-20-04-pt#passo-4-habilitando-o-arquivo-de-swap)
Agora que temos um arquivo do tamanho correto disponível, precisamos realmente transformar isso em espaço de swap.
Primeiro, precisamos bloquear as permissões do arquivo para que apenas os usuários com privilégios **root** possam ler o conteúdo. Isso impede que os usuários normais possam acessar o arquivo, o que teria implicações de segurança significativas.
Torne o arquivo acessível somente para **root** digitando:
```
```
1. sudochmod600 /swapfile
```
```
Verifique a alteração de permissões digitando:
```
```
1. ls-lh /swapfile
```
```
```
```
Output
```
-rw------- 1 root root 1.0G Apr 25 11:14 /swapfile
```
Como você pode ver, apenas o usuário **root** tem os sinalizadores de leitura e gravação habilitados.
Podemos agora marcar o arquivo como espaço de swap digitando:
```
```
1. sudomkswap /swapfile
```
```
```
```
Output
```
Setting up swapspace version 1, size = 1024 MiB (1073737728 bytes)
no label, UUID=6e965805-2ab9-450f-aed6-577e74089dbf
```
Após marcar o arquivo, podemos habilitar o arquivo de swap, permitindo que nosso sistema comece a utilizá-lo:
```
```
1. sudoswapon /swapfile
```
```
Verifique se o swap está disponível digitando:
```
```
1. sudoswapon--show
```
```
```
```
Output
```
NAME TYPE SIZE USED PRIO
/swapfile file 1024M 0B -2
```
Podemos verificar a saída do utilitário `free` novamente para corroborar nossos resultados:
```
```
1. free-h
```
```
```
```
Output
```
total used free shared buff/cache available
Mem: 981Mi 123Mi 644Mi 0.0Ki 213Mi 714Mi
Swap: 1.0Gi 0B 1.0Gi
```
Nosso swap foi configurado com sucesso e nosso sistema operacional começará a usá-lo conforme necessário.
## [Passo 5 – Tornando o Arquivo de Swap Permanente](https://www.digitalocean.com/community/tutorials/how-to-add-swap-space-on-ubuntu-20-04-pt#passo-5-tornando-o-arquivo-de-swap-permanente)
Nossas alterações recentes habilitaram o arquivo de swap para a sessão atual. No entanto, se reiniciarmos, o servidor não manterá as configurações de swap automaticamente. Podemos alterar isso adicionando o arquivo de swap ao nosso arquivo `/etc/fstab`.
Faça um backup do arquivo `/etc/fstab` para o caso de algo dar errado:
```
```
1. sudocp /etc/fstab /etc/fstab.bak
```
```
Adicione a informação do arquivo de swap no final do seu arquivo `/etc/fstab` digitando:
Em seguida, avaliaremos algumas configurações que podemos atualizar para ajustar nosso espaço de swap.
## [Passo 6 – Ajustando as Configurações de Swap](https://www.digitalocean.com/community/tutorials/how-to-add-swap-space-on-ubuntu-20-04-pt#passo-6-ajustando-as-configuracoes-de-swap)
Há algumas opções que você pode configurar que terão um impacto no desempenho do seu sistema quando estiver lidando com o swap.
### [Ajustando a propriedade Swappiness](https://www.digitalocean.com/community/tutorials/how-to-add-swap-space-on-ubuntu-20-04-pt#ajustando-a-propriedade-swappiness)
O parâmetro `swappiness` configura a frequência com que o seu sistema transfere dados da RAM para o espaço de swap. Esse é um valor entre 0 e 100 que representa uma porcentagem.
Com valores próximos de zero, o kernel não irá transferir dados para o disco a menos que seja absolutamente necessário. Lembre-se, as interações com o arquivo de swap são “dispendiosas”, no sentido de que demoram mais que as interações com a RAM e podem causar uma redução significativa no desempenho. Dizer ao sistema para não depender tanto do swap irá geralmente tornar o seu sistema mais rápido.
Valores que estão mais próximos de 100 irão tentar colocar mais dados no swap em um esforço para manter mais espaço da RAM livre. Dependendo do perfil de memória de seus aplicativos ou do motivo pelo qual você está usando o seu servidor, isso pode ser melhor em alguns casos.
Podemos ver o valor atual do parâmetro swappiness digitando:
```
```
1. cat /proc/sys/vm/swappiness
```
```
```
```
Output
```
60
```
Para um desktop, um valor de swappiness de 60 não é um valor ruim. Para um servidor, você pode deixá-lo mais próximo de 0.
Podemos definir o parâmetro swappiness para um valor diferente usando o comando `sysctl`.
Por exemplo, para definir o valor do parâmetro swappiness em 10, poderíamos digitar:
```
```
1. sudosysctlvm.swappiness=10
```
```
```
```
Output
```
vm.swappiness = 10
```
Este valor persistirá até a próxima reinicialização. Podemos definir este valor automaticamente na reinicialização, adicionando a linha no nosso arquivo `/etc/sysctl.conf`:
```
```
1. sudonano /etc/sysctl.conf
```
```
No final, você pode adicionar:
/etc/sysctl.conf
```
vm.swappiness=10
```
Salve e feche o arquivo quando você terminar.
### [Ajustando a Configuração da Pressão por Cache](https://www.digitalocean.com/community/tutorials/how-to-add-swap-space-on-ubuntu-20-04-pt#ajustando-a-configuracao-da-pressao-por-cache)
Outro valor relacionado que você pode querer modificar é o `vfs_cache_pressure`. Este ajuste configura o quanto o sistema escolherá para as informações cache dos objetos *inode* e *dentry* em detrimento de outros dados.
Basicamente, tratam-se de dados de acesso sobre o sistema de arquivos. De maneira geral, isso é difícil de consultar e, com frequência, muito solicitado. Assim, é algo muito bom que o seu sistema armazene dados em cache. Você pode ver o valor atual questionando o sistema de arquivos `proc` novamente:
```
```
1. cat /proc/sys/vm/vfs\_cache\_pressure
```
```
```
```
Output
```
100
```
Uma vez que ele está atualmente configurado, o nosso sistema remove as informações de inode do cache muito rapidamente. Podemos definir isso em um valor mais conservador como 50, digitando:
```
```
1. sudosysctlvm.vfs\_cache\_pressure=50
```
```
```
```
Output
```
vm.vfs_cache_pressure = 50
```
Novamente, isso é apenas válido para a nossa sessão atual. Podemos alterar esse valor, adicionando-o ao nosso arquivo de configuração como fizemos com a nossa configuração do parâmetro swappiness:
```
```
1. sudonano /etc/sysctl.conf
```
```
No final, adicione a linha que especifica o seu novo valor:
/etc/sysctl.conf
```
vm.vfs_cache_pressure=50
```
Salve e feche o arquivo quando você terminar.
## [Conclusão](https://www.digitalocean.com/community/tutorials/how-to-add-swap-space-on-ubuntu-20-04-pt#conclusao)
Seguir as etapas deste guia lhe dará algum espaço para respirar em casos que de outra forma conduziriam a exceções de falta de memória. O espaço de swap pode ser incrivelmente útil para evitar alguns desses problemas comuns.
Se você está encontrando erros de OOM (out of memory - falta de memória), ou se você descobrir que o seu sistema não consegue usar os aplicativos de que você precisa, a melhor solução é otimizar as configurações do seu aplicativo ou atualizar o seu servidor.
# Formatar horário no Linux para 24 horas
Extraído do ChatGPT
### **1. Pelo Ambiente Gráfico (GUI):**
1. **Abra as Configurações de Data e Hora:**
- Clique no menu no canto superior direito da tela e selecione **Configurações**.
- Navegue até **Região e Idioma** ou **Data e Hora** (o nome exato pode variar dependendo da versão do Ubuntu).
2. **Configurar o Formato de Hora:**
- No menu de Região e Idioma, escolha o idioma principal.
- Certifique-se de que o formato de hora está configurado para o padrão de 24 horas.
- Em algumas versões, você verá uma opção como **Formato de Hora: 12 horas / 24 horas**. Escolha **24 horas**.
- Caso contrário, ajuste o formato manualmente seguindo as próximas instruções no terminal.
---
### **2. Pelo Terminal:**
#### **Ajustar o Formato de Hora no GNOME (outra interface gráfica):**
1. **Verifique o Formato Atual:**
bash
`gsettings get org.gnome.desktop.interface clock-format`
- O resultado será `12h` ou `24h`.
2. **Configurar para 24 Horas:**
bash
`gsettings set org.gnome.desktop.interface clock-format '24h'`
---
#### **Configurar o Formato no Sistema:**
1. **Editar o Locale (Formato de Data e Hora do Sistema):**
- Abra o arquivo de configuração do locale com seu editor favorito, por exemplo:
bash
`sudo nano /etc/default/locale`
- Adicione ou edite a linha para incluir:
plaintext
`LC_TIME="en_GB.UTF-8"`
- O `en_GB.UTF-8` é o padrão do Reino Unido, que usa o formato de 24 horas. Você pode usar outro locale adequado ao seu idioma, como `pt_BR.UTF-8`.
2. **Atualize as Configurações:**
bash
`sudo locale-gensudo update-locale`
3. **Reinicie o sistema ou a interface gráfica** para aplicar as mudanças:
bash
`sudo systemctl restart gdm3`
**Para não precisar reiniciar o sistema pode ser utilizado o comando:**
source /root/.bashrc para carregar as novas configurações.
# Como Alterar o Fuso Horário no Ubuntu (3 Métodos Fáceis)
Link: [https://www.hostinger.com.br/tutoriais/alterar-fuso-horario-ubuntu](https://www.hostinger.com.br/tutoriais/alterar-fuso-horario-ubuntu)
Alterar o fuso horário no Linux é algo essencial para tarefas e processos como registro de dados, *cron jobs* e para a gestão em geral de um [servidor virtual privado](https://www.hostinger.com.br/tutoriais/o-que-e-vps-como-escolher-um-servidor-vps) baseado em Ubuntu ou outras distribuições.
Além disso, a maioria dos aplicativos usa o fuso horário apra gerenciar os seus dados. No caso do Ubuntu, o fuso horário do sistema é definido durante a configuração inicial, mas os usuários ainda podem modificá-lo.
Este artigo vai explicar como alterar o fuso horário no Linux usando três métodos fáceis. Neste texto, vamos focar sobre a distribuição Ubuntu. Recomendamos que você leia nosso outro tutorial se quiser aprender [como alterar o fuso horário no CentOS](https://www.hostinger.com.br/tutoriais/como-alterar-fuso-horario-centos-7).
Conteúdo
## **Como Alterar o Fuso Horário no Ubuntu**
Nesta seção, vamos mostrar passo-a-passo como alterar o fuso horário no Ubuntu, para que você possa gerenciar melhor o seu [VPS Linux](https://www.hostinger.com.br/servidor-vps). Certifique-se de se logar como **usuário root** para executar as seguintes ações.
### **Usando a Interface Gráfica do Usuário (GUI)**
A maneira mais conveniente de alterar o fuso horário num sistema Ubuntu é através da **interface gráfica do usuário** (**GUI**). Como ela é acessível a partir da área de trabalho, você não precisa rodar nenhum comando.
Confira como alterar o fuso horário usando a GUI — as instruções se aplicam para Ubuntu 18.04, Ubuntu 20.04 e Ubuntu 22.04:
1. Clique no menu **System** (Sistema) no canto superior direito da tela.
2. Selecione **Settings** (Configurações) e vá até a aba **Date & Time** (Data e Hora).
3. Desmarque a opção **Automatic Time Zone** (Fuso Horário Automático). Se essa configuração estivar **ativada** e o sistema estiver conectado à internet, ele vai automaticamente determinar o fuso horário de acordo com a localização do usuário.
4. Clique em **Fuso Horário**.
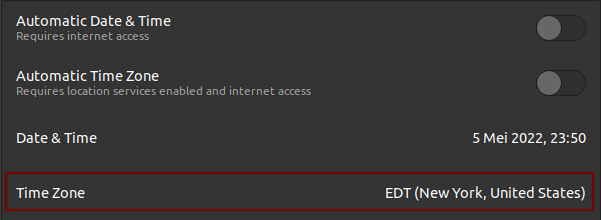
5. Uma nova janela vai aparecer. Selecione o novo fuso horário clicando diretamente no mapa ou usando a barra de pesquisa.
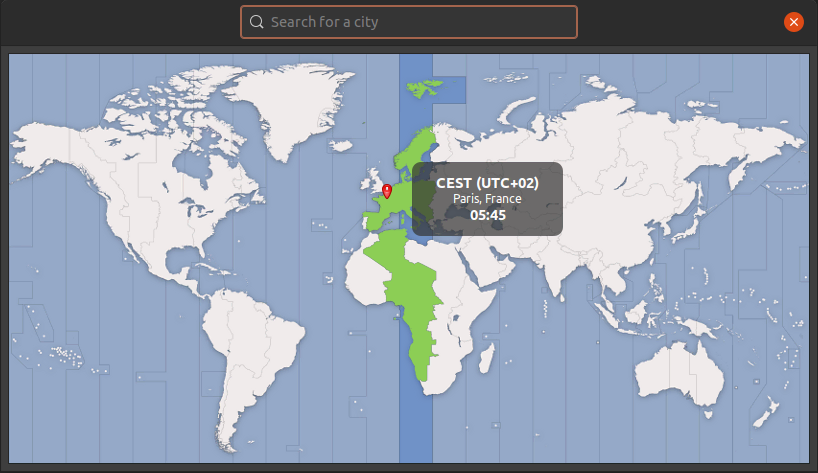
6. Assim que tiver terminado, clique no botão **X** para fechar a janela.
Confira a caixa **Time Zone** (Fuso Horário) dentro da aba **Data e Hora** para verificar se o novo fuso horário e adata atual foram atualizados com sucesso.
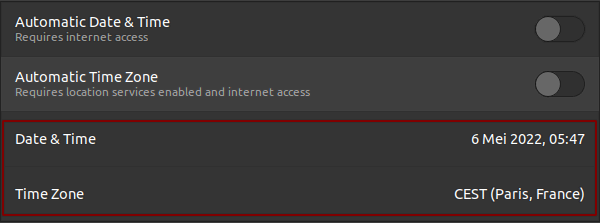
### **Usando timedatectl (via Linha de Comando)**
Existem duas maneiras de configurar o fuso horário de um servidor através da linha de comando — usando **tzselect** ou **timedatectl**. Contudo, o primeiro comando só funciona para mudar o fuso horário de maneira temporária.
Se você optar por usar o **tzselect**, o fuso horário será revertido para o que estiver determinado no arquivo **/etc/timezone** depois que o computador ou servidor for reiniciado. Você ainda pode usar este comando como uma maneira alternativa de listar as opções de fuso horário no sistema.
Para fazer isso, abra o **Terminal** na sua interface de linha de comando (CLI) e rode o comando tzselect. Então, especifique o fuso horário desejado e aperte **Enter**.
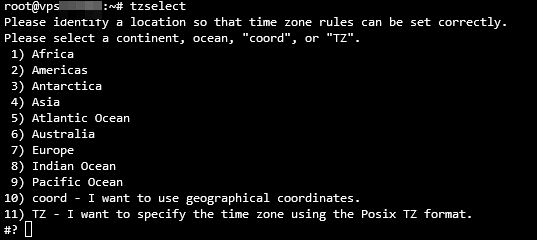
Um dos melhores métodos para alterar o fuso horário de maneira permanente no Ubuntu é usando o comando `timedatectl`. Esse é um recurso do Linux que permite que os usuários revisem e alterem a configuração do relógio do sistema.
Além disso, o comando **timedatectl** permite que os usuários modifiquem a data e a hora atuais do sistema, definam um fuso horário e sincronizem automaticamente o relógio através de um servidor remoto. Nós recomendamos que você faça isso se a sua máquina está rodando Ubuntu 18.04, Ubuntu 20.04 ou Ubuntu 22.04.
Veja como mudar o fuso horário usando este método:
1. Abra seu CLI. Rode o comando timedatectl para conferir o fuso horário atual do sistema.
2. A resposta abaixo mostra que o horário local está definido para o Tempo Universal Coordenado (UTC).
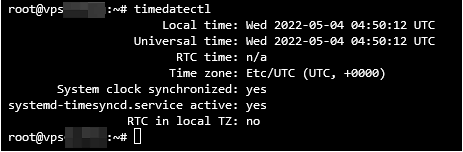
3. Encontre o nome completo do seu fuso horário. Normalmente, a convenção usa o formato **Região/Cidade**. Insira o comando abaixo para ver a lista de fusos horários:
timedatectl list-timezones
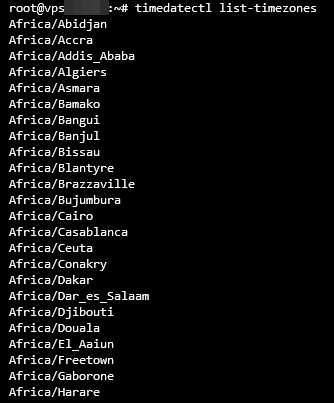
4. De maneira alternativa, combine o comando **timedatectl** com o [comando grep](https://www.hostinger.com.br/tutoriais/comando-grep-linux) para filtrar a pesquisa usando o nome de uma cidade.
`timedatectl list-timezones | grep Paris`
5. Pressione **Ctrl + C para sair**
6. Assim que tiver decidido qual fuso horário selecionar, rode o seguinte comando para realizar a mudança. Note que ele não vai produzir qualquer resposta:
`sudo timedatectl set-timezone [timezone]`
7. Insira o comando abaixo e pressione **Enter** para verificar a atualização:
`timedatectl`
Os valores de **time zone** (fuso horário) e de **system clock synchronized** (relógio do sistema sincronizado) mostram que o novo horário local foi atualizado com sucesso.
### Usando o Comando tzdata (Versões Mais Antigas do Ubuntu)
Usuários de versões do Ubuntu como 16.04 ou mais baixas podem definir seus fusos horários reconfigurando os **dados de fuso horário e horário de verão** ou **tzdata**. Esses parâmetros contêm arquivos que documentam tanto as transições de fuso horário atuais quanto as histórias ao redor do planeta.
Siga estes passos para mudar o fuso horário usando o comando **tzdata**:
1. Digite o seguinte comando para reconfigurar o **tzdata** e pressione **Enter**:
`sudo dpkg-reconfigure tzdata`
2. A janela de configuração do pacote será aberta. Escolha sua área geográfica e pressione **Enter**.
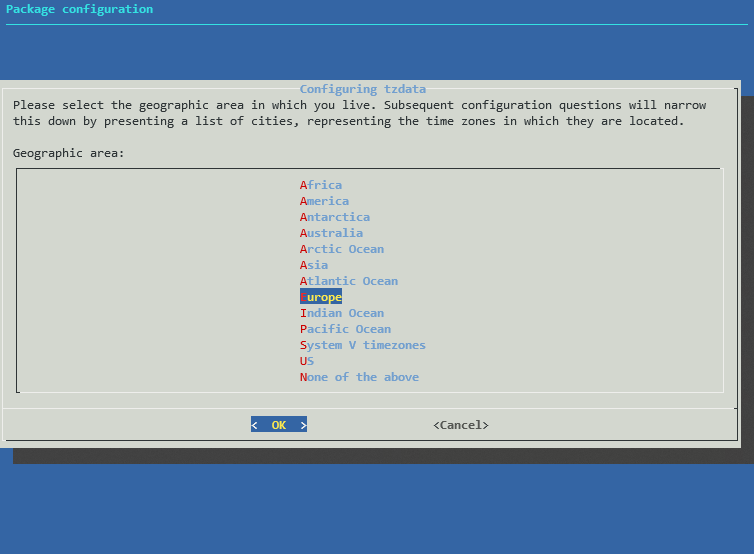
3. Selecione **OK** e pressione **Enter**.
4. A seguir, selecione a cidade ou região que corresponde ao seu fuso horário.
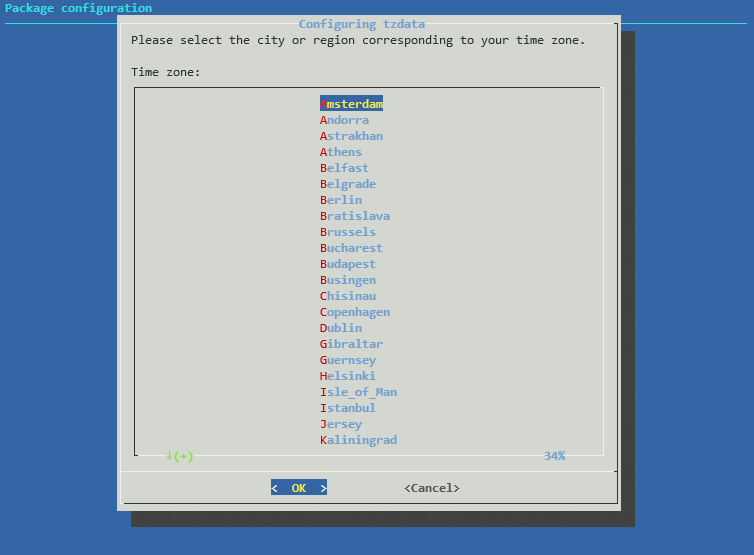
5. Selecione **OK** e pressione **Enter**.
6. Uma resposta vai aparecer automaticamente para garantir que seu fuso horário atual foi definido com sucesso.

Você também pode encontrar as informações de fuso horário do seu sistema operacional Linux no diretório **/etc/timezone**.
## **Conclusão**
O uso correto dos fuso horários é importante para os processos de um sistema, já que ele define quando essas tarefas serão iniciadas e finalizadas. No Ubuntu, os usuários geralmente configuram o relógio do sistema durante a instalação inicial.
Contudo, o fuso horário atual é ajustável usando três métodos fáceis: a interface gráfica de usuário (GUI), o comando **timedatectl** ou o comando **tzdata**.
Se você usa o Ubuntu 18.04, Ubuntu 20.04 ou Ubuntu 22.04, nós recomendamos o método GUI ou o comando **timedatectl**. Para Ubuntu 16.04 ou mais antigos, recomendamos reconfigurar o **tzdata**.
Esperamos que este artigo tenha ajudado você a configurar o fuso horário do seu sistema Ubuntu. Se você tiver quaisquer dúvidas ou sugestões, deixe-as na seção de comentários abaixo.
# 10 Comandos Linux que talvez nunca ouviu falar
Linux, a powerhouse of flexibility and control, often reveals its true magic through the command line. While `ls`, `grep`, and `cd` are universally known, the operating system houses a constellation of lesser-known utilities—each with unique capabilities. These obscure commands, once discovered, can enhance your workflows, increase productivity, and turn you into a command-line artisan.
## 1. `look` — Fast Dictionary Lookup
The `look` command performs a binary search on a sorted file, typically a dictionary, and prints all lines that begin with a given string. It's perfect for autocomplete tools, word games, or when verifying the existence of a term.
```
look pro
```
This will return all dictionary entries beginning with “pro.” Fast, lean, and astonishingly handy.
## 2. `rev` — Reverse the Characters of a Line
A surprisingly effective tool, `rev` reverses each line of input character by character. It might sound like a novelty, but it’s invaluable in scenarios involving cryptic text transformations or palindromic algorithms.
```
echo "Linux" | rev
```
This returns “xuniL”. Simple, elegant, and precise.
## 3. `tac` — The Reverse of `cat`
While `cat` displays file content from top to bottom, `tac` (cat spelled backward) prints lines in reverse order. For tail-heavy logs, or when parsing data from the bottom up, `tac` can be a lifesaver.
```
tac access.log
```
This allows you to read logs in a reverse chronological sequence without needing `tail -r`.
## 4. `yes` — Repetitive Stream Generator
The `yes` command outputs a string repeatedly until interrupted. When automating scripts or testing buffer behavior, this tool shines.
```
yes | sudo apt install mypackage
```
This command auto-confirms every prompt, useful in scripted installs.
## 5. `nl` — Number Lines of Files
A more sophisticated cousin of `cat -n`, the `nl` command adds line numbers with robust formatting control.
```
nl file.txt
```
With support for logical page delimiters and line numbering styles, `nl` is ideal for structured file documentation.
## 6. `column` — Format Output into Columns
`column` transforms textual data into well-aligned columns, making output dramatically more readable—especially when viewing CSVs or tabular data.
```
cat data.txt | column -t -s,
```
This aligns comma-separated data neatly into tabular format.
## 7. `shuf` — Shuffle Lines Randomly
Need to randomize a playlist or test against unpredictable data? `shuf` randomizes input line order effortlessly.
```
shuf list.txt
```
It’s also useful in shell-based gaming, simulation, and statistical sampling.
## 8. `comm` — Compare Two Sorted Files Line by Line
`comm` is an unsung hero in file comparison. It contrasts two sorted files line-by-line and categorizes them: lines unique to file1, file2, and lines common to both.
```
comm file1.txt file2.txt
```
Ideal for syncing datasets or identifying deltas.
## 9. `chrt` — Manipulate Real-Time Scheduling Policies
For those tinkering with performance tuning, `chrt` adjusts a process’s real-time scheduling policy. Combined with `ps` or `top`, it’s a potent performance tool.
```
sudo chrt -f 99 ./my_program
```
This elevates your process to the highest fixed-priority level.
## 10. `watch` — Execute a Program Periodically
Observe command output in near real-time with `watch`. It’s perfect for monitoring resource usage, service health, or file changes.
```
watch -n 2 df -h
```
This runs `df -h` every 2 seconds, refreshing the terminal view dynamically.
Mastering Linux means going beyond the commonplace. These ten underutilized commands unlock new layers of potential, allowing developers, admins, and enthusiasts to operate with greater fluency and finesse. With just a bit of curiosity, even the most obscure tool can become an indispensable ally in your command-line journey.
# Melhores Práticas para Downloads
Coletânea de melhores práticas
# Dica para download de diretórios de aplicativos do Bitnami
Informações extraída do CharGPT
**DOWNLOAD DE DIRETÓRIO DE APLICATIVOS DO BITNAMI**
Para baixar o diretório `bitnami/wordpress` do repositório Bitnami Containers no GitHub, você pode utilizar os seguintes métodos:
---
##### ✅ Opção 1 – Usar o site download-directory.github.io
### Passos:
1. Acesse o site: https://download-directory.github.io
2. Cole o seguinte link no campo indicado:
3. Clique em **Download**.
4. O site gerará e baixará um arquivo `.zip` contendo apenas o diretório `bitnami/wordpress`.
> Este método é rápido e não requer instalação de ferramentas adicionais.
---
##### ✅ Opção 2 – Usar Git com `sparse-checkout` (linha de comando)
### Pré-requisitos:
- Git versão 2.25 ou superior instalado.
### Passos:
1. Clone o repositório com filtro para evitar baixar todo o conteúdo:
5. Resultado: Apenas o diretório `bitnami/wordpress` será baixado para o seu sistema.
> Este método é ideal para quem deseja integrar o processo em scripts ou automações.
##### ✅ Opção 3 – Usar `npx gitzip-cli` (requer Node.js)
##### Pré-requisitos:
- Node.js instalado
### Passos:
1. Execute o seguinte comando no terminal:
2. O comando irá baixar o diretório como um arquivo `.zip` na pasta atual.
> Este método é útil para quem prefere utilizar o terminal e já possui o Node.js instalado.